Airtable integration
Generate invoices, quotes, reports, and other PDFs from your Airtable records. Connect Airtable to your ShipPDF workspace, create a reusable action, and map your table’s fields to a published template. Each source record generates one PDF, which ShipPDF attaches to that same record in Airtable.
This guide uses ShipPDF - Invoice Tracker Demo, a base with Customers, Invoices, and Line Items tables. An action named Demo uses the published Airtable Invoice (Test) template to generate invoices with customer details and repeating line items. Your template and field names can be different.
Before you start
You need:
- A ShipPDF workspace where you are an owner or manager, with permission to generate documents and enough generation credits.
- A published template with input fields that match your Airtable data. For invoice rows, define a collection with columns such as description, quantity, and unit price.
- An Airtable account with access to the source base and permission to update the records.
- An Attachment field in the source table for the generated PDFs. This example uses Invoice Attachment in Invoices.
Create and publish your template first. See Create your template and Data Schema and Default Data.
Use a dedicated output field. ShipPDF fills only empty attachment fields. If the chosen field already contains any attachment, that record is skipped. Existing attachments are not replaced.
Connect Airtable
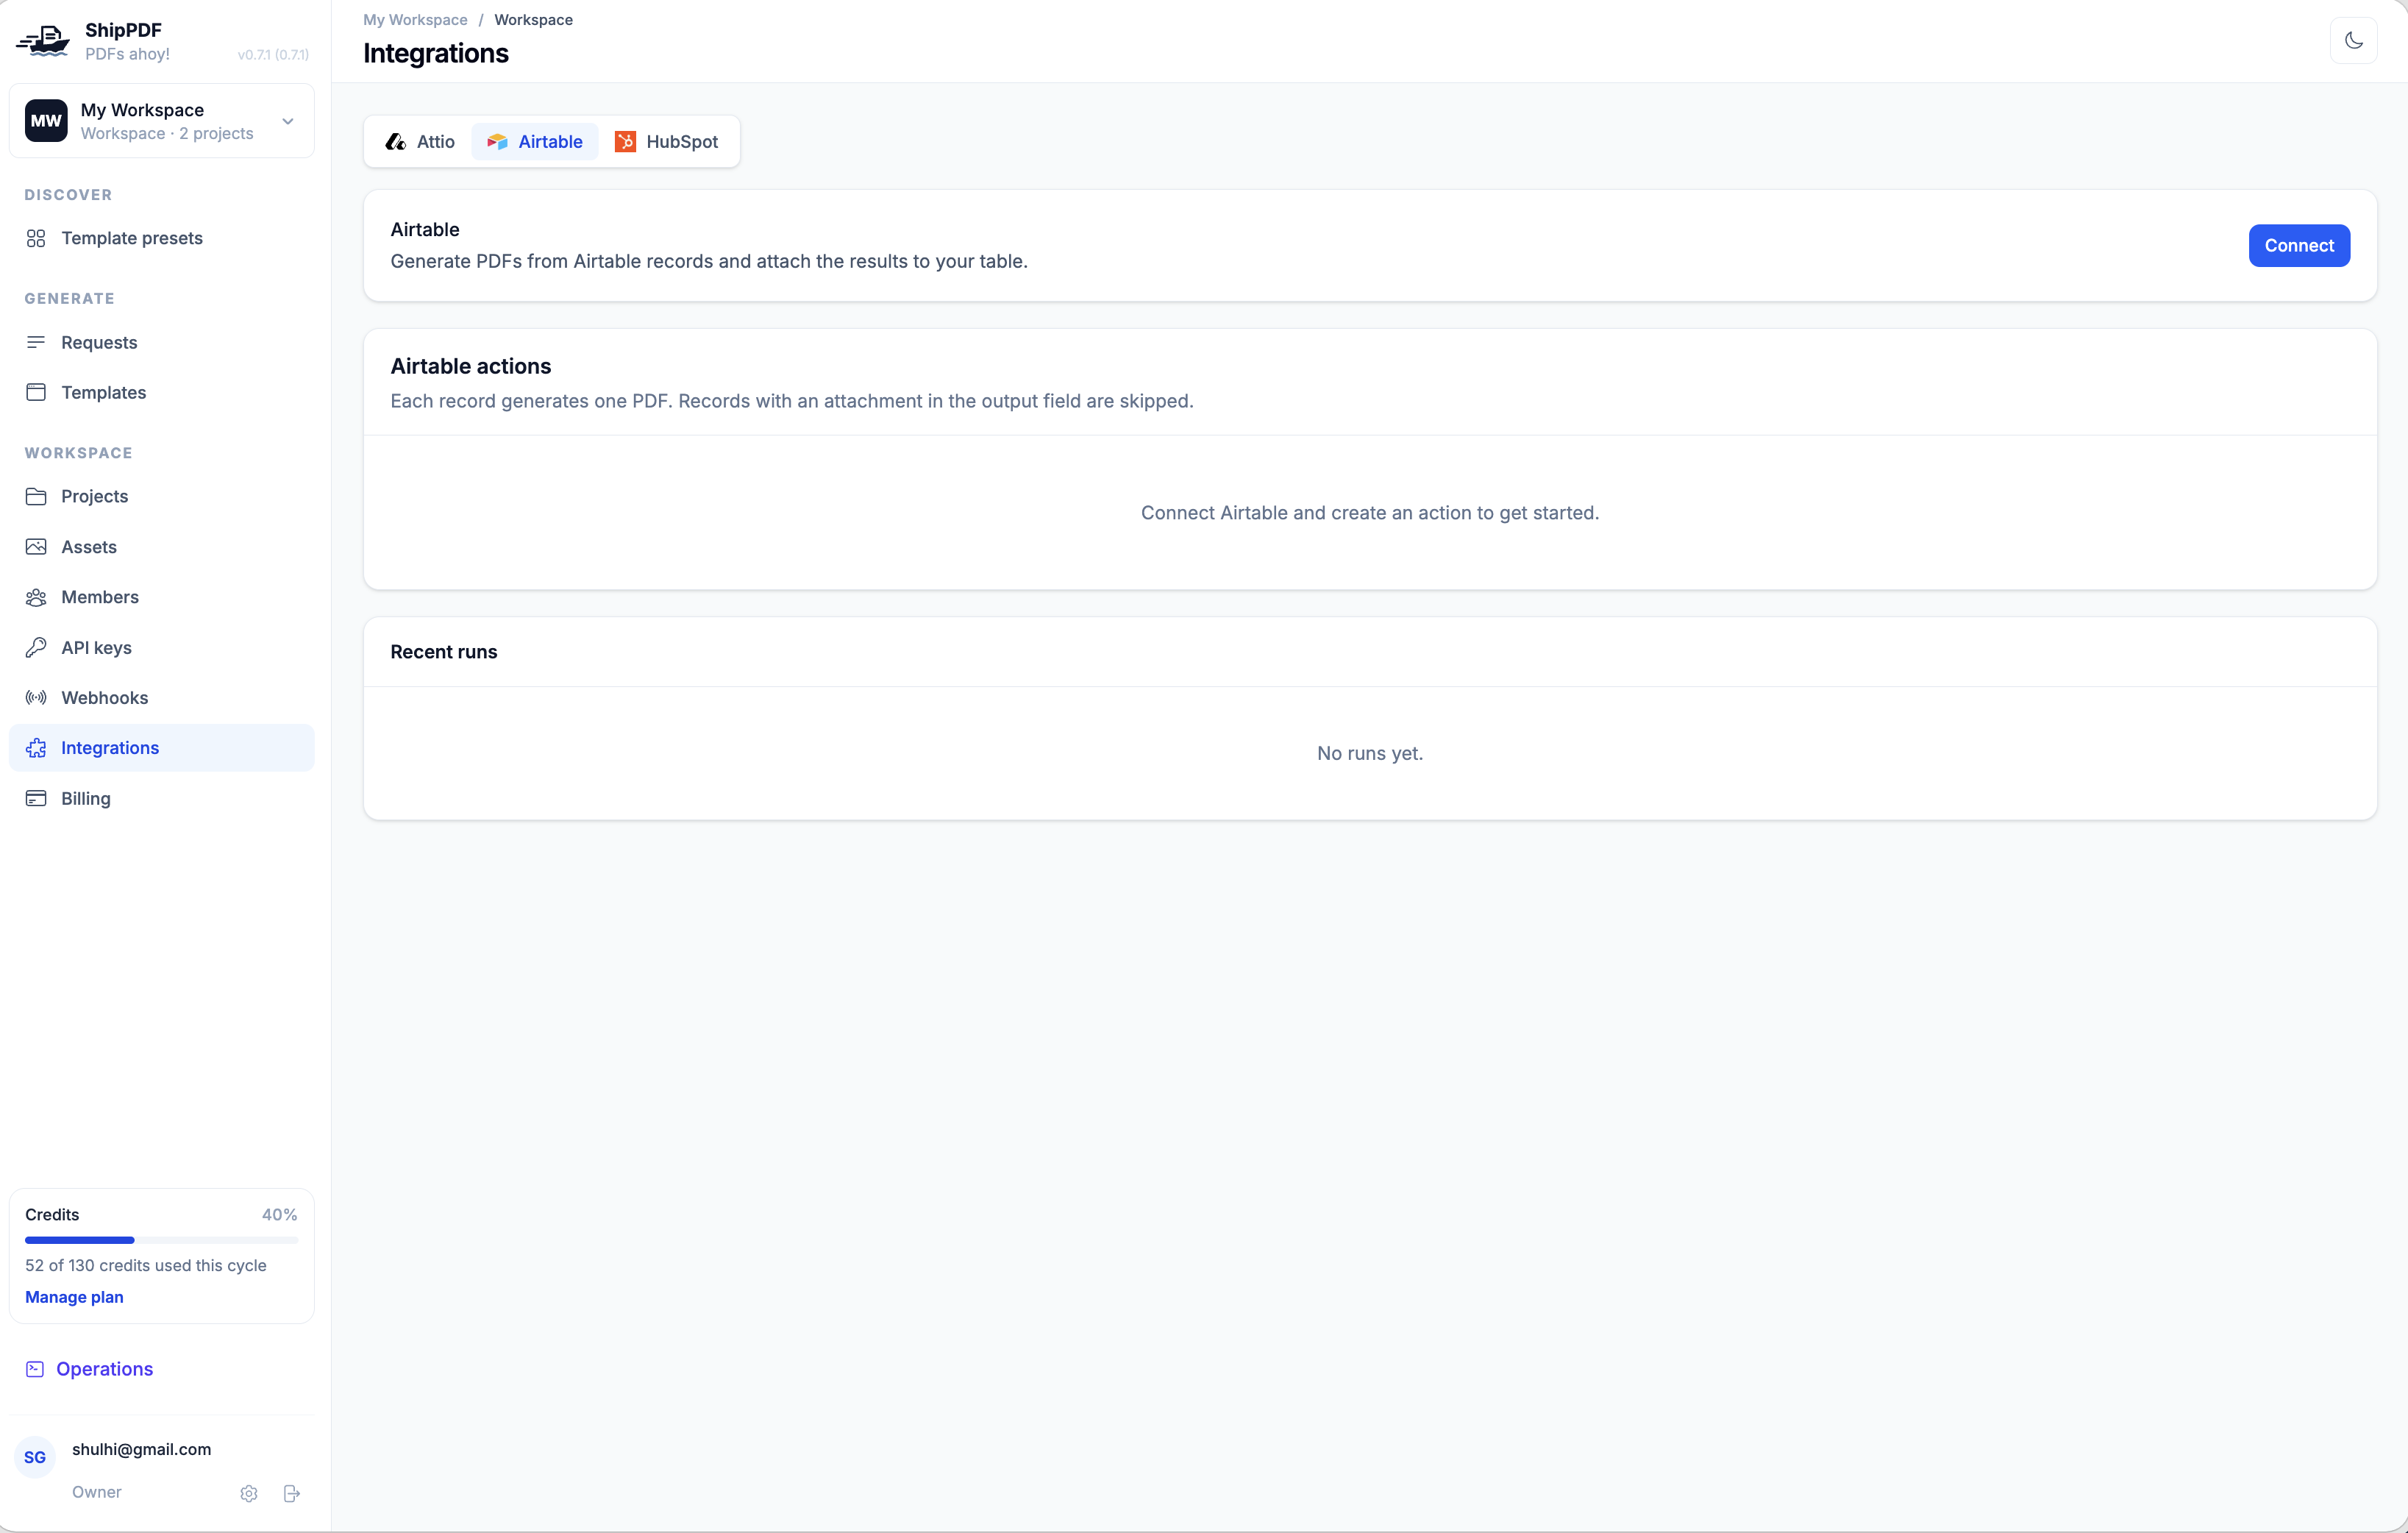
1. Open the integration
In ShipPDF, select your workspace, open Integrations in the sidebar, and choose the Airtable tab. Click Connect.
2. Choose which bases to share
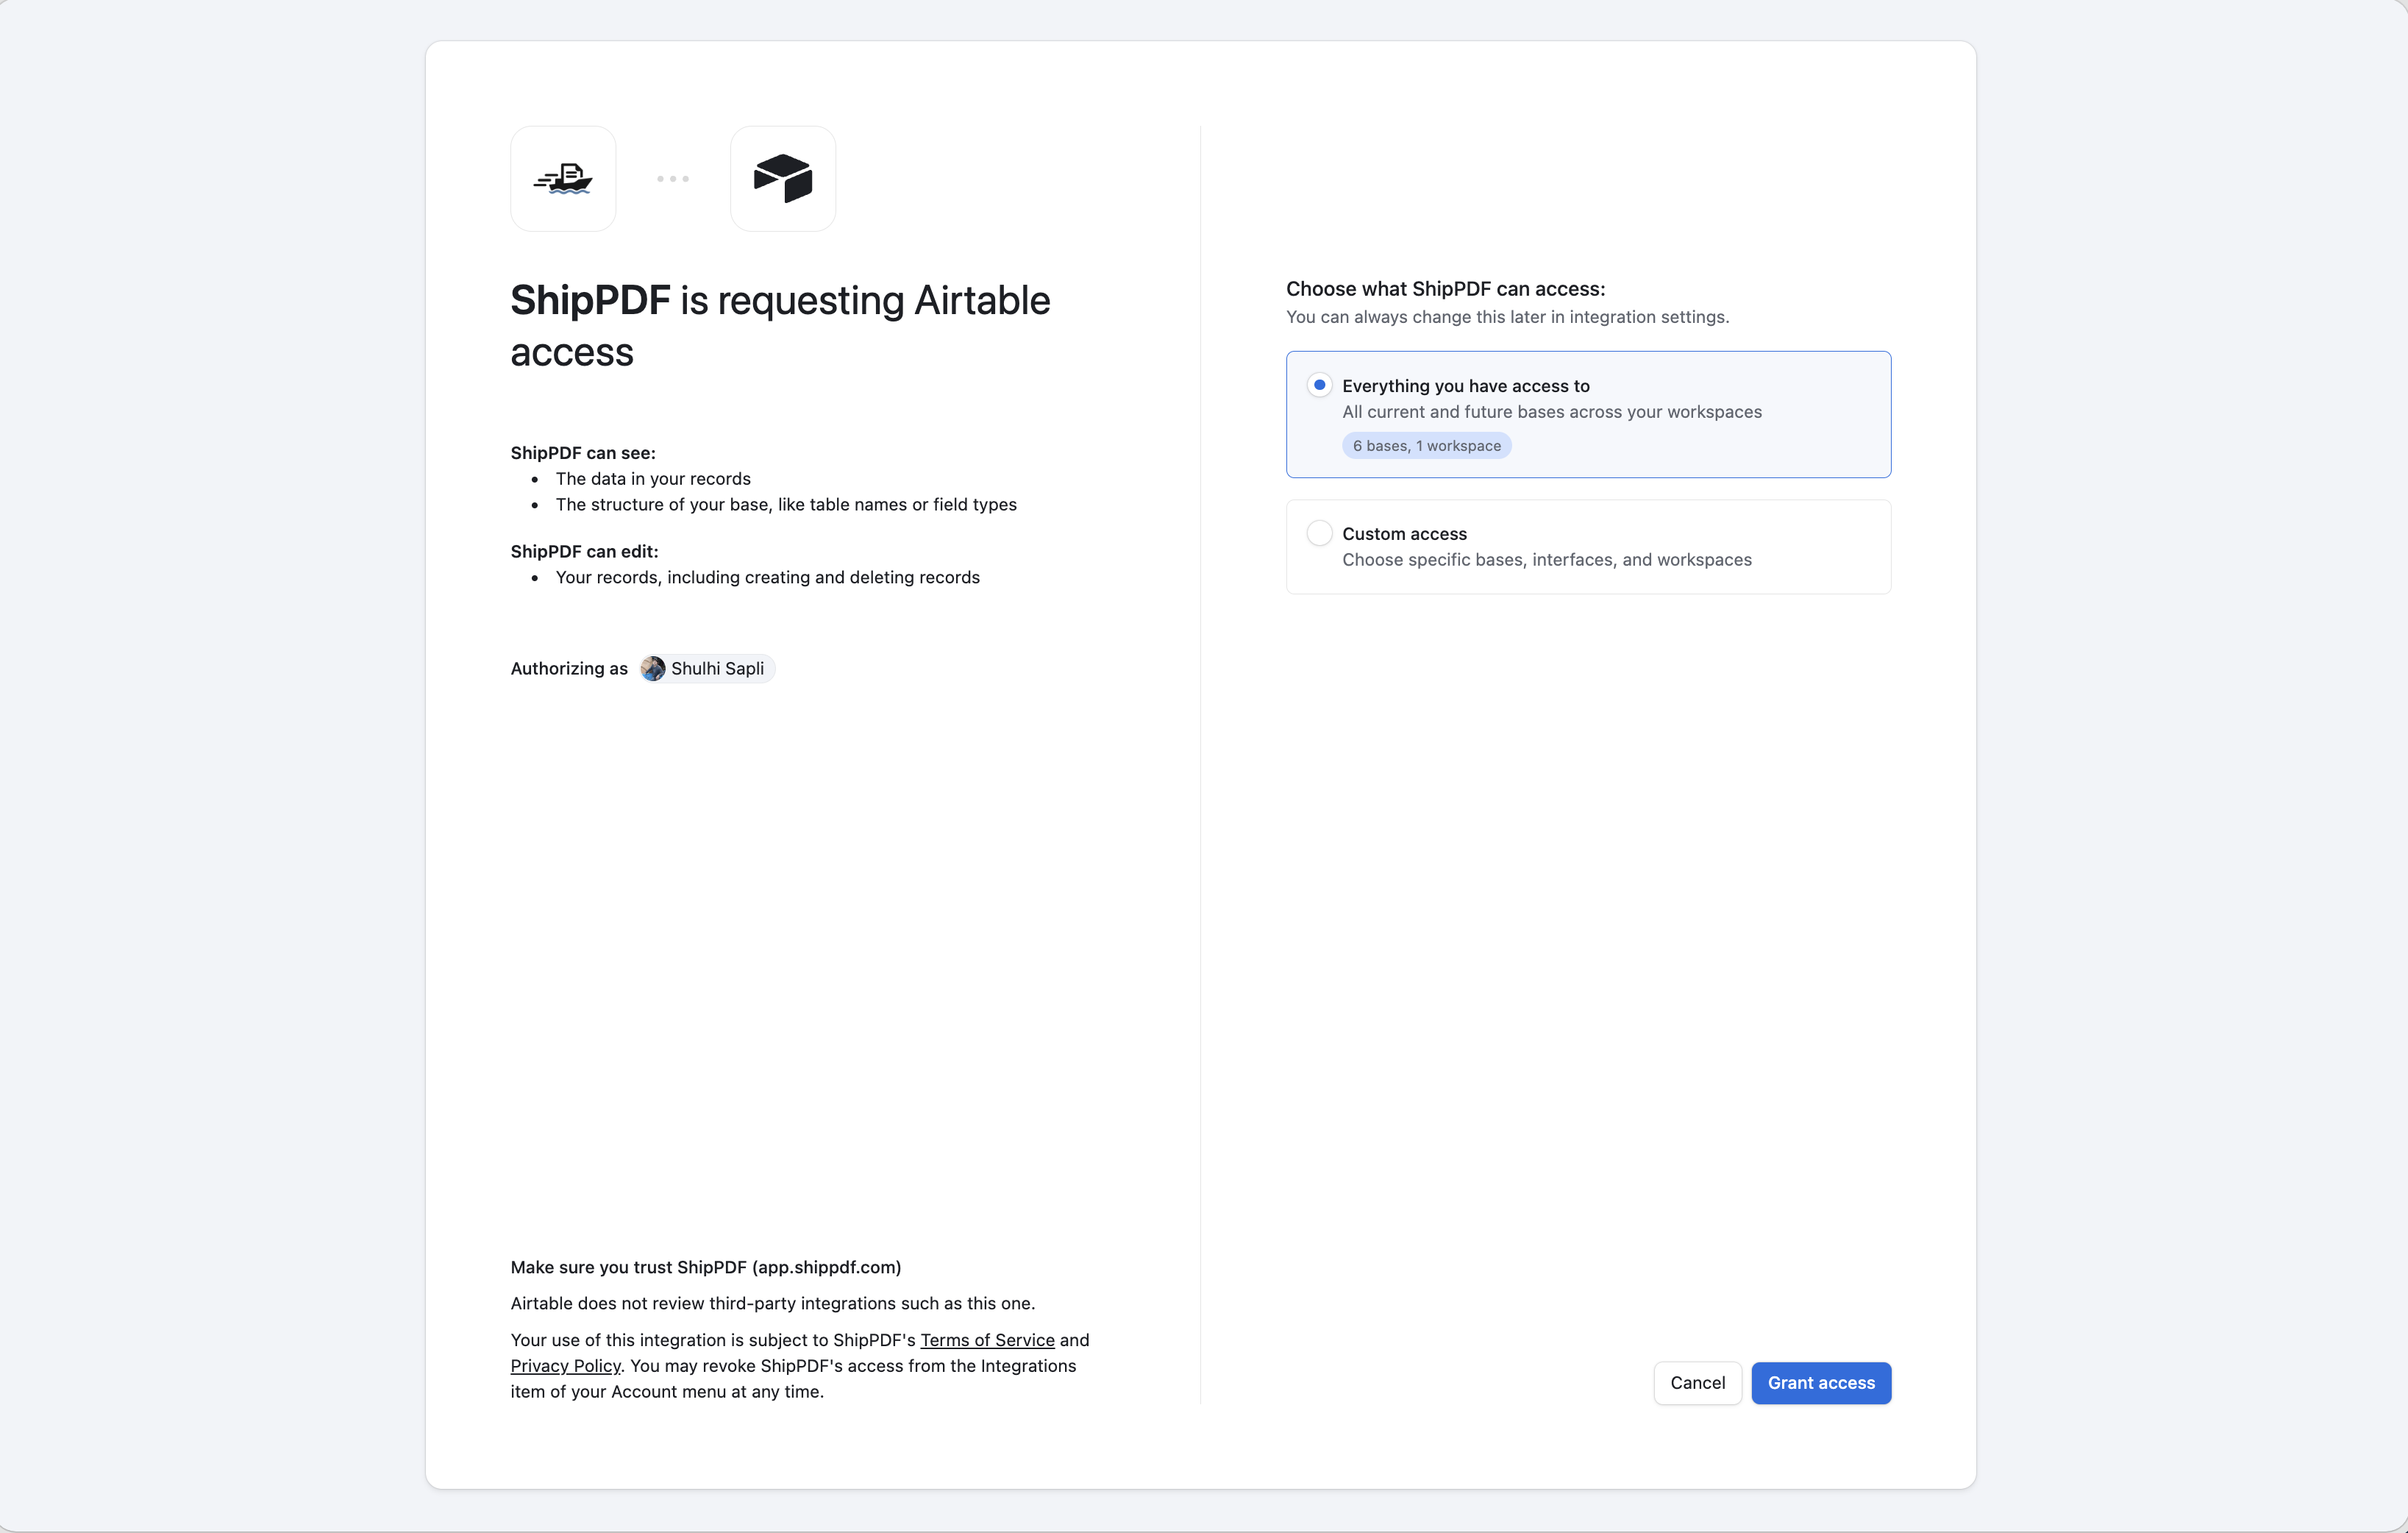
Sign in to Airtable if prompted. On the authorization screen, review the requested access. ShipPDF needs to read your records and base structure to load tables and fields, and write records to attach finished PDFs.
Choose Custom access to share the bases you want to use, or Everything you have access to to share all current and future bases covered by that option. Click Grant access to continue. You do not need to paste an API key into ShipPDF.
3. Confirm the connection
You return to ShipPDF. The Airtable card shows Connected, and New action becomes available.
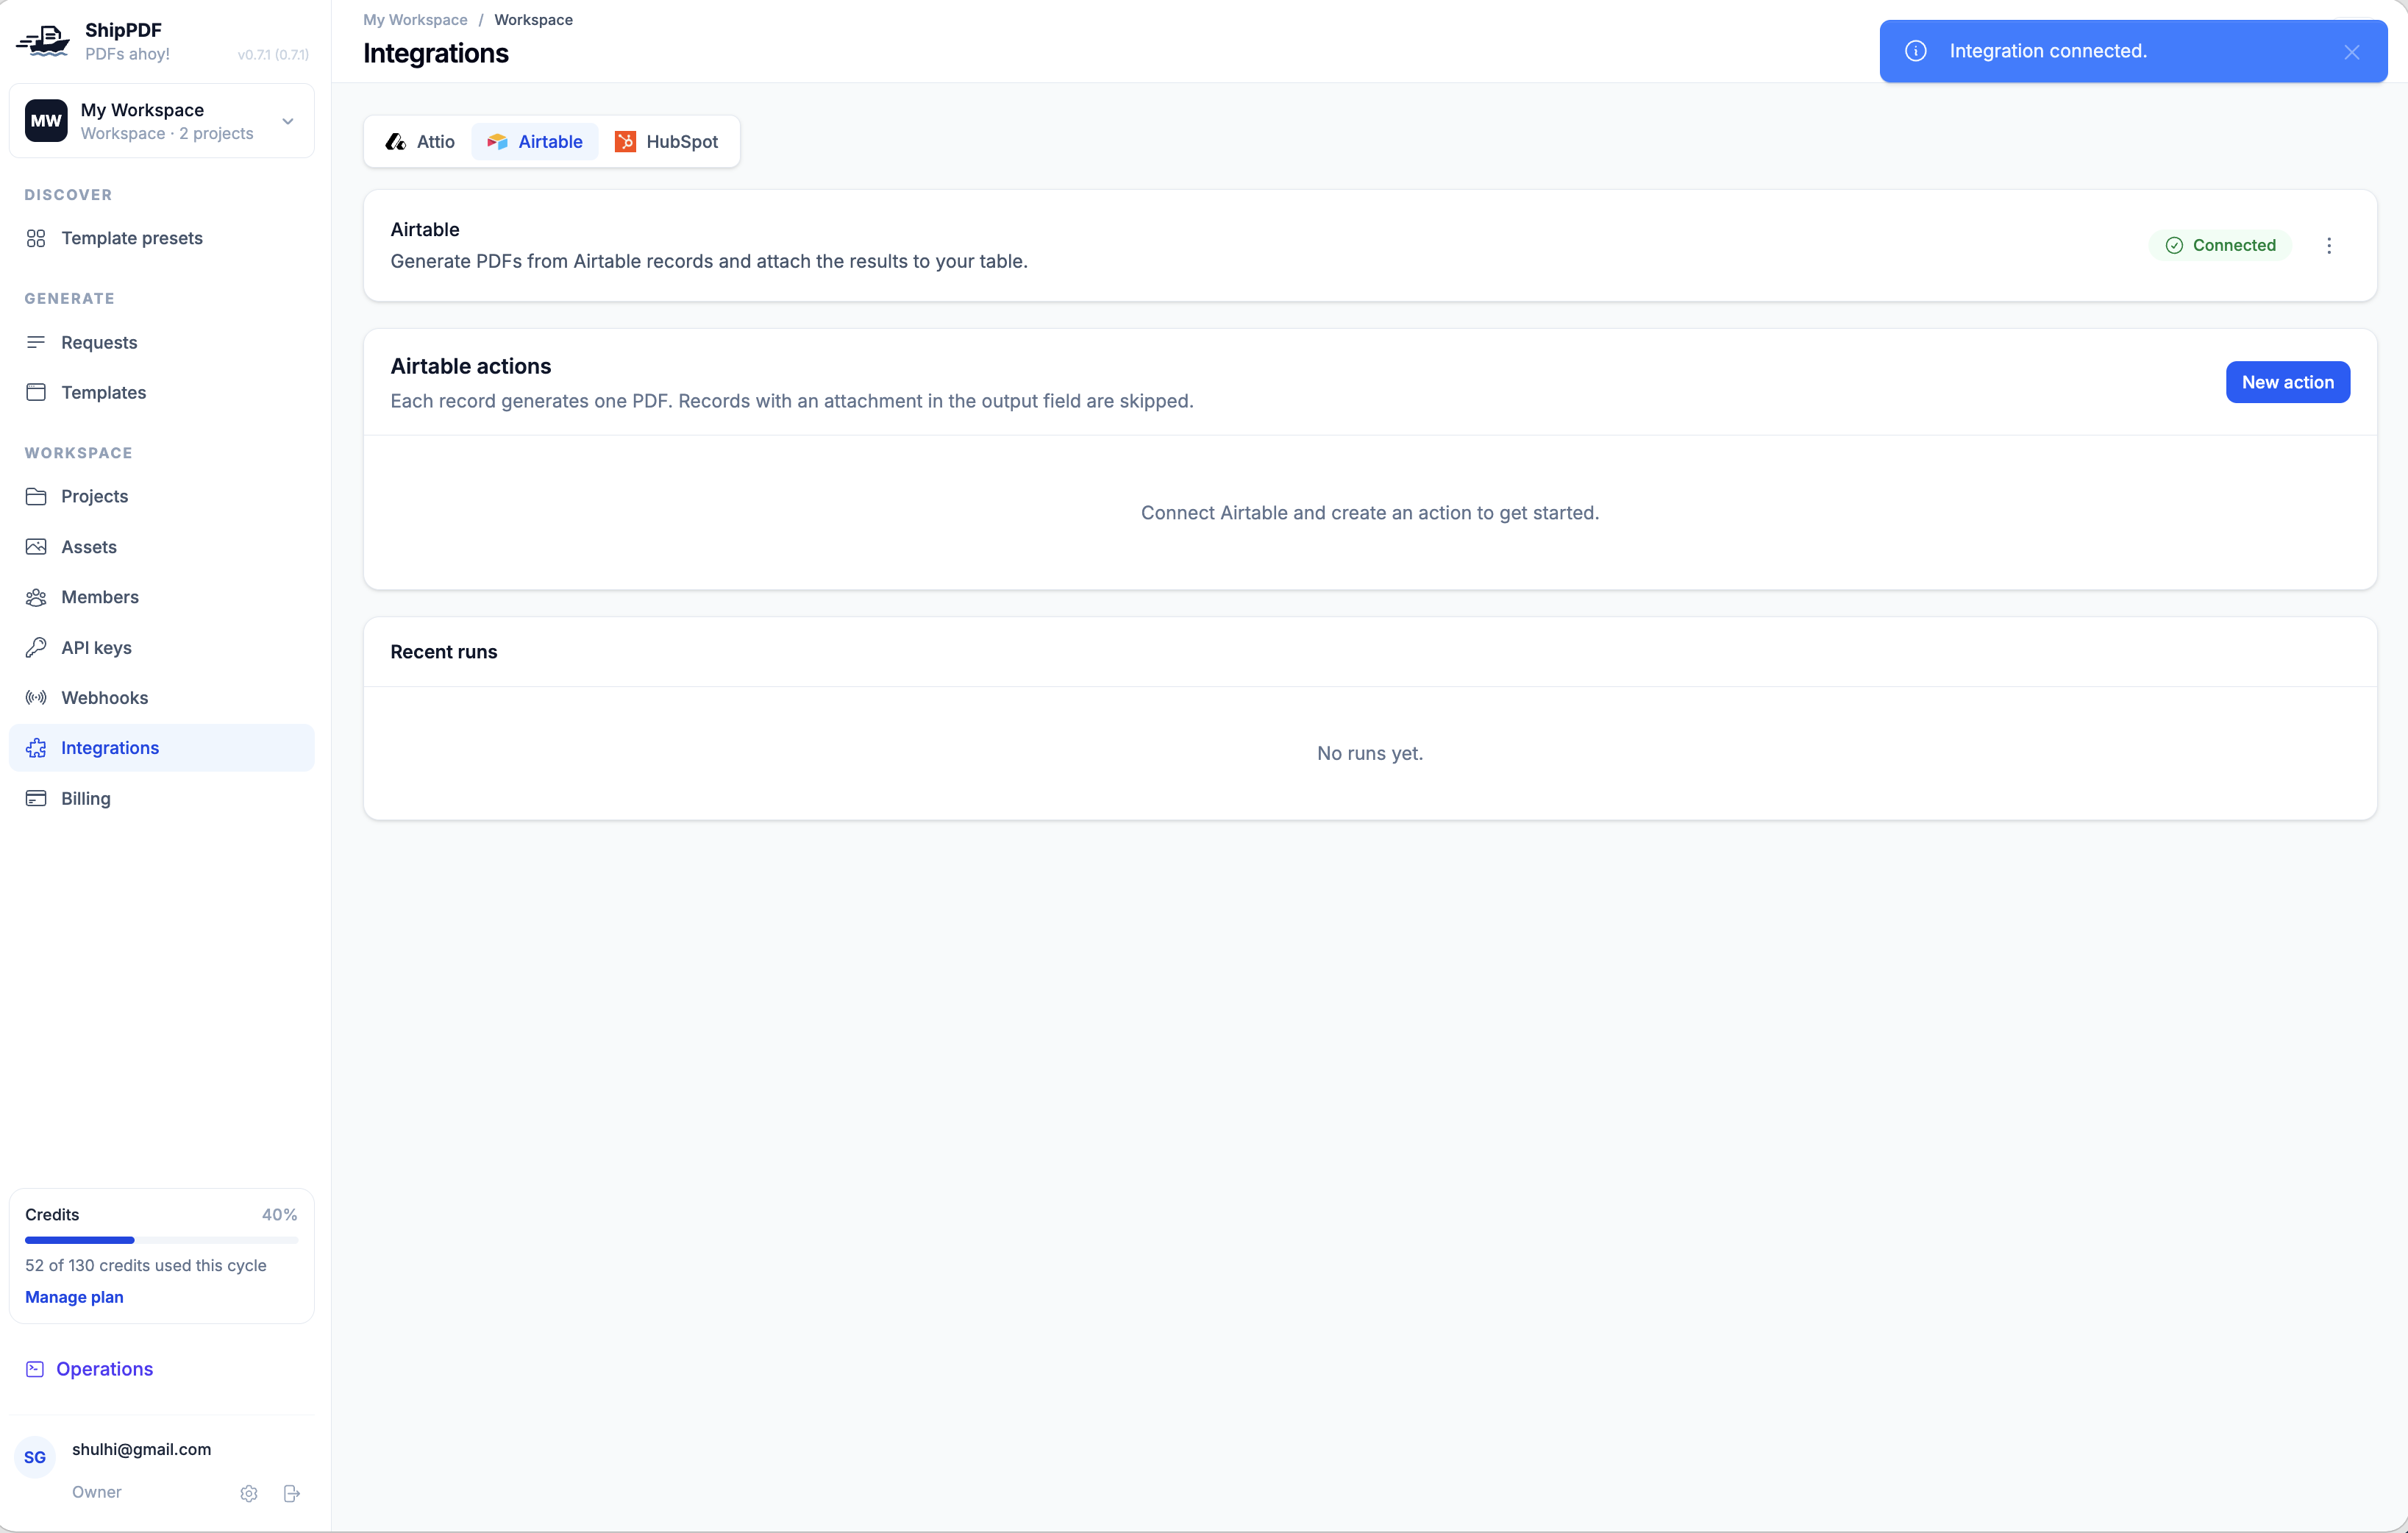
Only bases shared during authorization appear in the action editor. To change them later, open the three-dot menu beside Connected, choose Change base access, and authorize again.
Create an Airtable action
Click New action. An action saves your template, record selection, input mappings, and output field so you can run the same setup again.
1. Choose a template and records
Under Action settings, enter an Action name and choose a Published template. This example uses Demo and My Project / Airtable Invoice (Test).
Under Select Airtable records, choose:
- Base: the authorized base containing your data, such as ShipPDF - Invoice Tracker Demo.
- Table: the source records, such as Invoices. Each invoice record produces its own PDF.
- View (optional): a view to limit the source records, or All records to use the whole table.
For your first run, use a view containing a small number of records with empty output fields.
2. Map template inputs
Under Map inputs, choose an Airtable field for each template input. The left column lists inputs from your published template; the right column selects their Airtable sources.
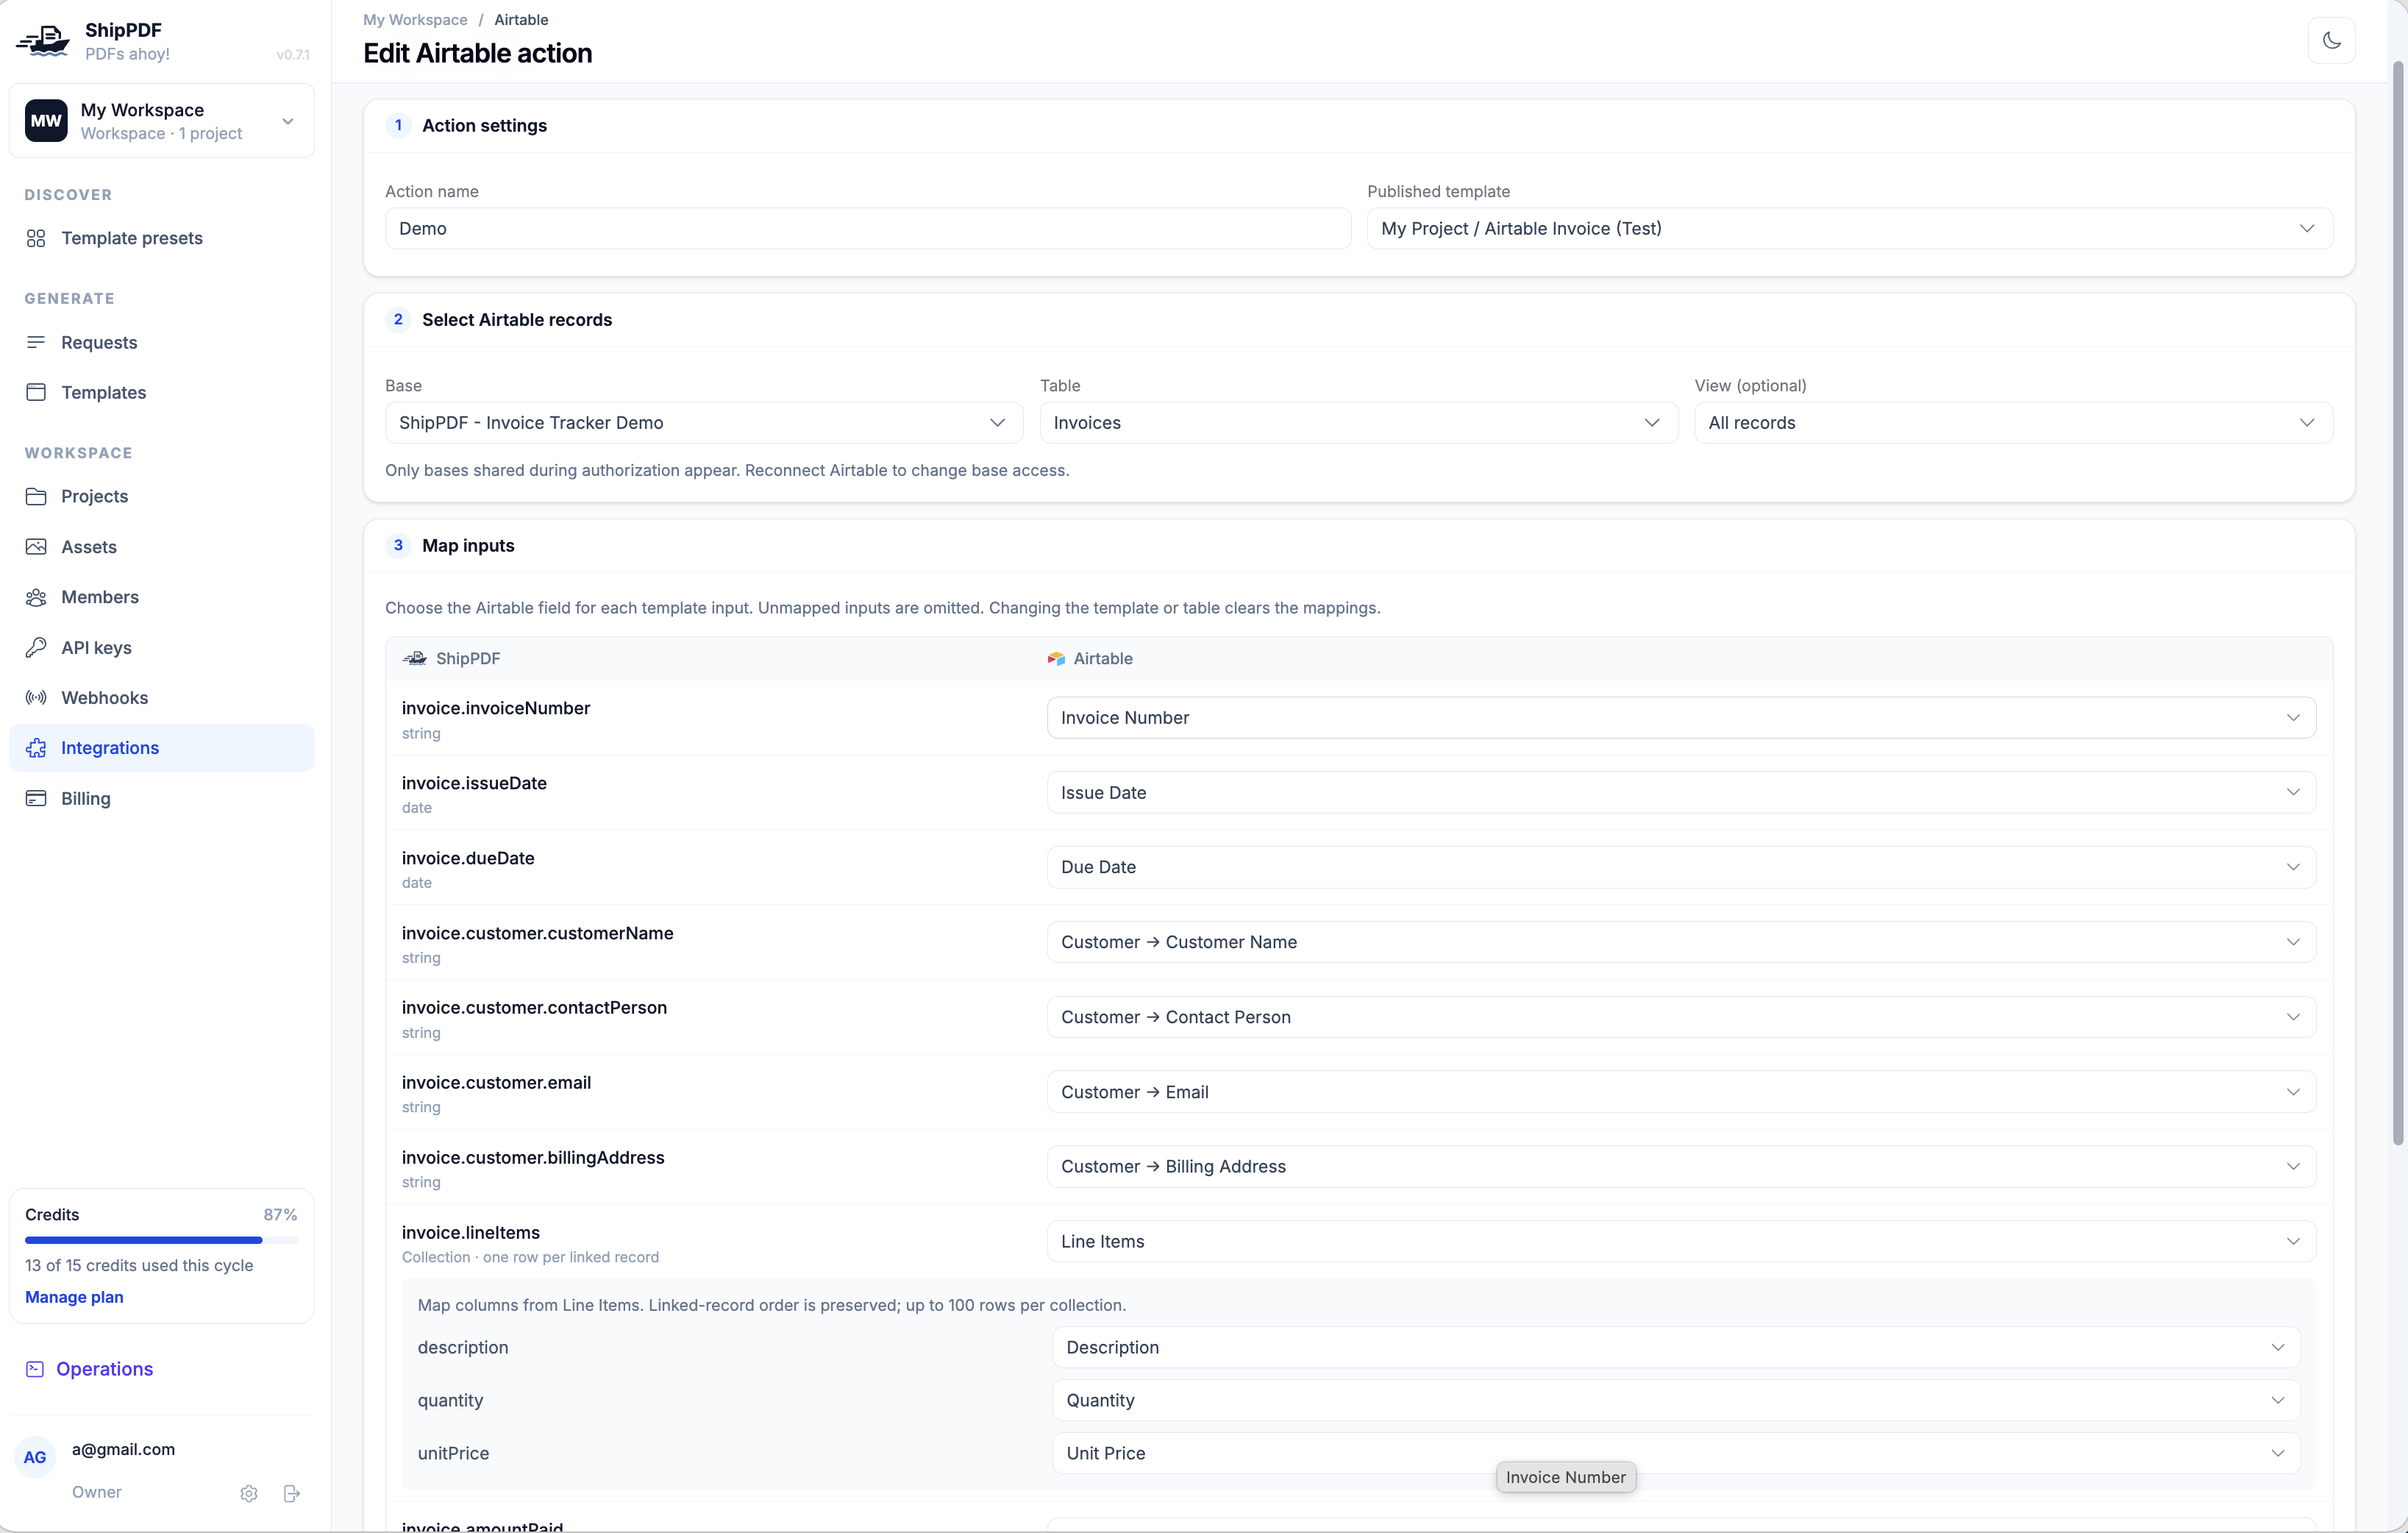
For example:
| ShipPDF input | Airtable source |
|---|---|
invoice.invoiceNumber |
Invoice Number |
invoice.issueDate |
Issue Date |
invoice.dueDate |
Due Date |
invoice.customer.customerName |
Customer → Customer Name |
invoice.customer.contactPerson |
Customer → Contact Person |
invoice.customer.email |
Customer → Email |
invoice.customer.billingAddress |
Customer → Billing Address |
invoice.amountPaid |
Amount Paid |
invoice.balanceDue |
Balance Due |
invoice.notes |
Notes |
Dot notation identifies nested template fields: invoice.customer.email is the email field inside customer, inside invoice. The arrow in Customer → Email means the value comes from a linked customer record.
Use compatible field types, such as dates for date inputs and numbers for numeric inputs. A single-value input mapped through a linked field needs exactly one linked record when populated. Multiple linked customers cause an error rather than choosing one automatically; an empty link omits that input.
Unmapped inputs are omitted from the submitted data. Calculated template fields are handled by the template and do not need input mappings. Changing the template or source table clears the mappings, so review them before saving.
3. Map repeating line items
For a collection such as invoice.lineItems, choose the Line Items linked-record field. Then map each collection column to a field in the linked table:
| Collection column | Field in Line Items |
|---|---|
description |
Description |
quantity |
Quantity |
unitPrice |
Unit Price |
Each linked record becomes one row in the PDF, preserving the order of the links. Collections and lists support up to 100 items each. Recursively following links into nested collections is not supported.
Compatible multi-value fields, such as multi-selects, can also supply primitive lists in your template. A list of values and a collection of rows are different types; choose the source that matches your template’s schema.
4. Choose the output field and save
Under Save the PDF to Airtable, select your Output attachment field. In this example, choose Invoice Attachment. The output format is PDF, and Airtable stores its own copy of each attached file.
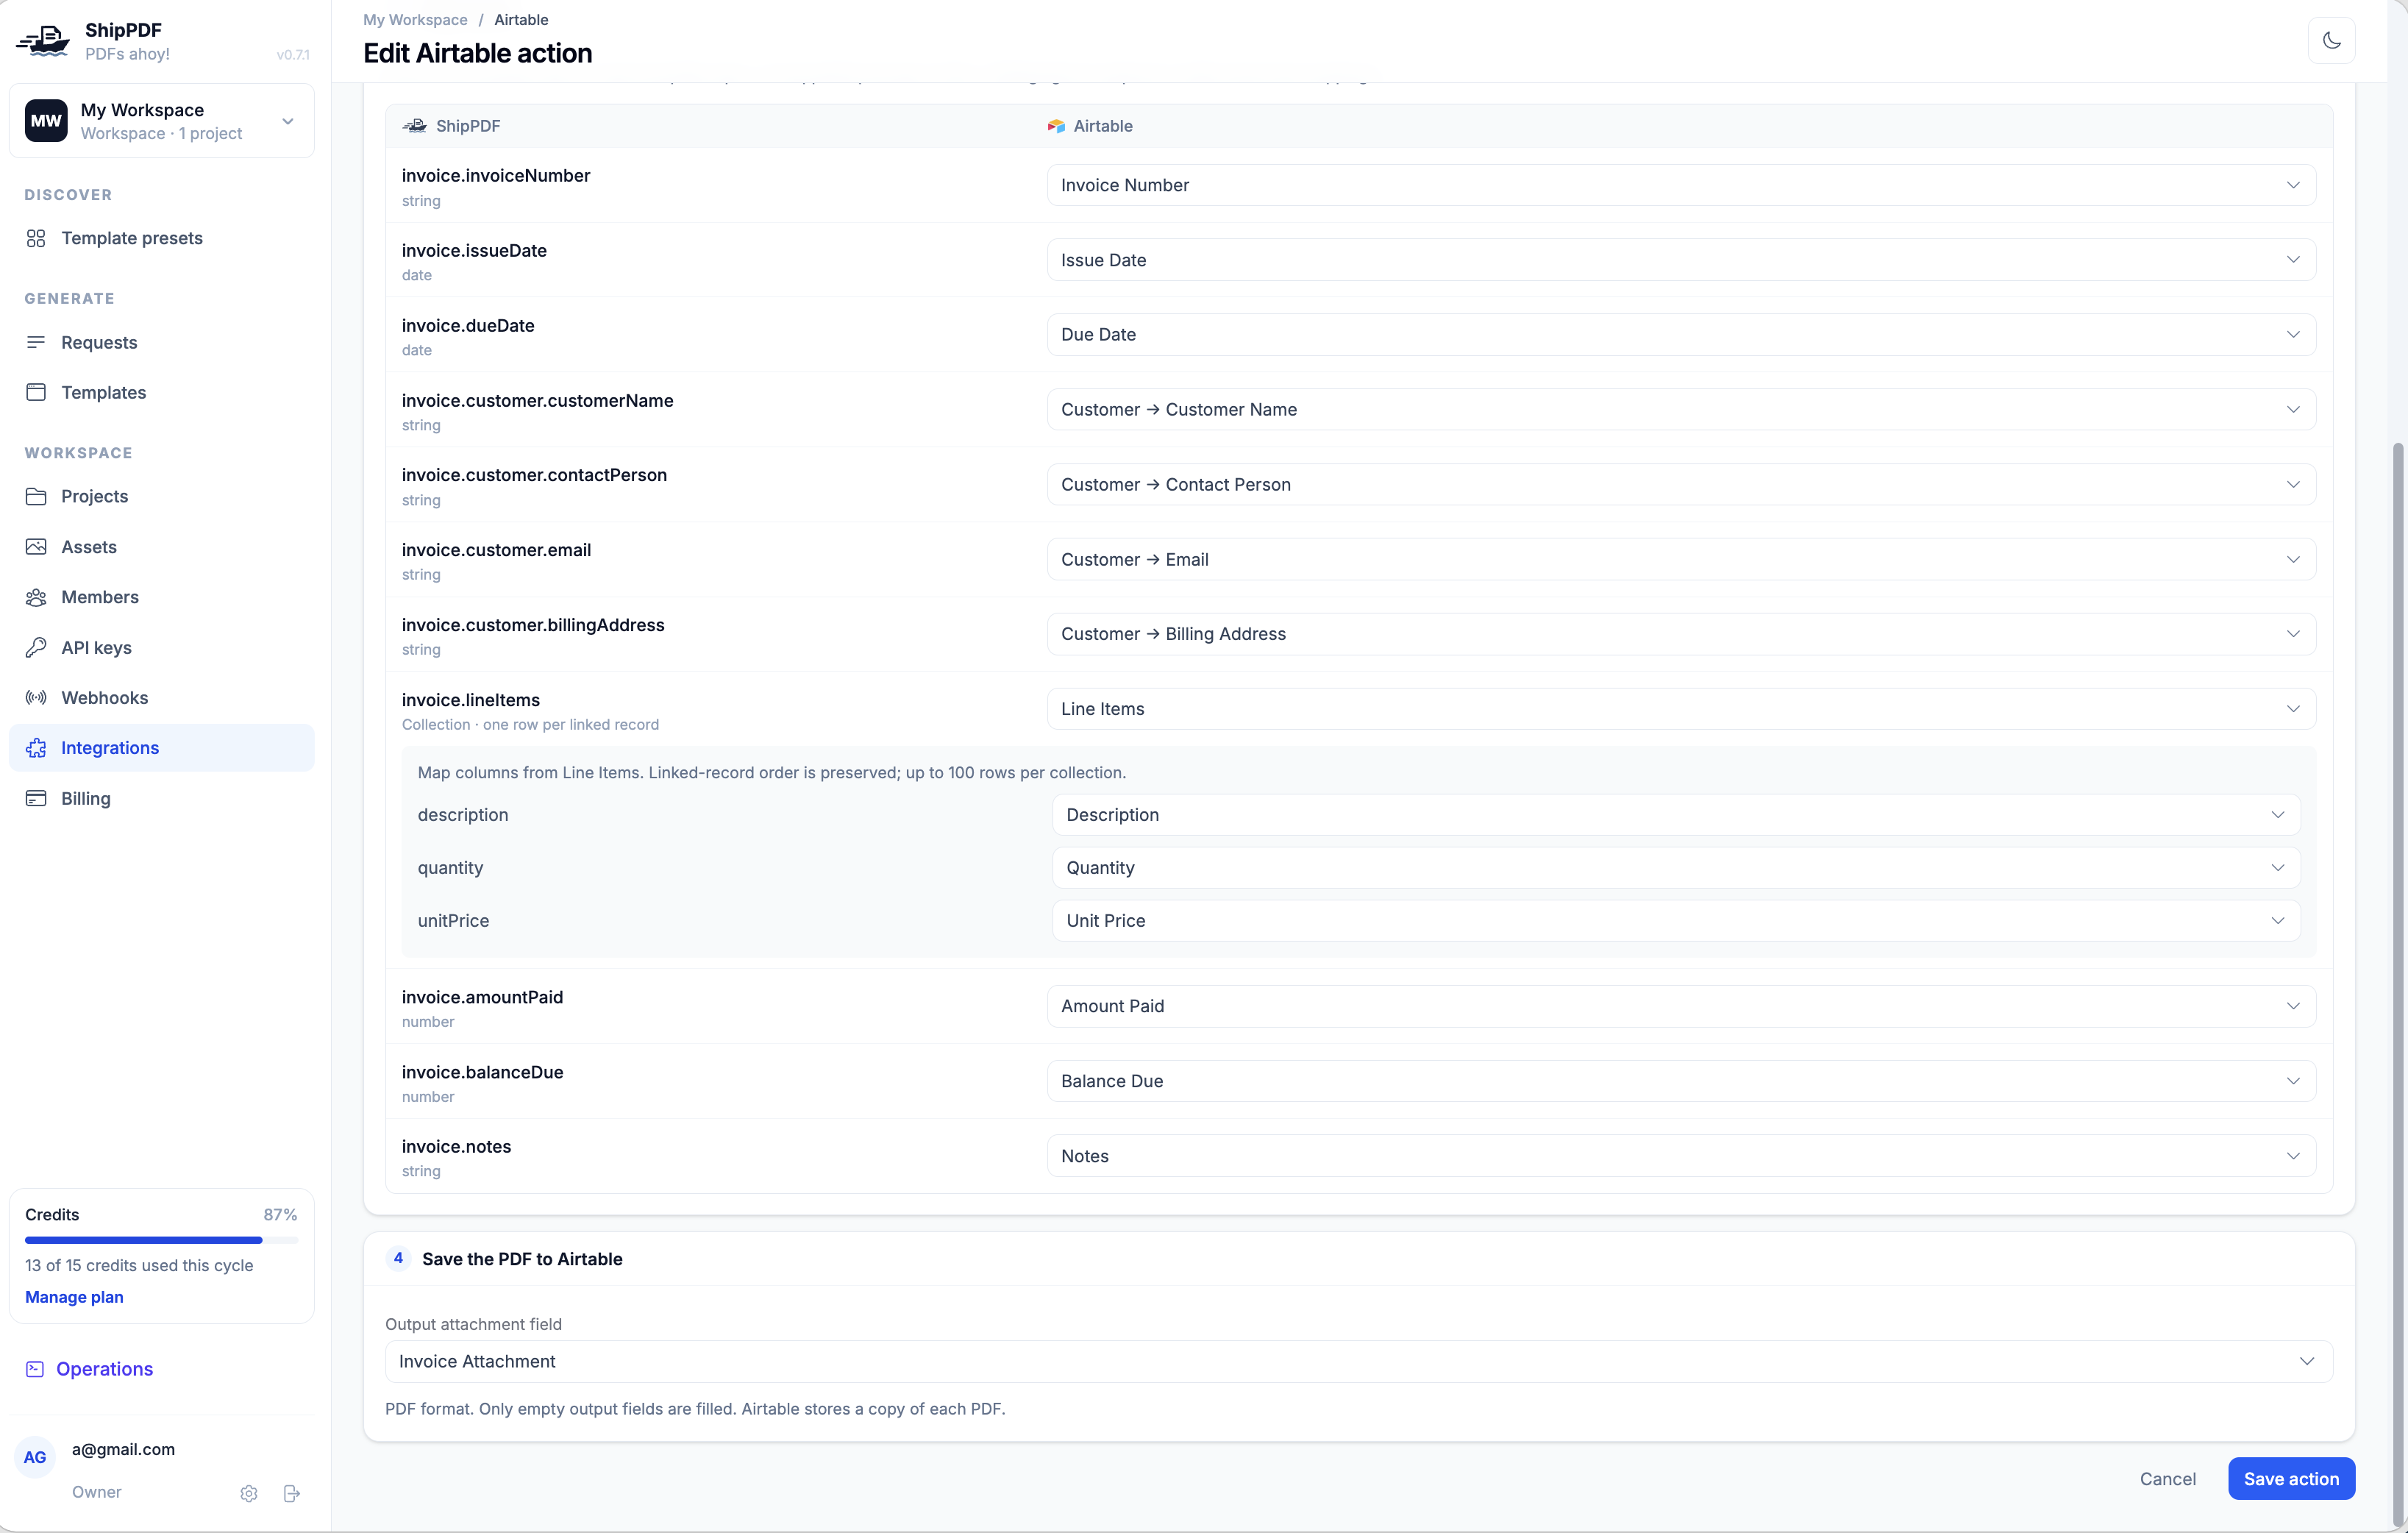
Click Save action. Saving the setup does not start generation; run it from the integration page when you are ready.
Run the action
On Integrations → Airtable, find your saved action and click Run action. ShipPDF finds records in the selected table or view, skips records whose output field already contains an attachment, and processes eligible records in the background. You can close the browser while the run continues.
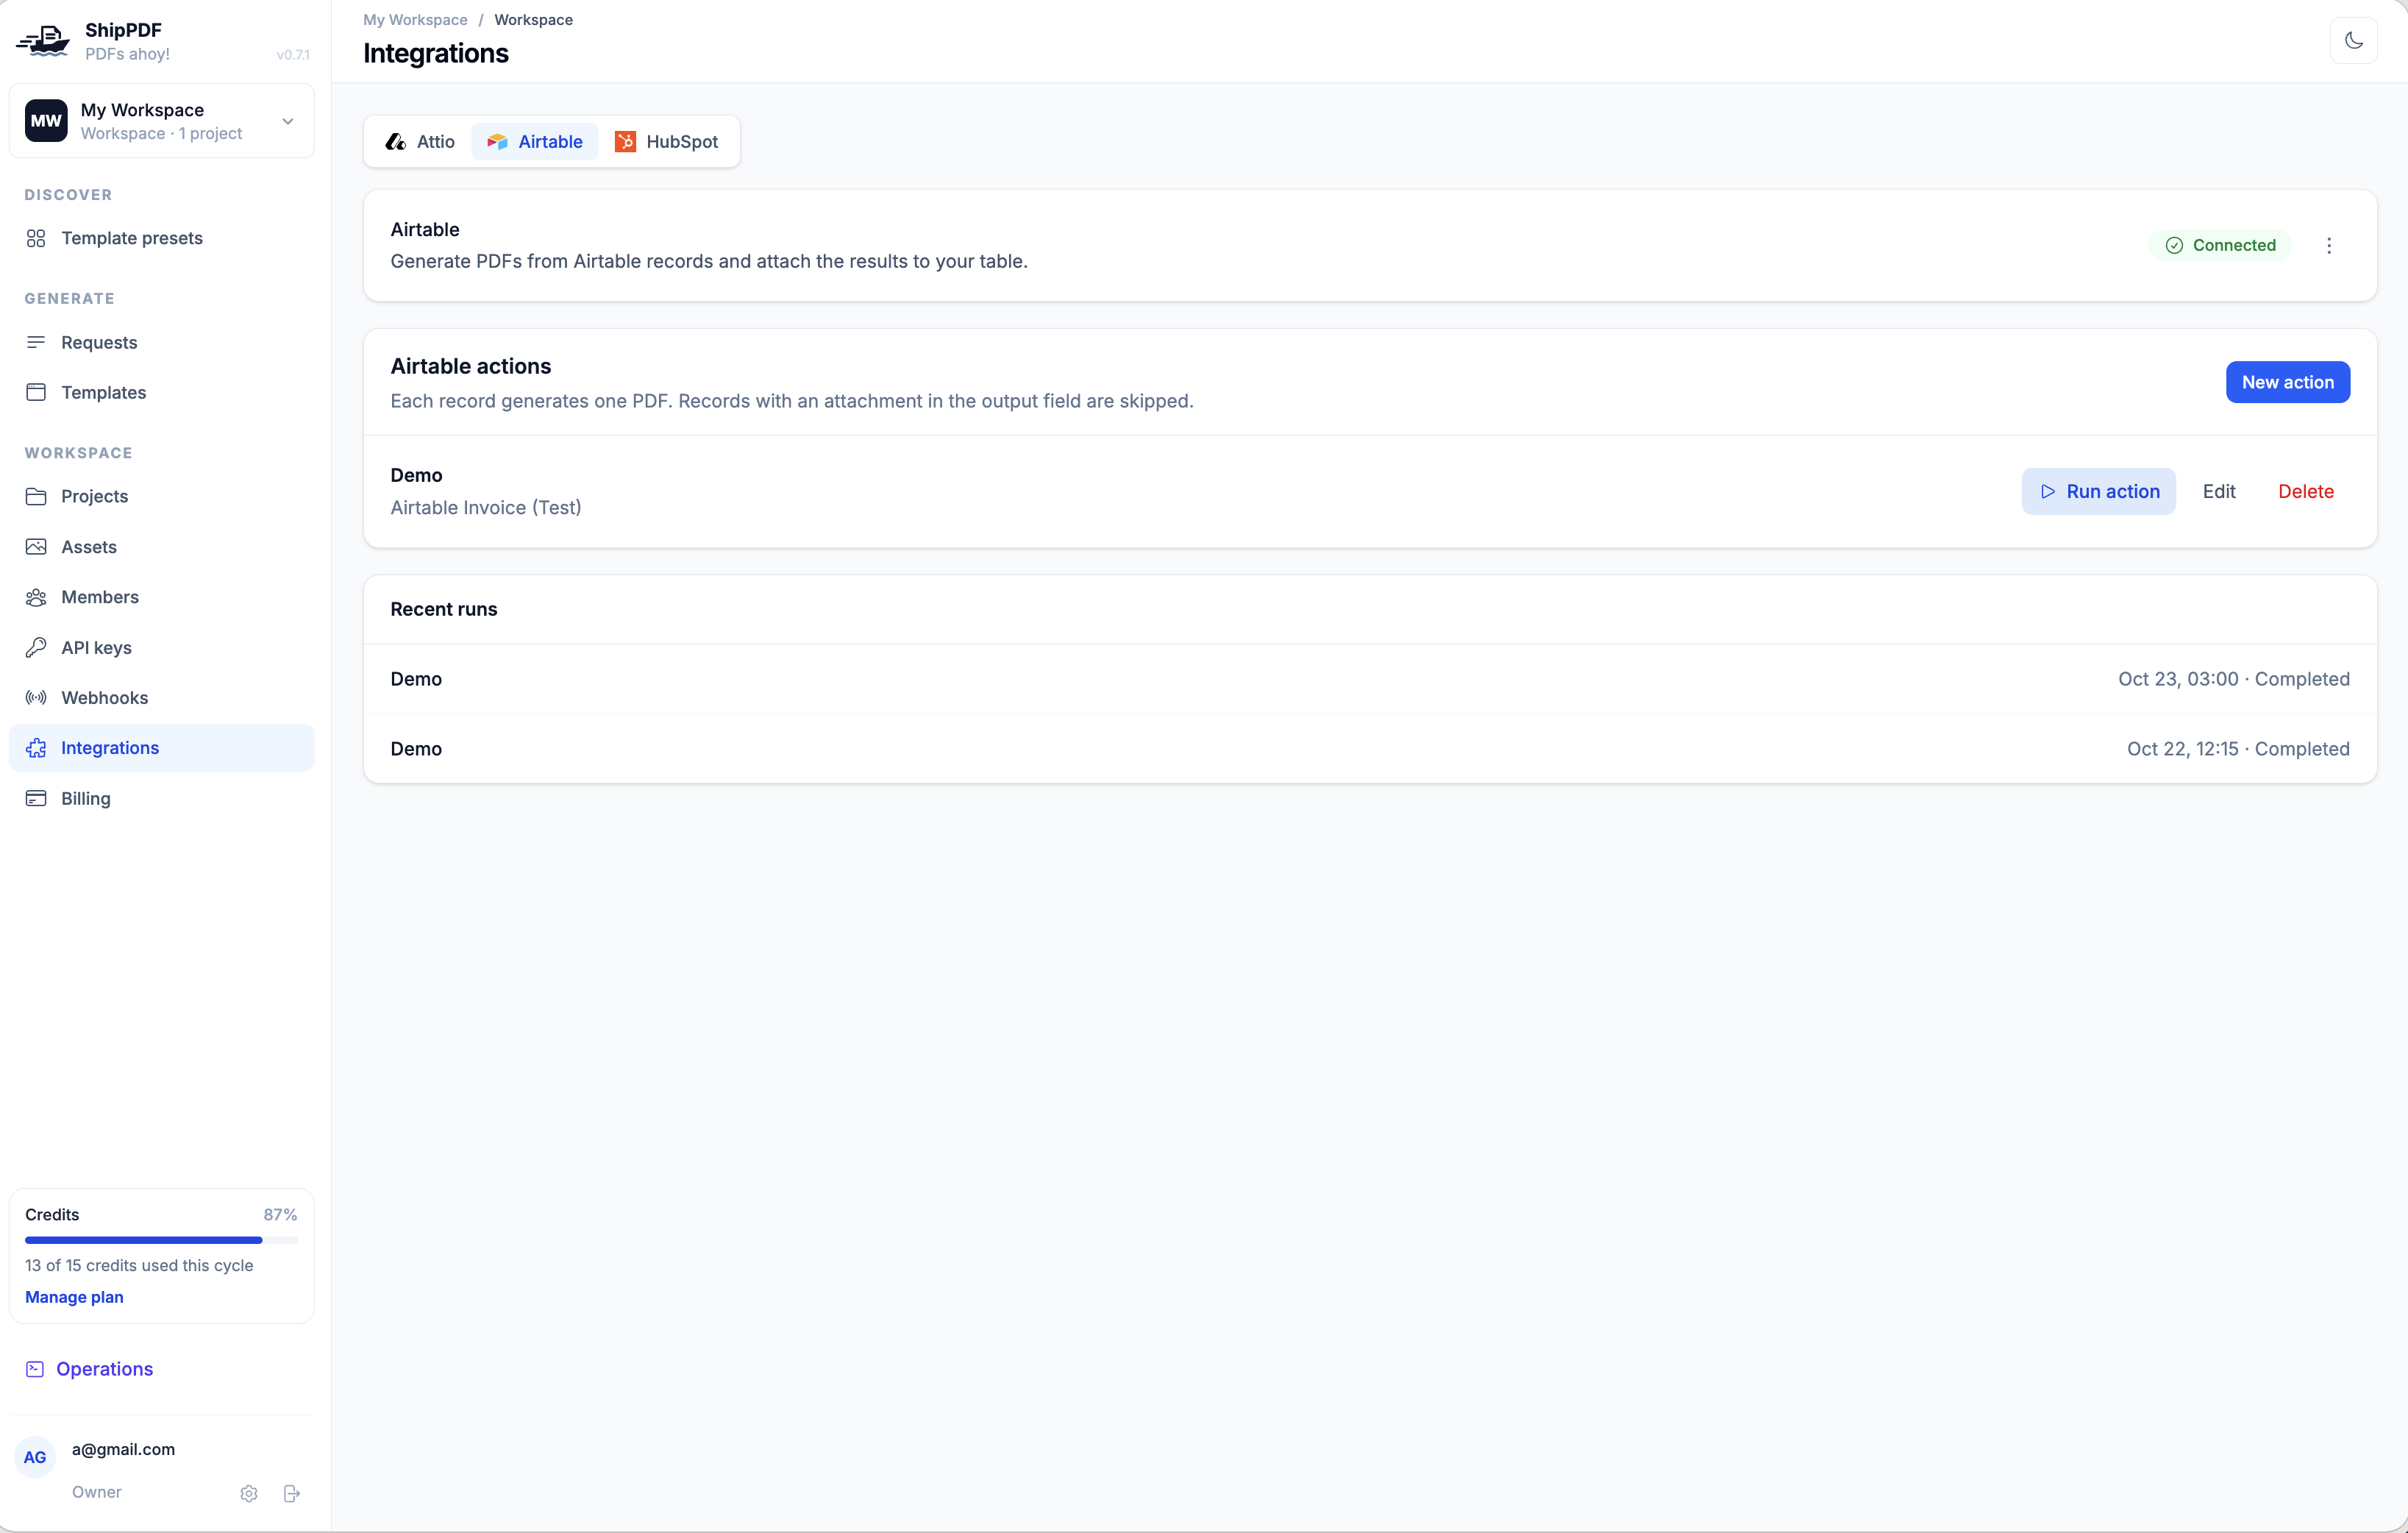
Starting the same action while a run is still active opens the existing run. Use Edit to change future runs; an already-started run keeps its saved configuration and published template revision.
Generating each new PDF uses a ShipPDF generation credit. Downloading a finished PDF or retrying delivery of an existing PDF does not use another generation credit.
Review the results
Open a run from Recent runs. Its summary shows Records found, PDFs attached, Skipped, and Failed. The table below shows each Airtable record, its status, any error details, and a Download link when a PDF is available.
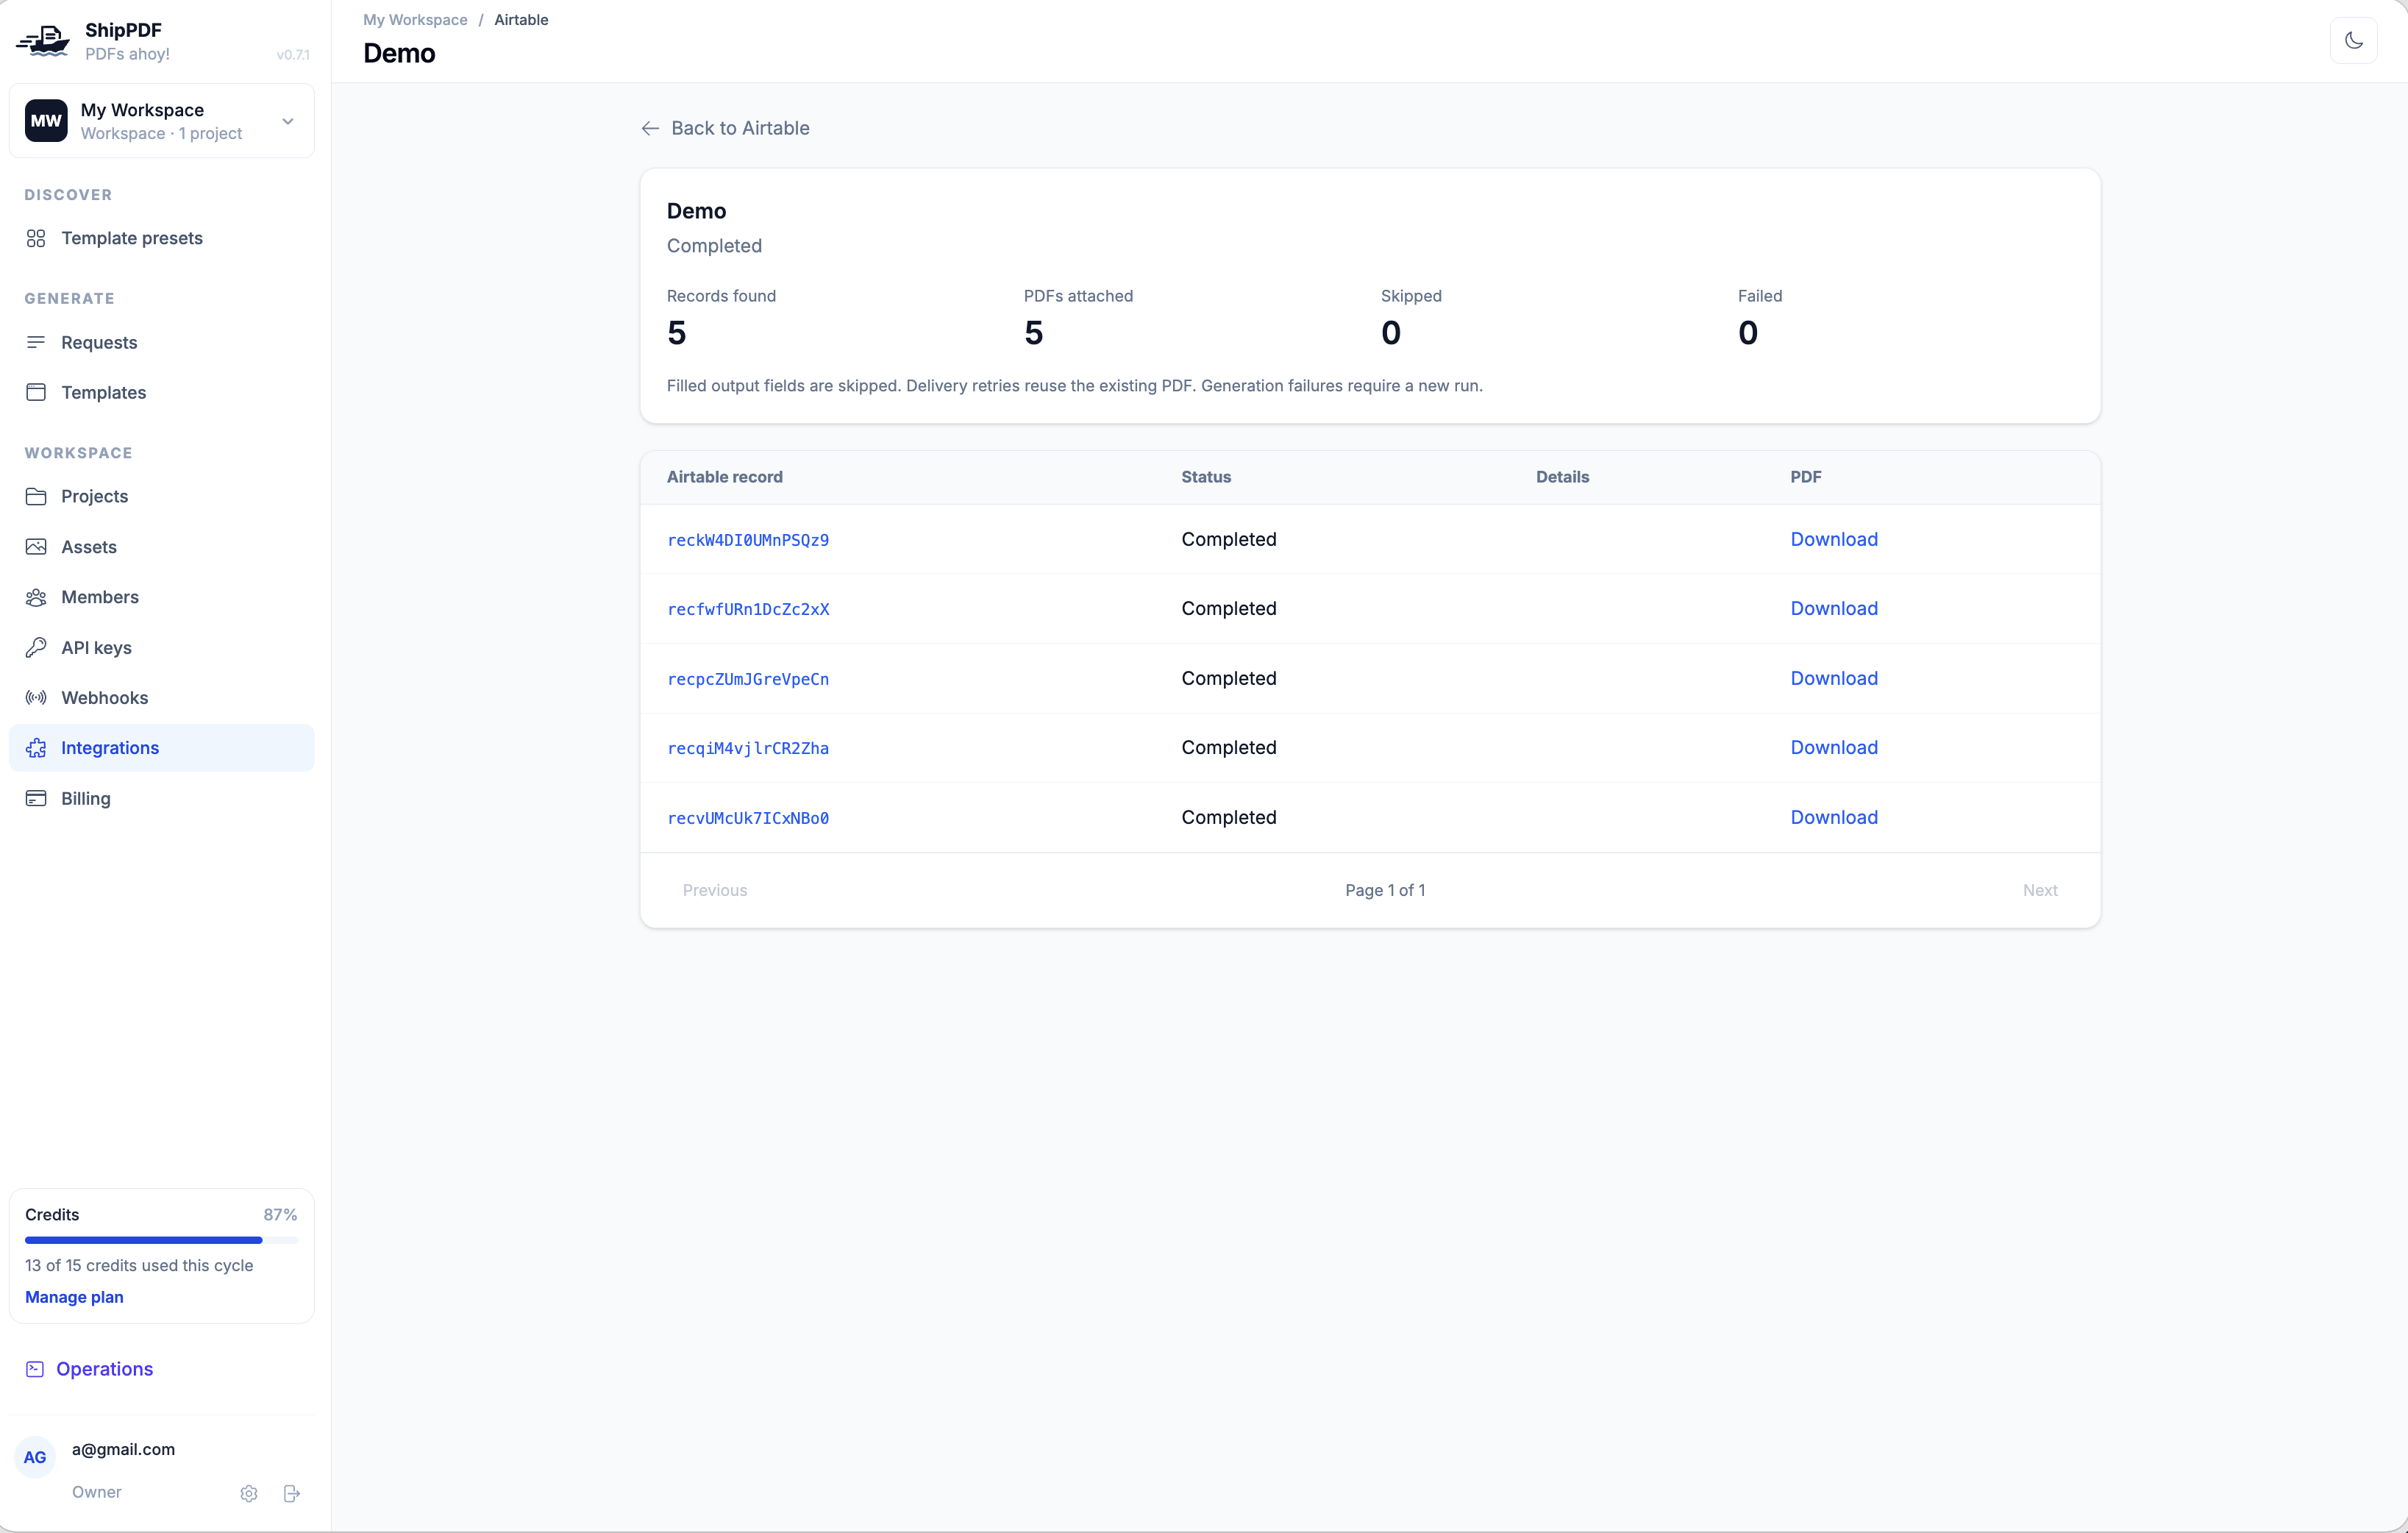
Click a record ID to open the source record in Airtable, or Download to retrieve its PDF from ShipPDF. Back to Airtable returns to the integration page.
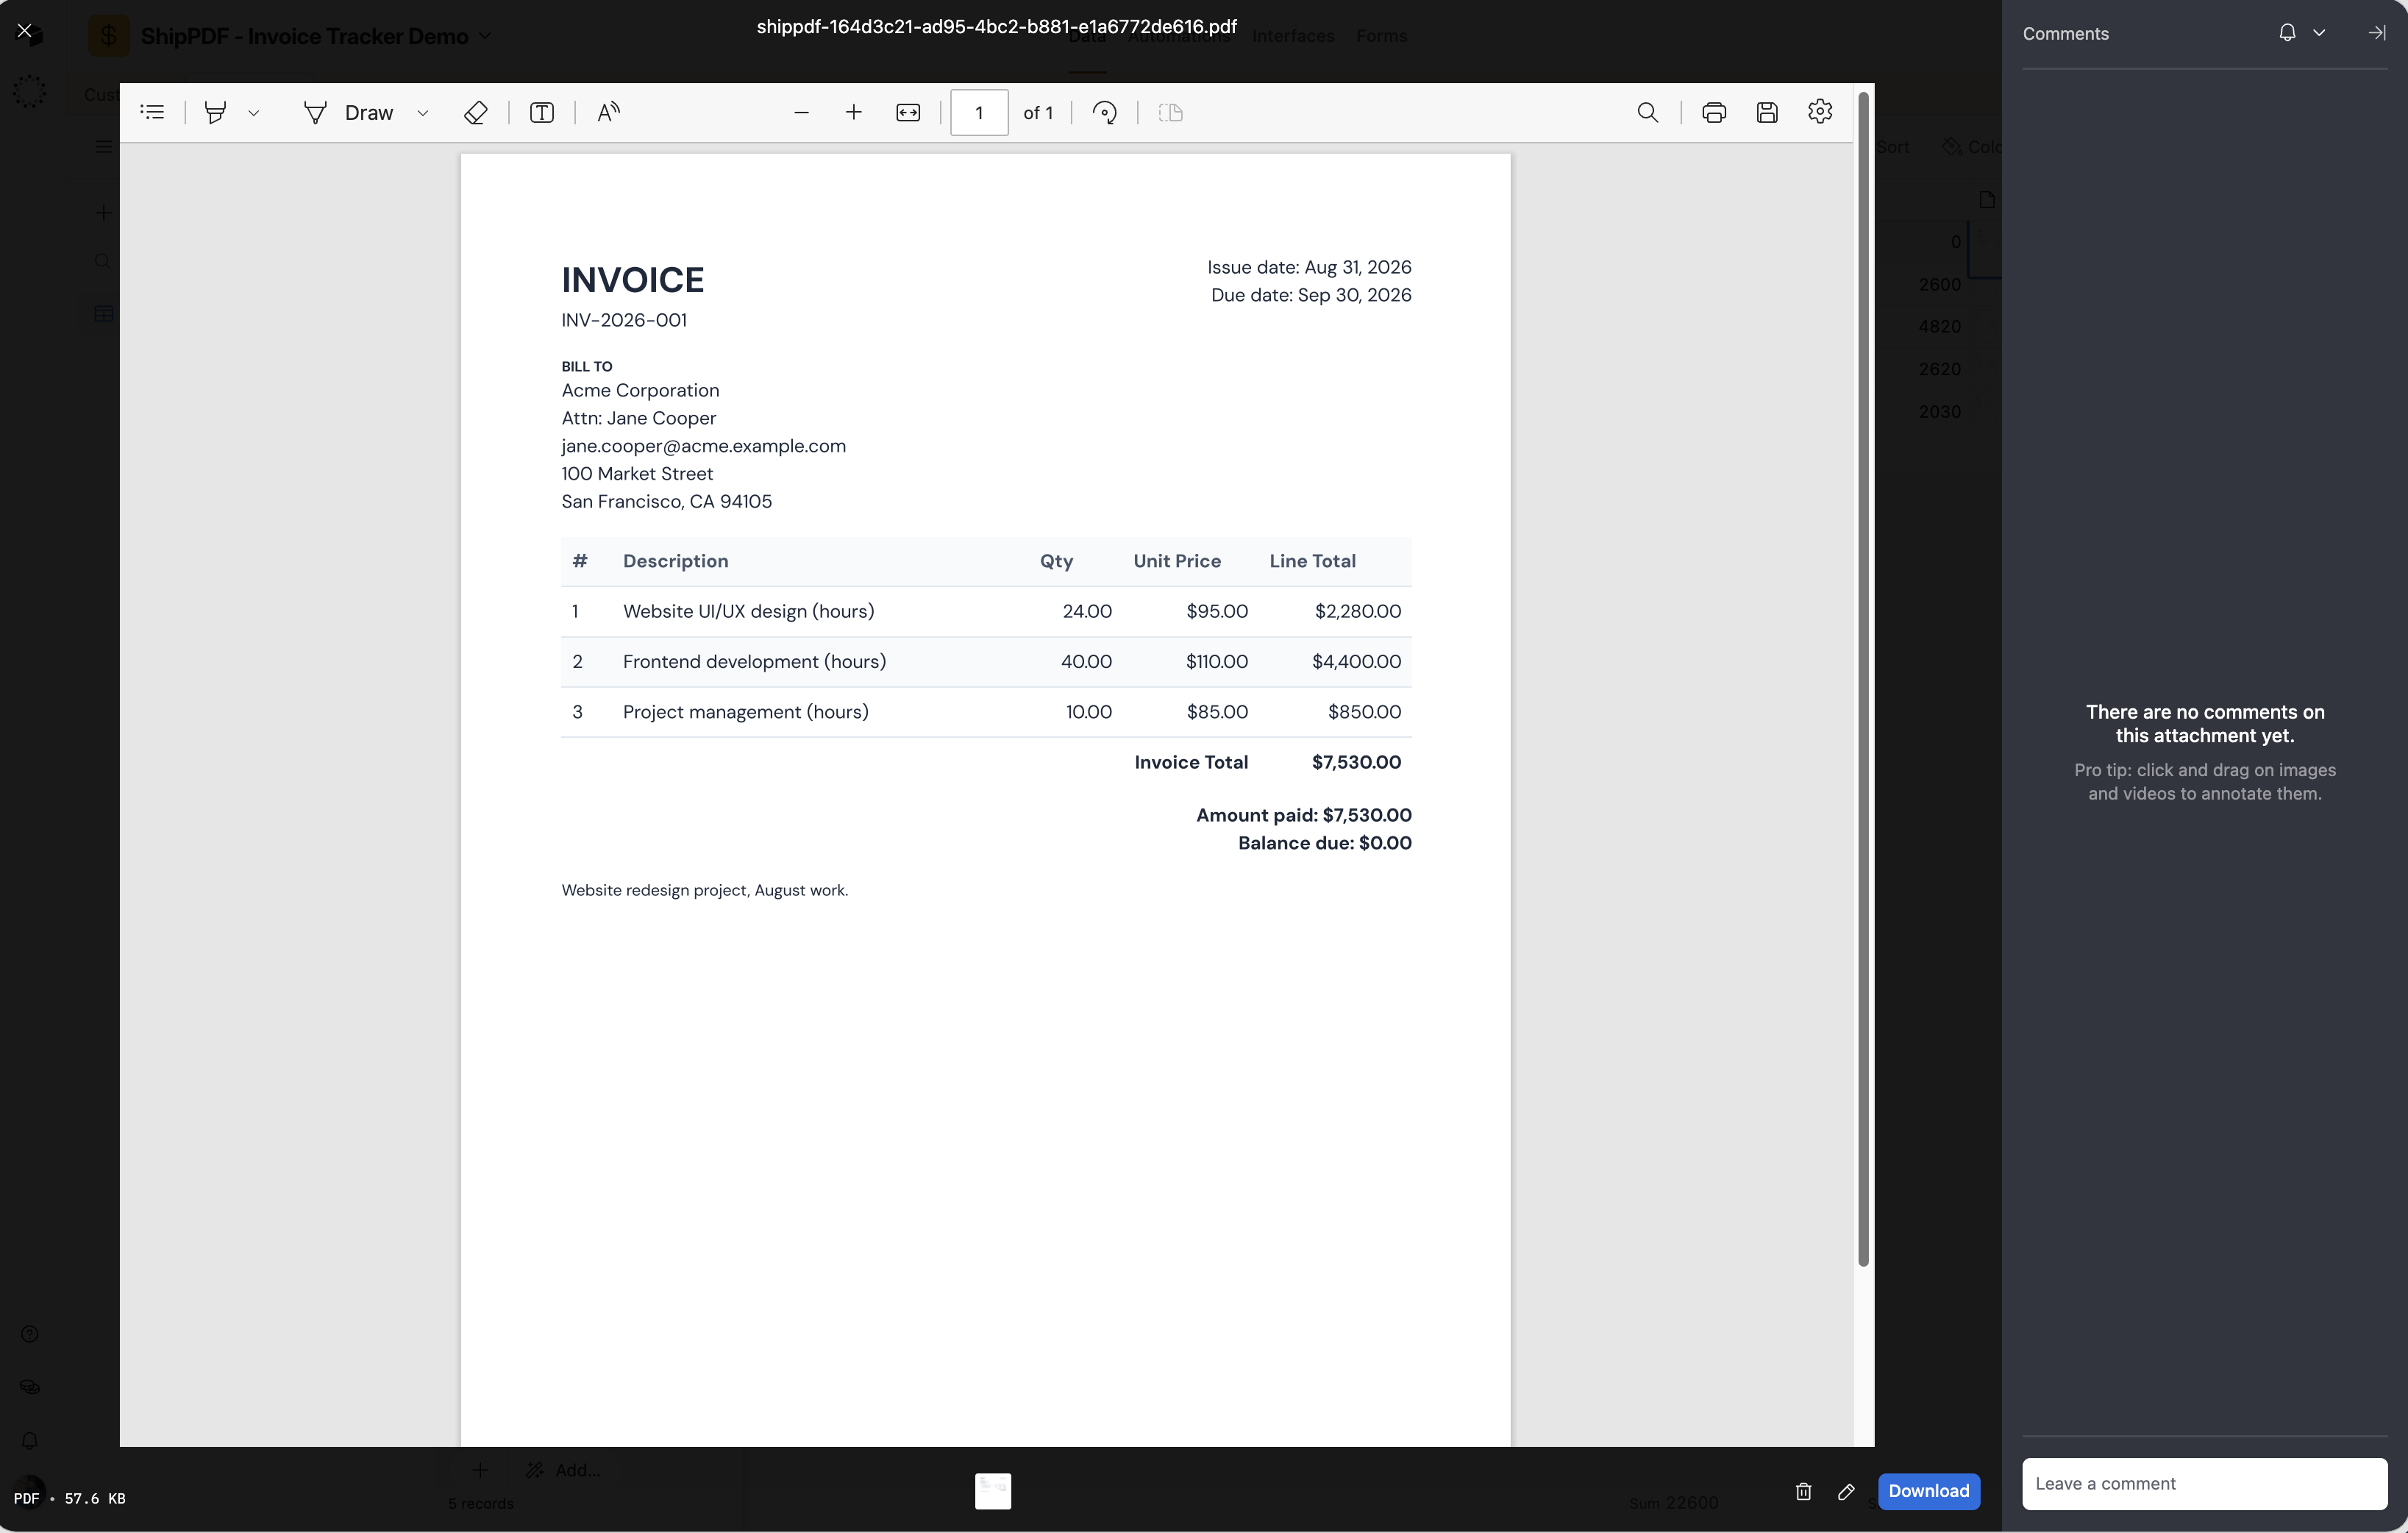
In Airtable, open the source table and check the output field. Each processed invoice now has a PDF in Invoice Attachment.
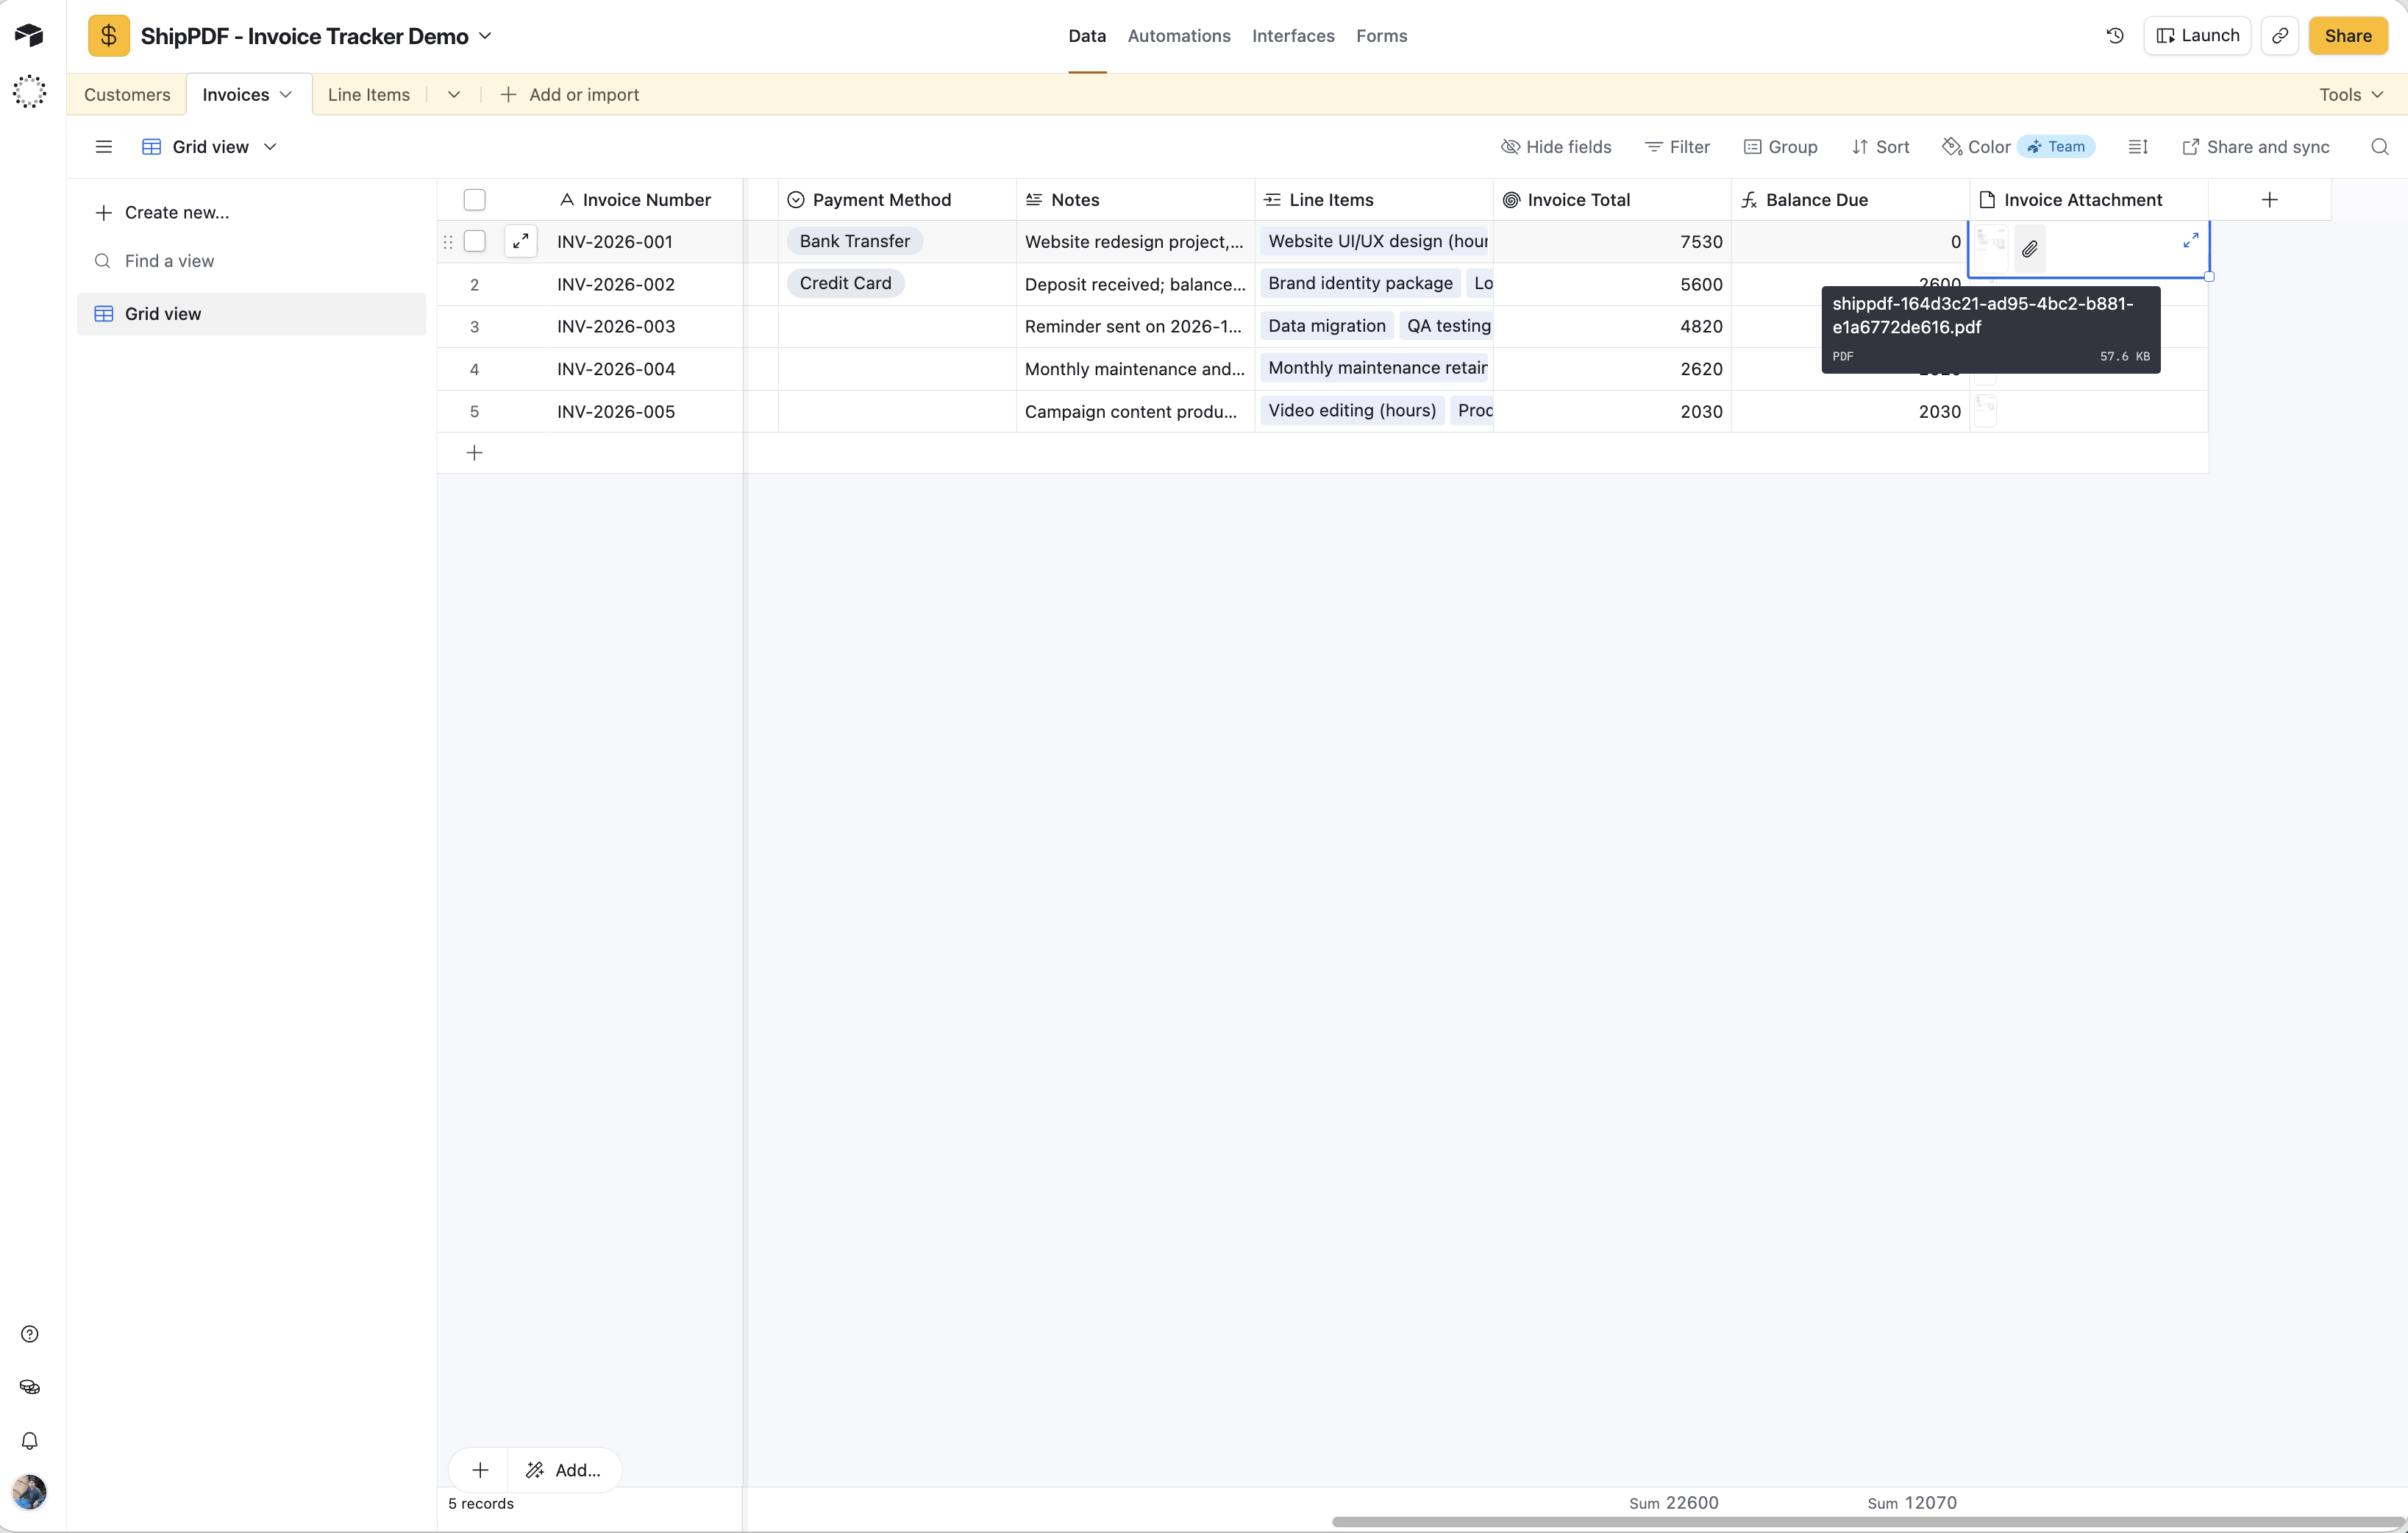
Open an attachment to preview the finished document. The invoice combines the source record’s dates, linked customer details, line item rows, and payment values using the published template’s layout.
Reruns and retries
- Records with attachments: later runs skip records with any attachment in the output field. To intentionally regenerate a PDF, first save any copy you need, clear that record’s output field in Airtable, and run the action again. A new PDF uses another generation credit.
- Delivery failed: if the PDF was generated but could not be attached, use Retry failed records when available on the run. ShipPDF reuses the existing PDF. Retry delivery before starting another run to avoid generating the same undelivered document again.
- Data failed before generation: eligible records that have no generated document can reread their source data on retry. Correct the source values first. Changes to an action’s mappings apply only to new runs.
- PDF generation failed: fix the template or data and start a new action run. Delivery retries cannot repair a failed PDF generation.
If the output field is filled after generation but before delivery, ShipPDF skips delivery. The generated PDF remains in ShipPDF, and its generation credit has already been used.
Troubleshooting
My base or template is missing
For a missing base, use the connection’s Change base access option and share the base during Airtable authorization. For a missing template, check that you selected the correct ShipPDF workspace and published the template. Publish schema changes before selecting updated inputs.
No output fields are available
Add an Attachment field to your source table in Airtable, then reopen the action editor to load it. A text or URL field cannot be used as the output attachment field.
Records were skipped or no records were found
Check the selected table and view, including the view’s filters. For skipped records, check whether the output attachment field already has a file. ShipPDF does not overwrite existing attachments.
A field mapping fails
Read the record’s Details in the run. Check value types, missing fields, linked-record access, and collection size. For a single-value input from a linked record, ensure the relationship contains only one record. Replace or unmap unavailable fields in the action editor before saving.
The connection or attachment delivery fails
Check Airtable access and record edit permissions, then reconnect from the integration’s connection menu if needed. Use Retry failed records for eligible delivery failures after access is restored. Keep the member who started the run authorized to manage integrations and generate documents.
To disconnect, open the three-dot connection menu and choose Disconnect. This removes the connection from ShipPDF. To remove the authorization in Airtable too, revoke ShipPDF’s access in your Airtable account’s integration settings.
If you need help, email support@shippdf.com with the action name, error details, and document reference if available. Do not include access tokens or other credentials.