HubSpot integration
Generate quotes, invoices, proposals, and other PDFs from HubSpot contacts, companies, and deals. Install the app, connect a ShipPDF workspace, and add Generate PDF document with ShipPDF to a record view. The card lets you choose a published template, map CRM properties, reuse saved mappings, and open or download the finished PDF.
The integration generates PDFs on demand from the record card. It does not attach the PDF to the HubSpot record or run automatically when a deal changes stage.
Before you start
You need:
- A ShipPDF workspace with API access, generation credits, and a published template.
- A ShipPDF workspace owner or manager to authorize the connection.
- A HubSpot account where you can install the app. Adding the card to a shared record view requires Super Admin or Customize record page layout permissions.
Design the template around the data you want to use. Add text, number, and date fields for record properties and a Collection for deal line items. The card loads fields from the published version, so publish template changes before using them in HubSpot. See Create your template and Data Schema and Default Data.
The walkthrough uses the Quotation template on a deal named Booking Portal Proposal. Some fields still begin with invoice, such as invoice.customer.customerName. A template’s display name does not change its data-field paths. Your card shows the paths defined in your own template.
Install and connect ShipPDF
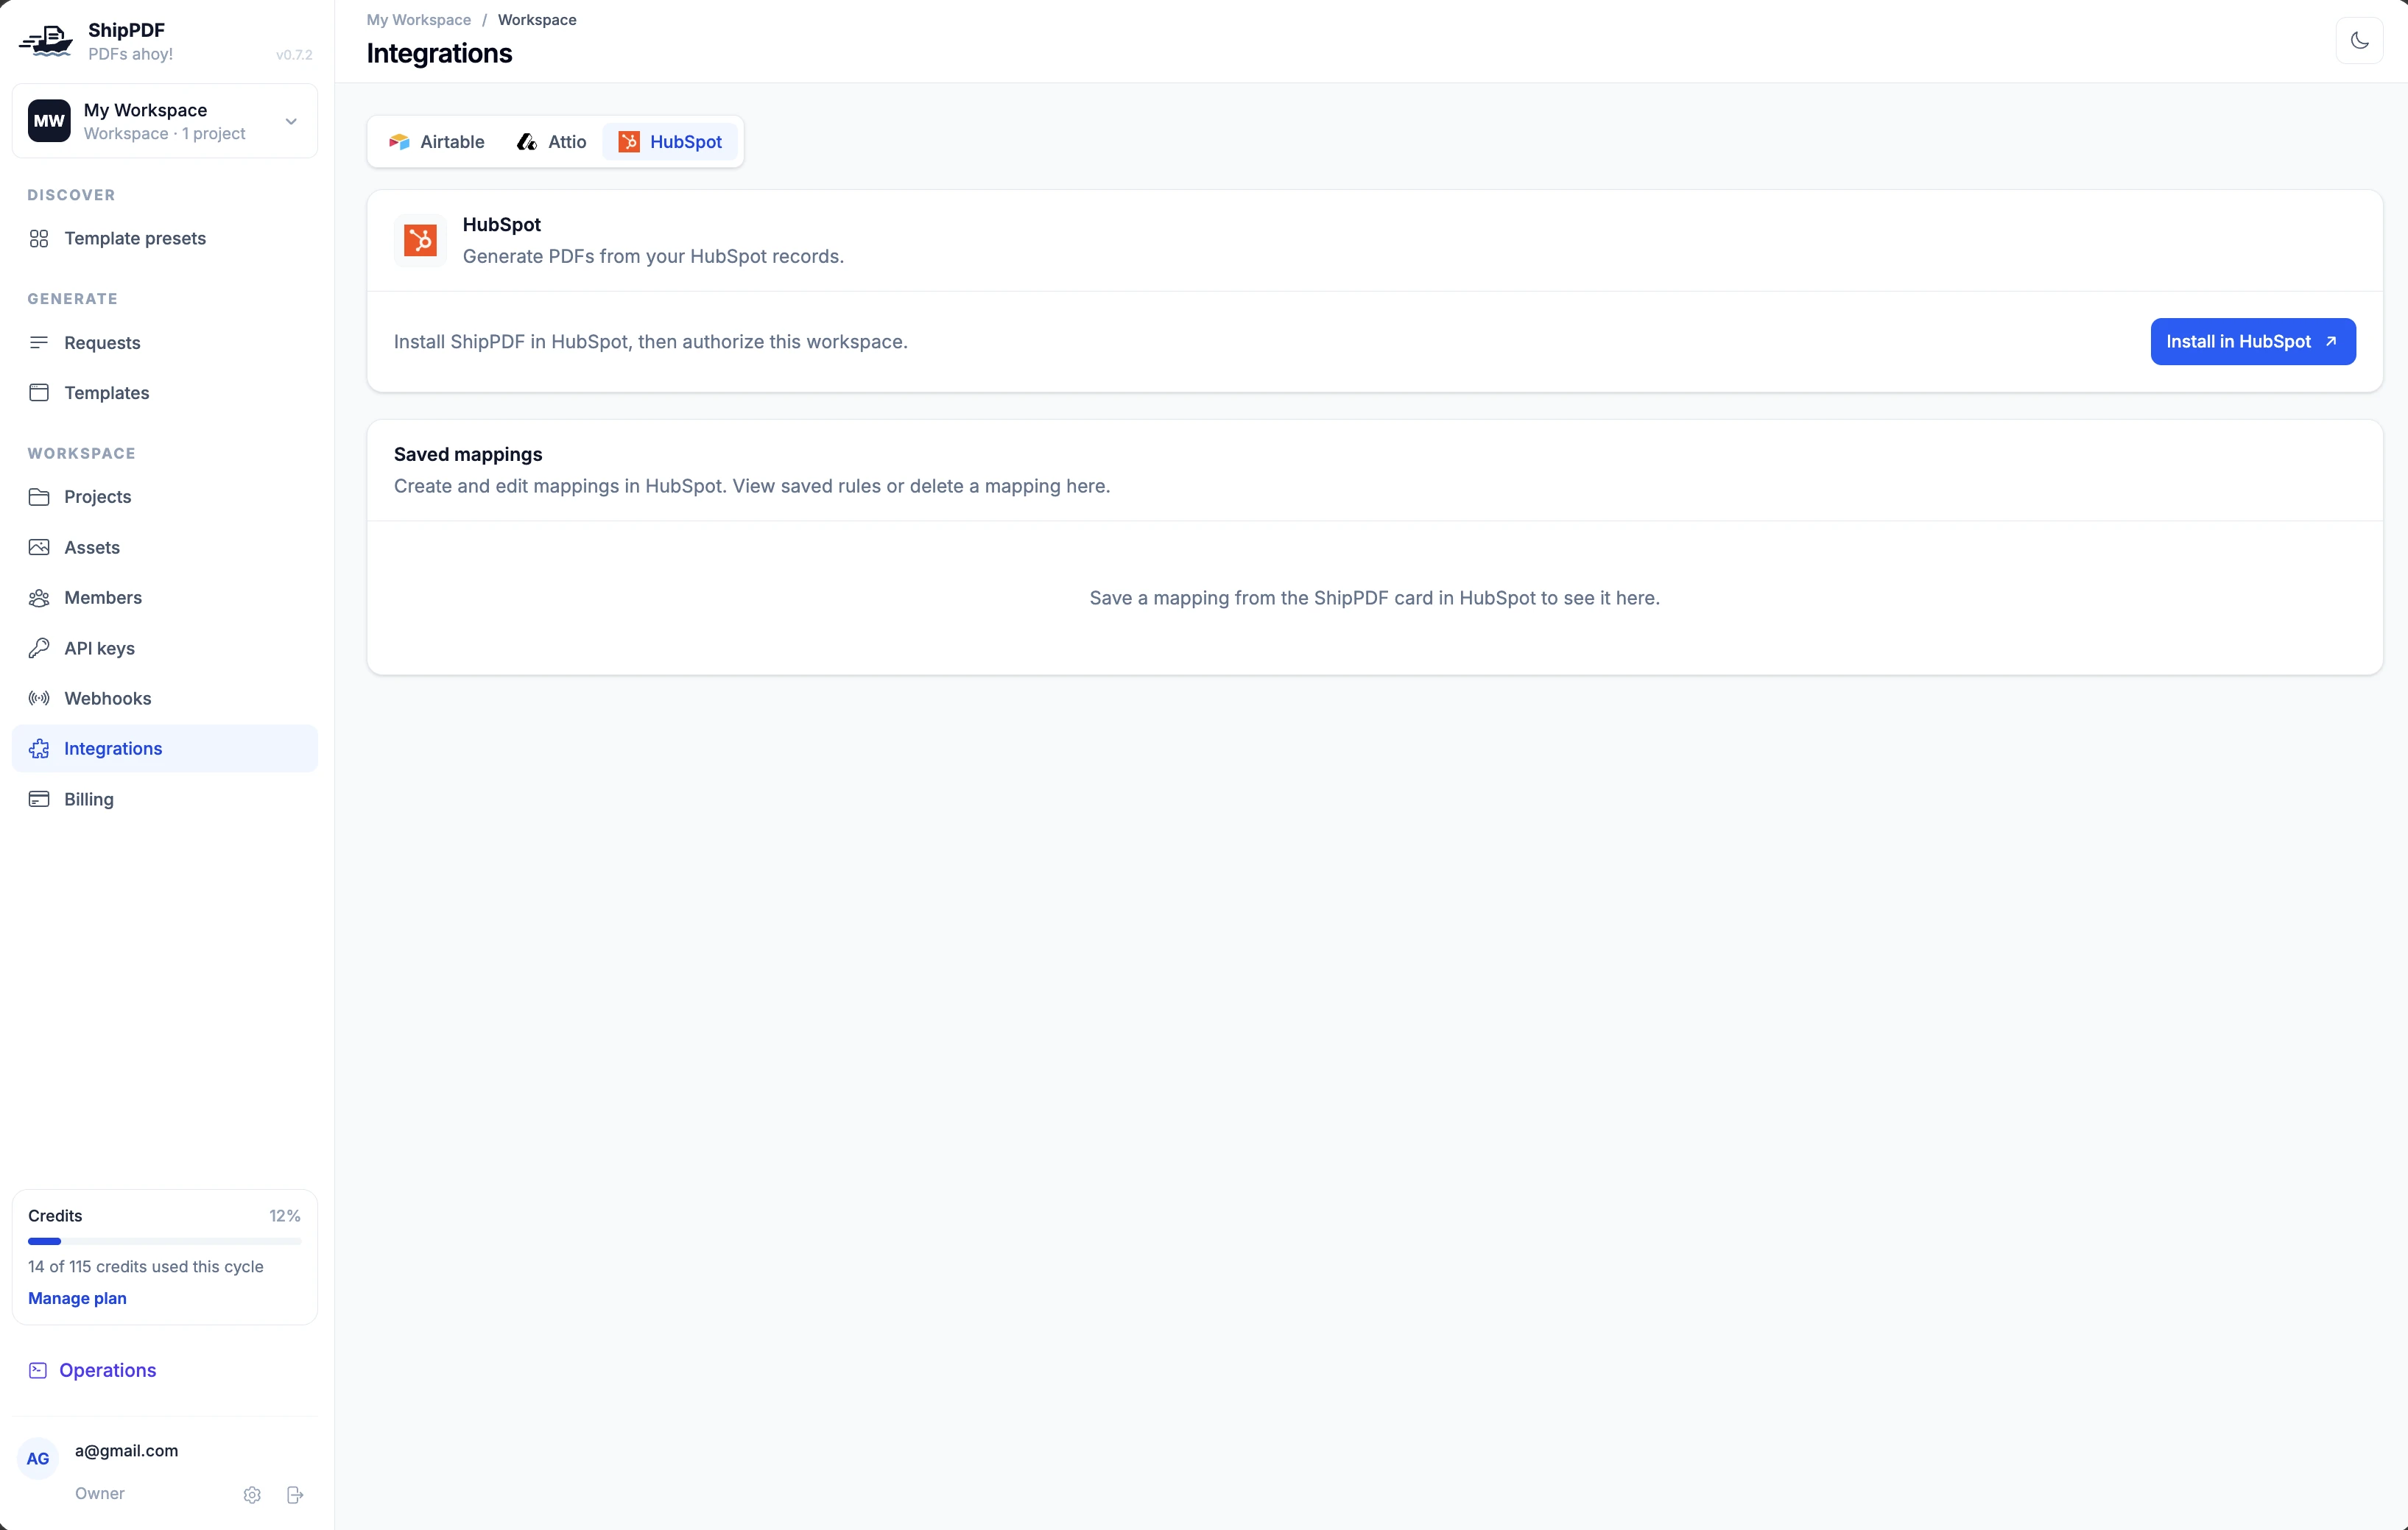
1. Start installation from ShipPDF
Open your ShipPDF workspace, select Integrations, and choose HubSpot. Click Install in HubSpot.
2. Choose the HubSpot account
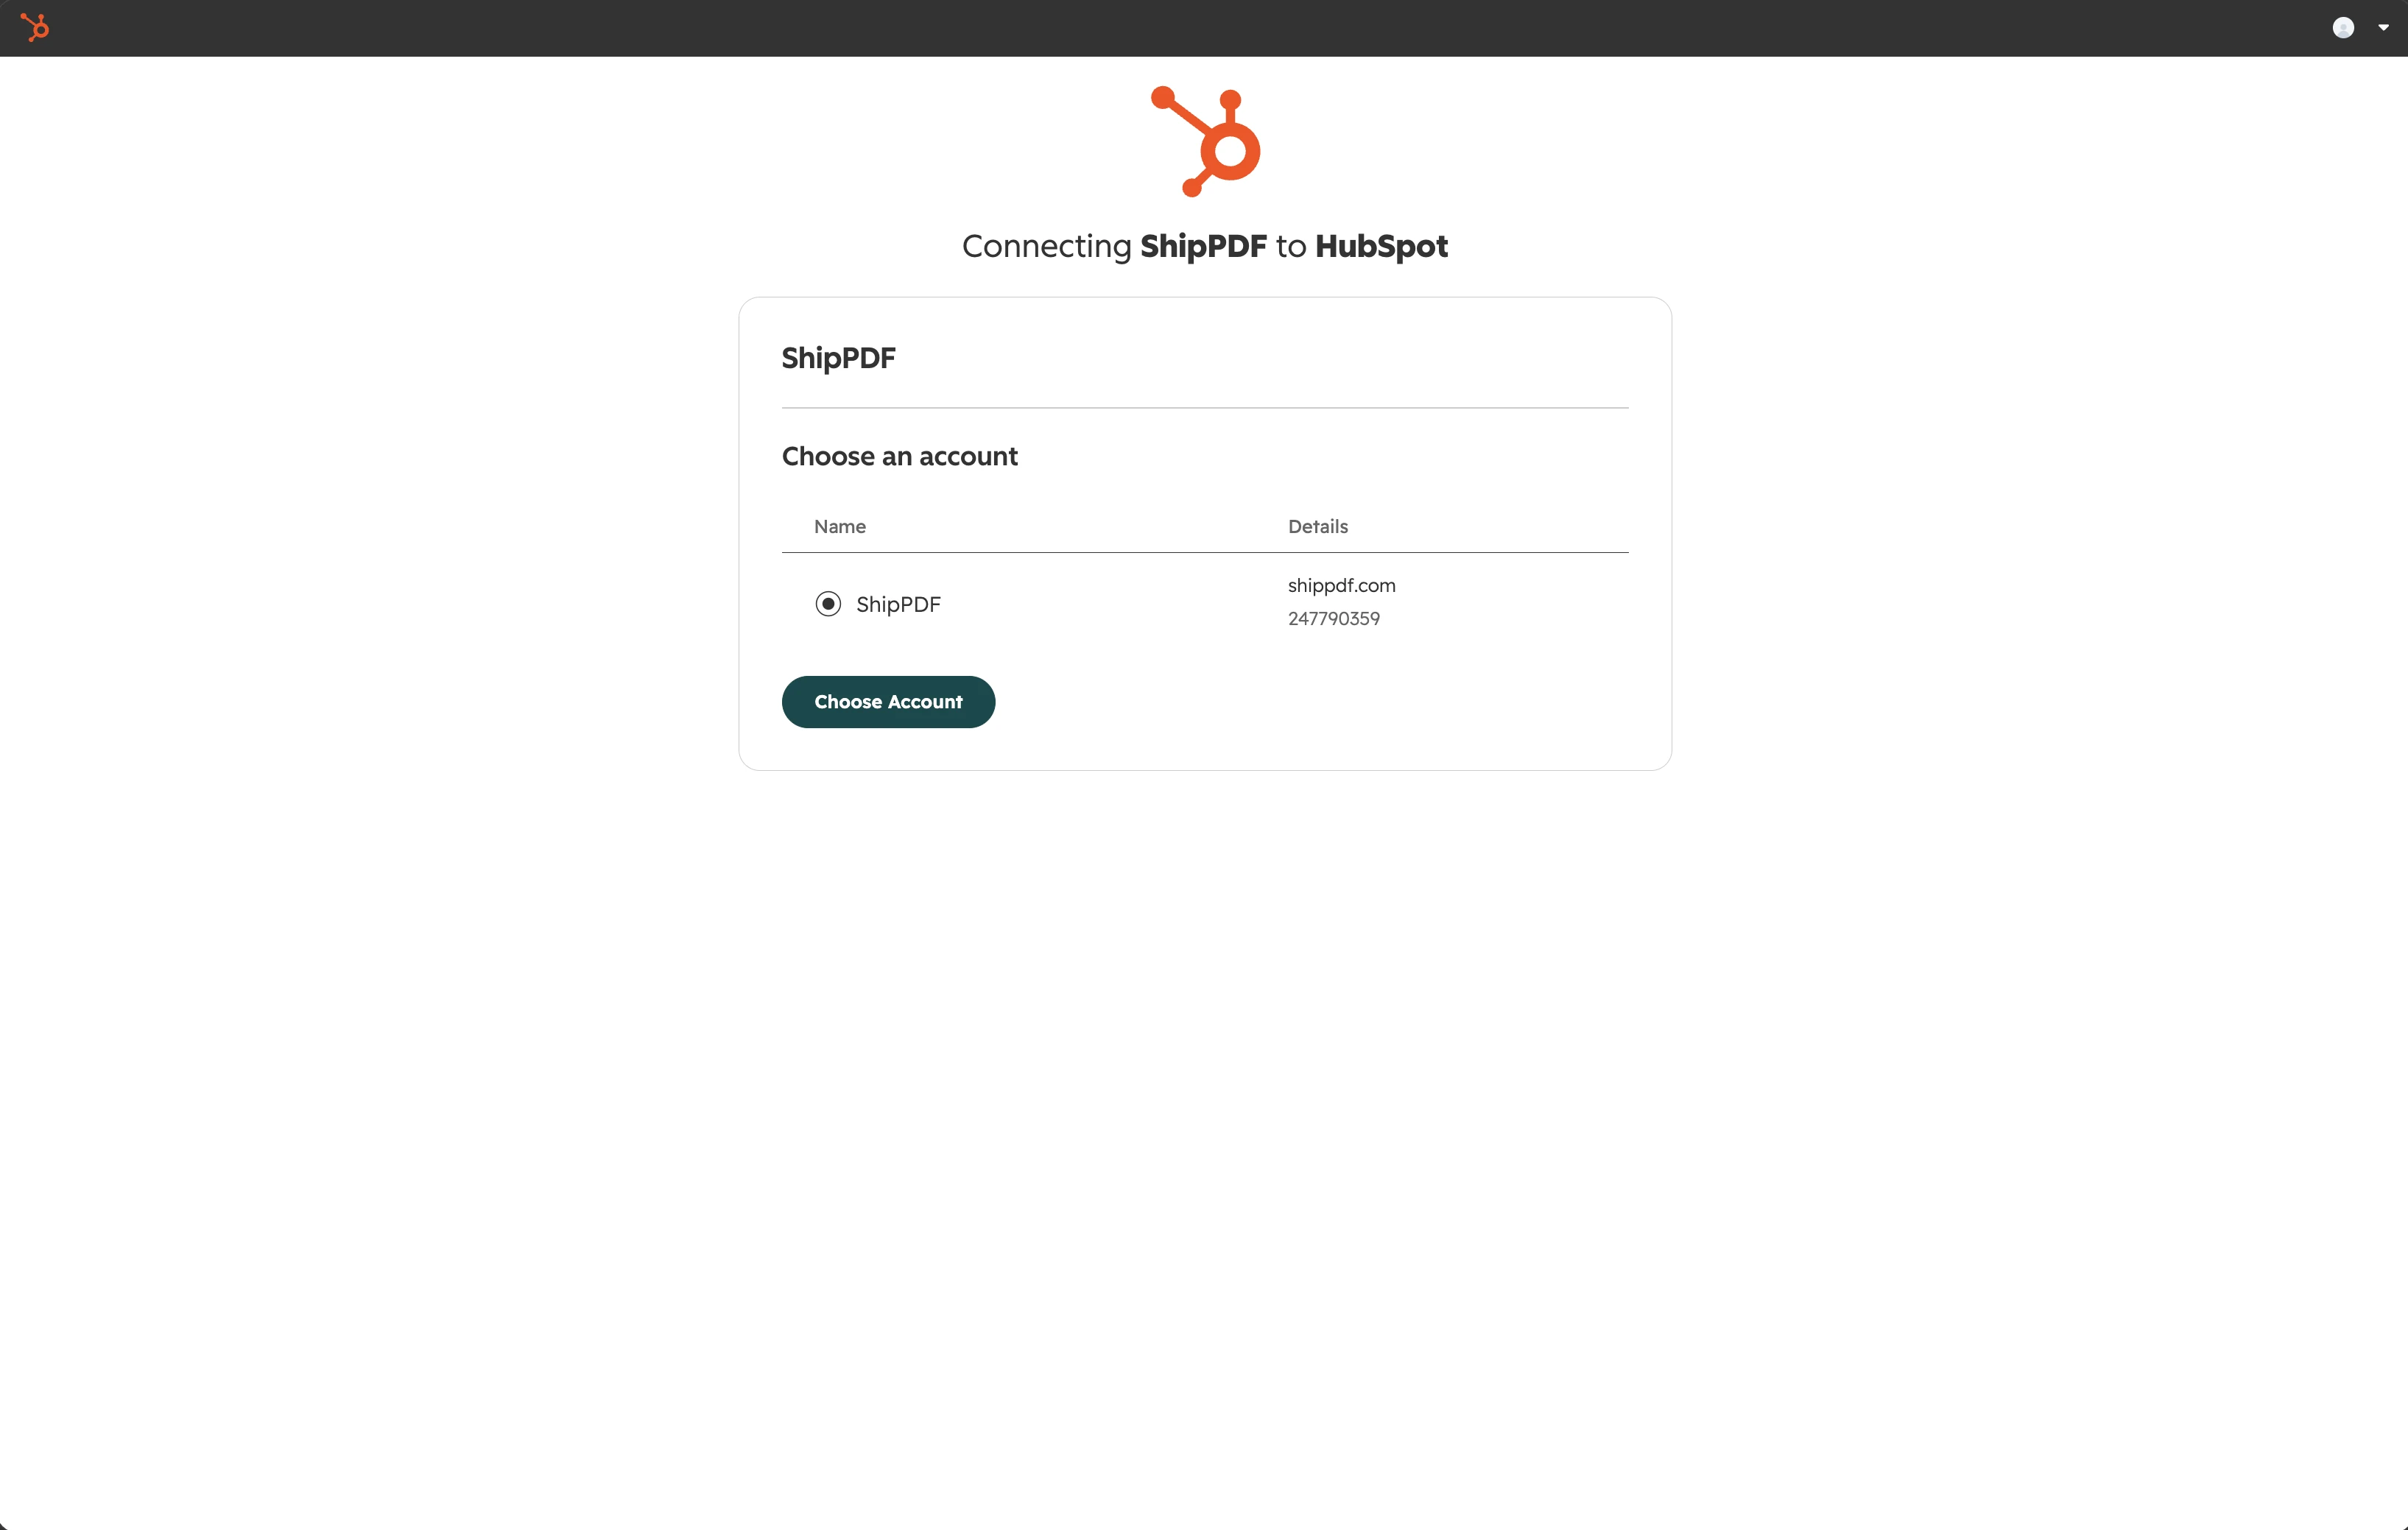
Sign in to HubSpot if prompted. Select the account you want to connect and click Choose Account.
3. Review HubSpot permissions
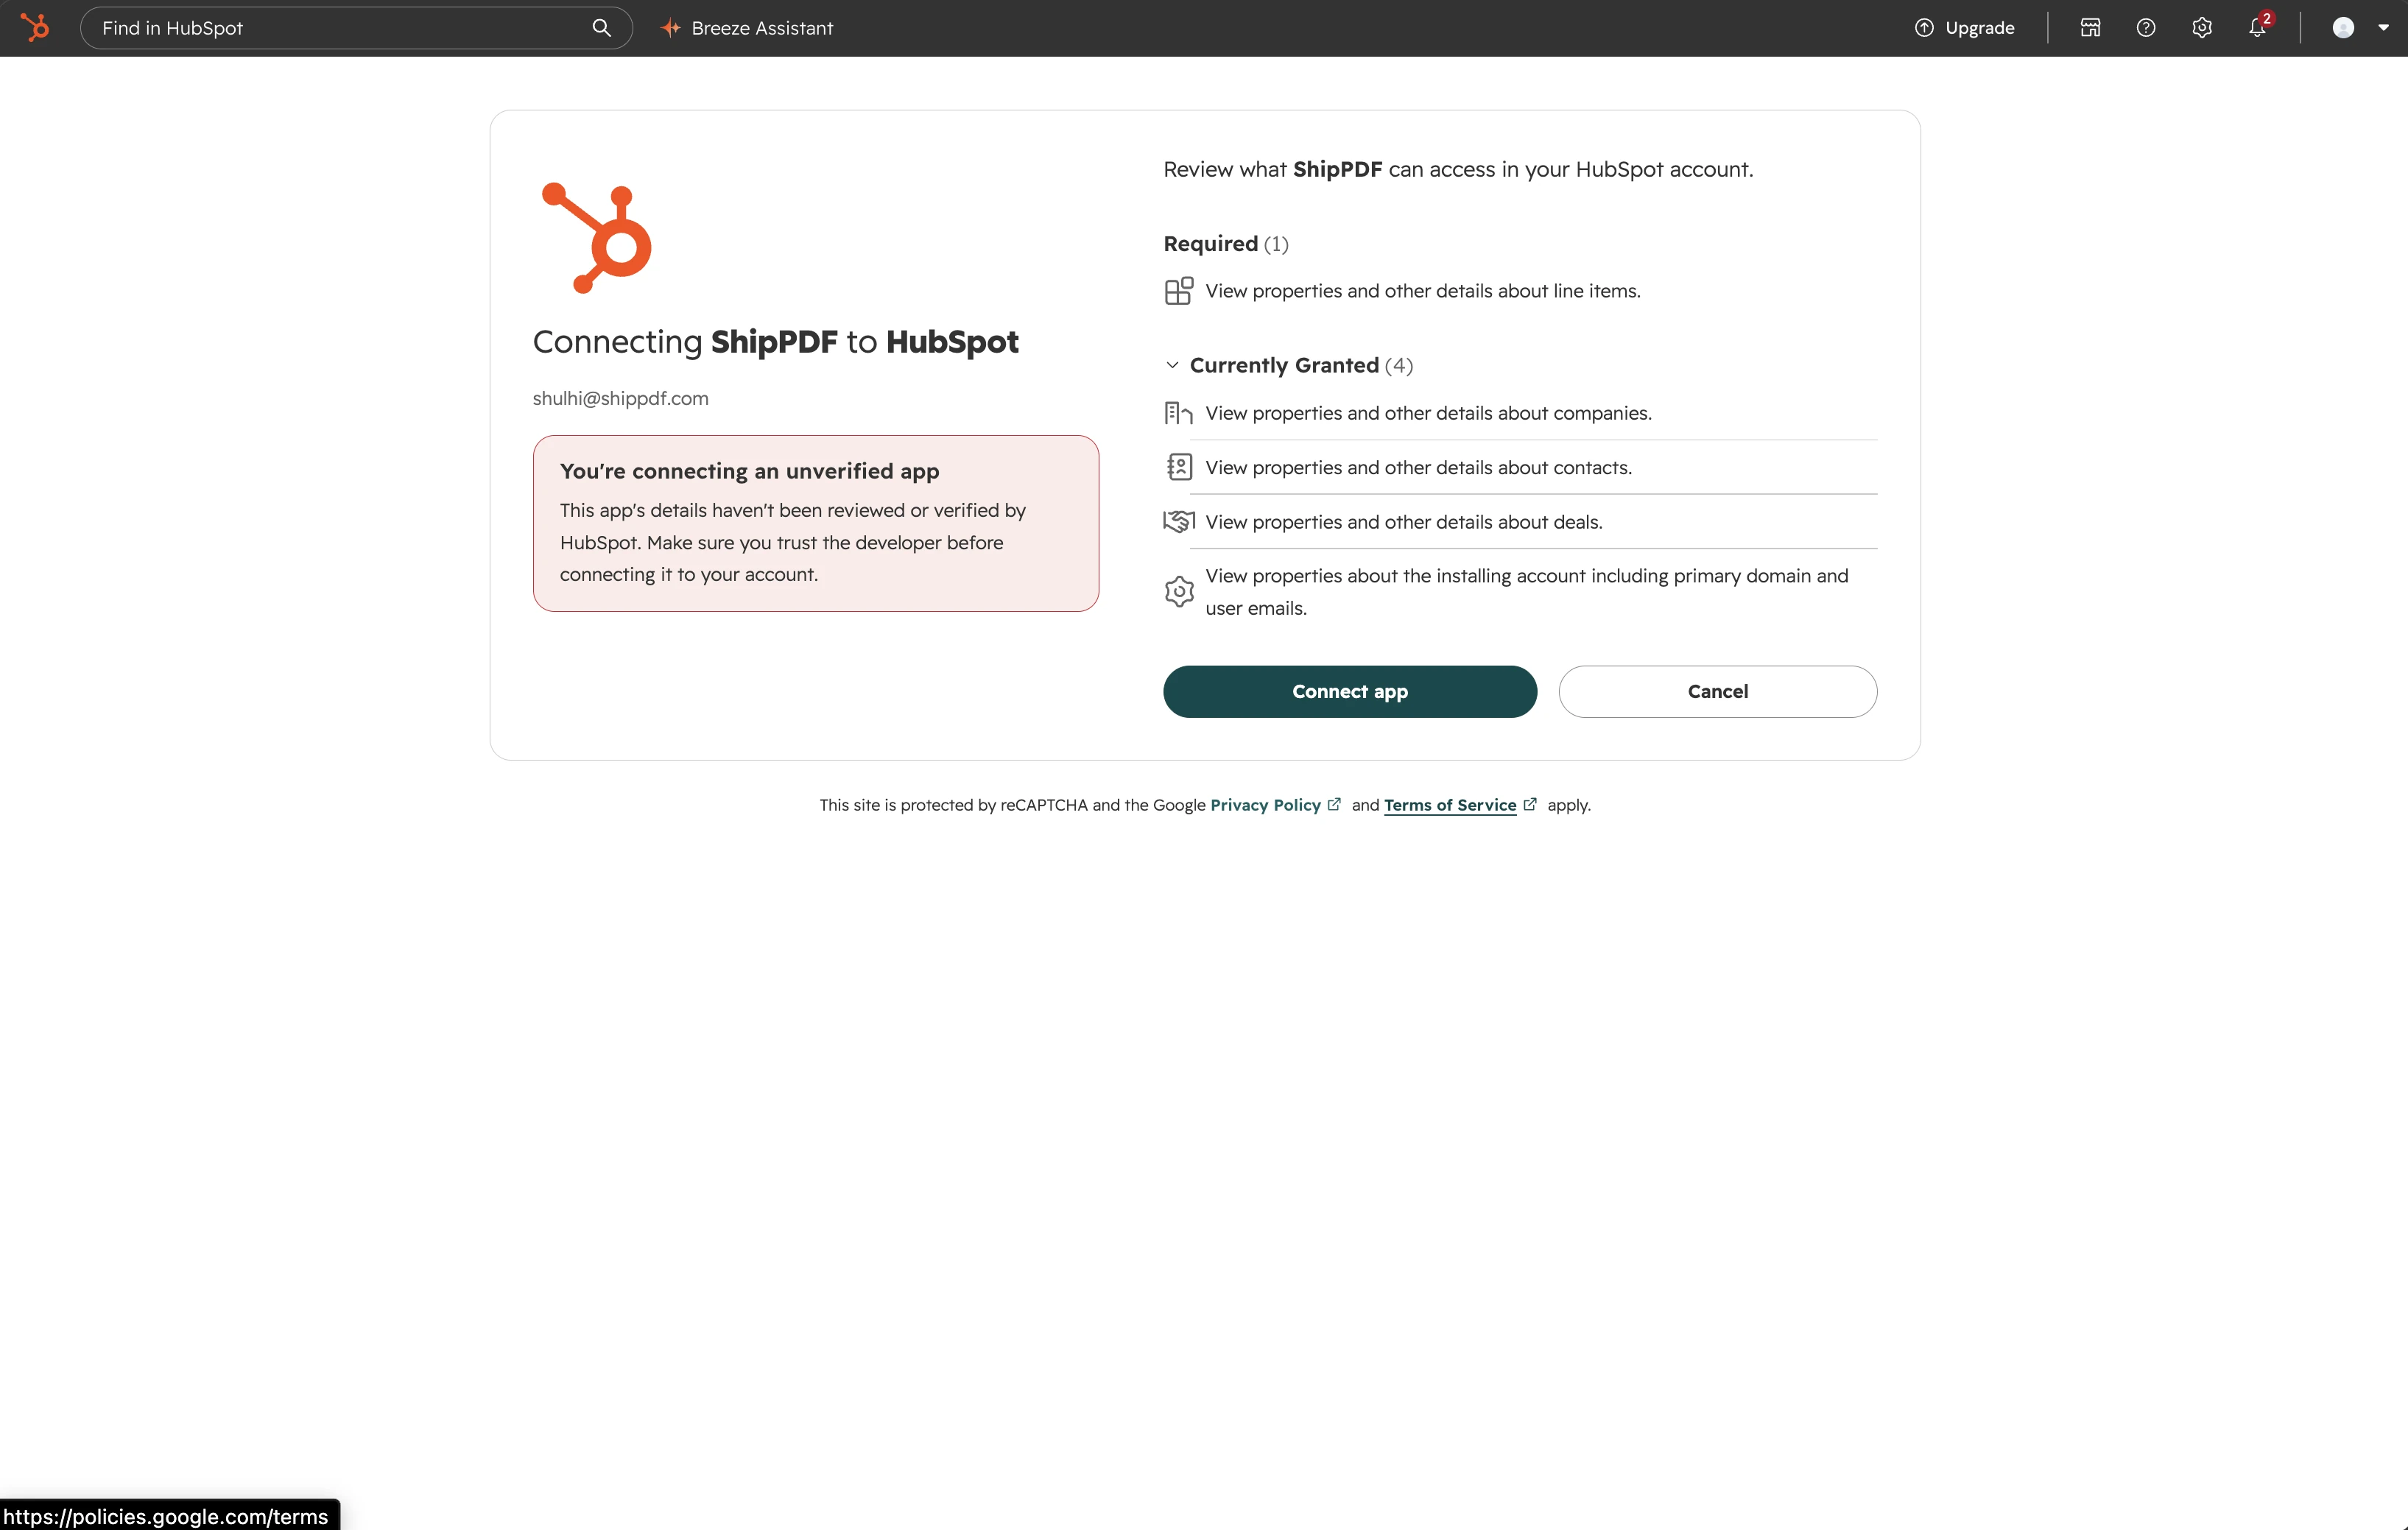
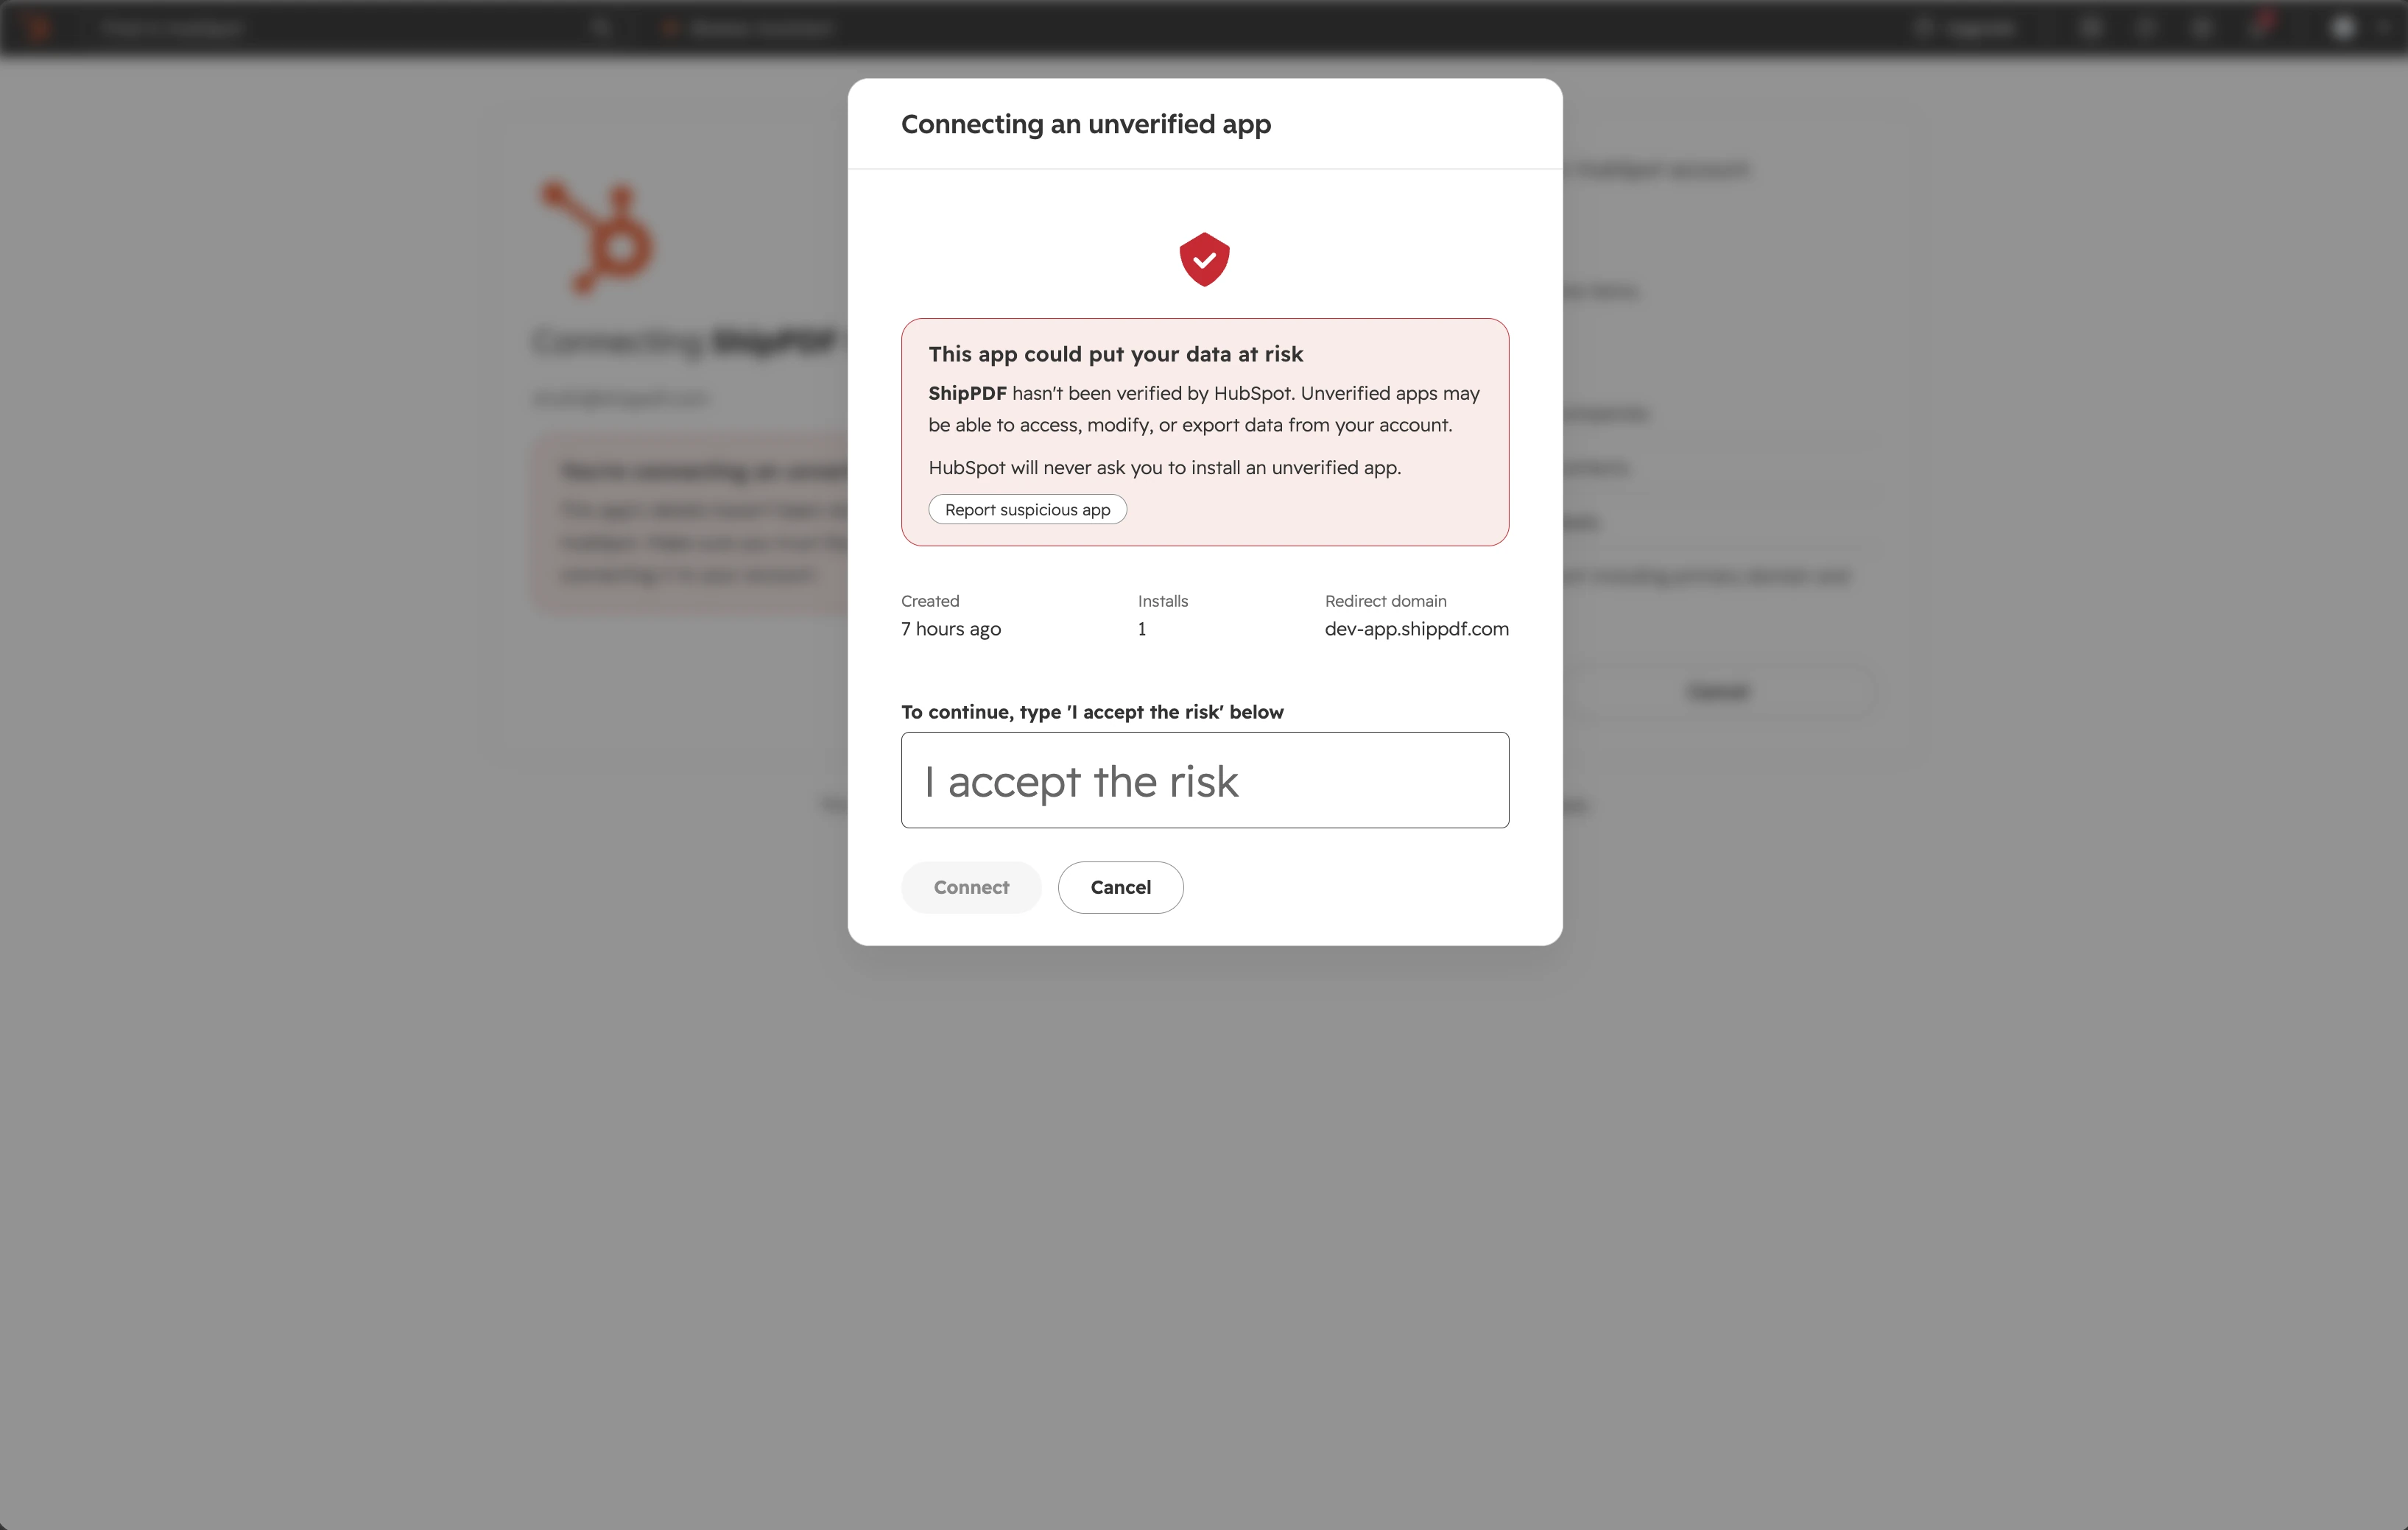
Review the app’s requested access, then choose Connect app when you are ready. The example requests access to contacts, companies, deals, line items, and account identity information.
4. Authorize a ShipPDF workspace
After the HubSpot step, sign in to ShipPDF if needed. On Connect HubSpot to ShipPDF, check the HubSpot account details and choose the ShipPDF workspace containing your templates. Click Authorize ShipPDF workspace.
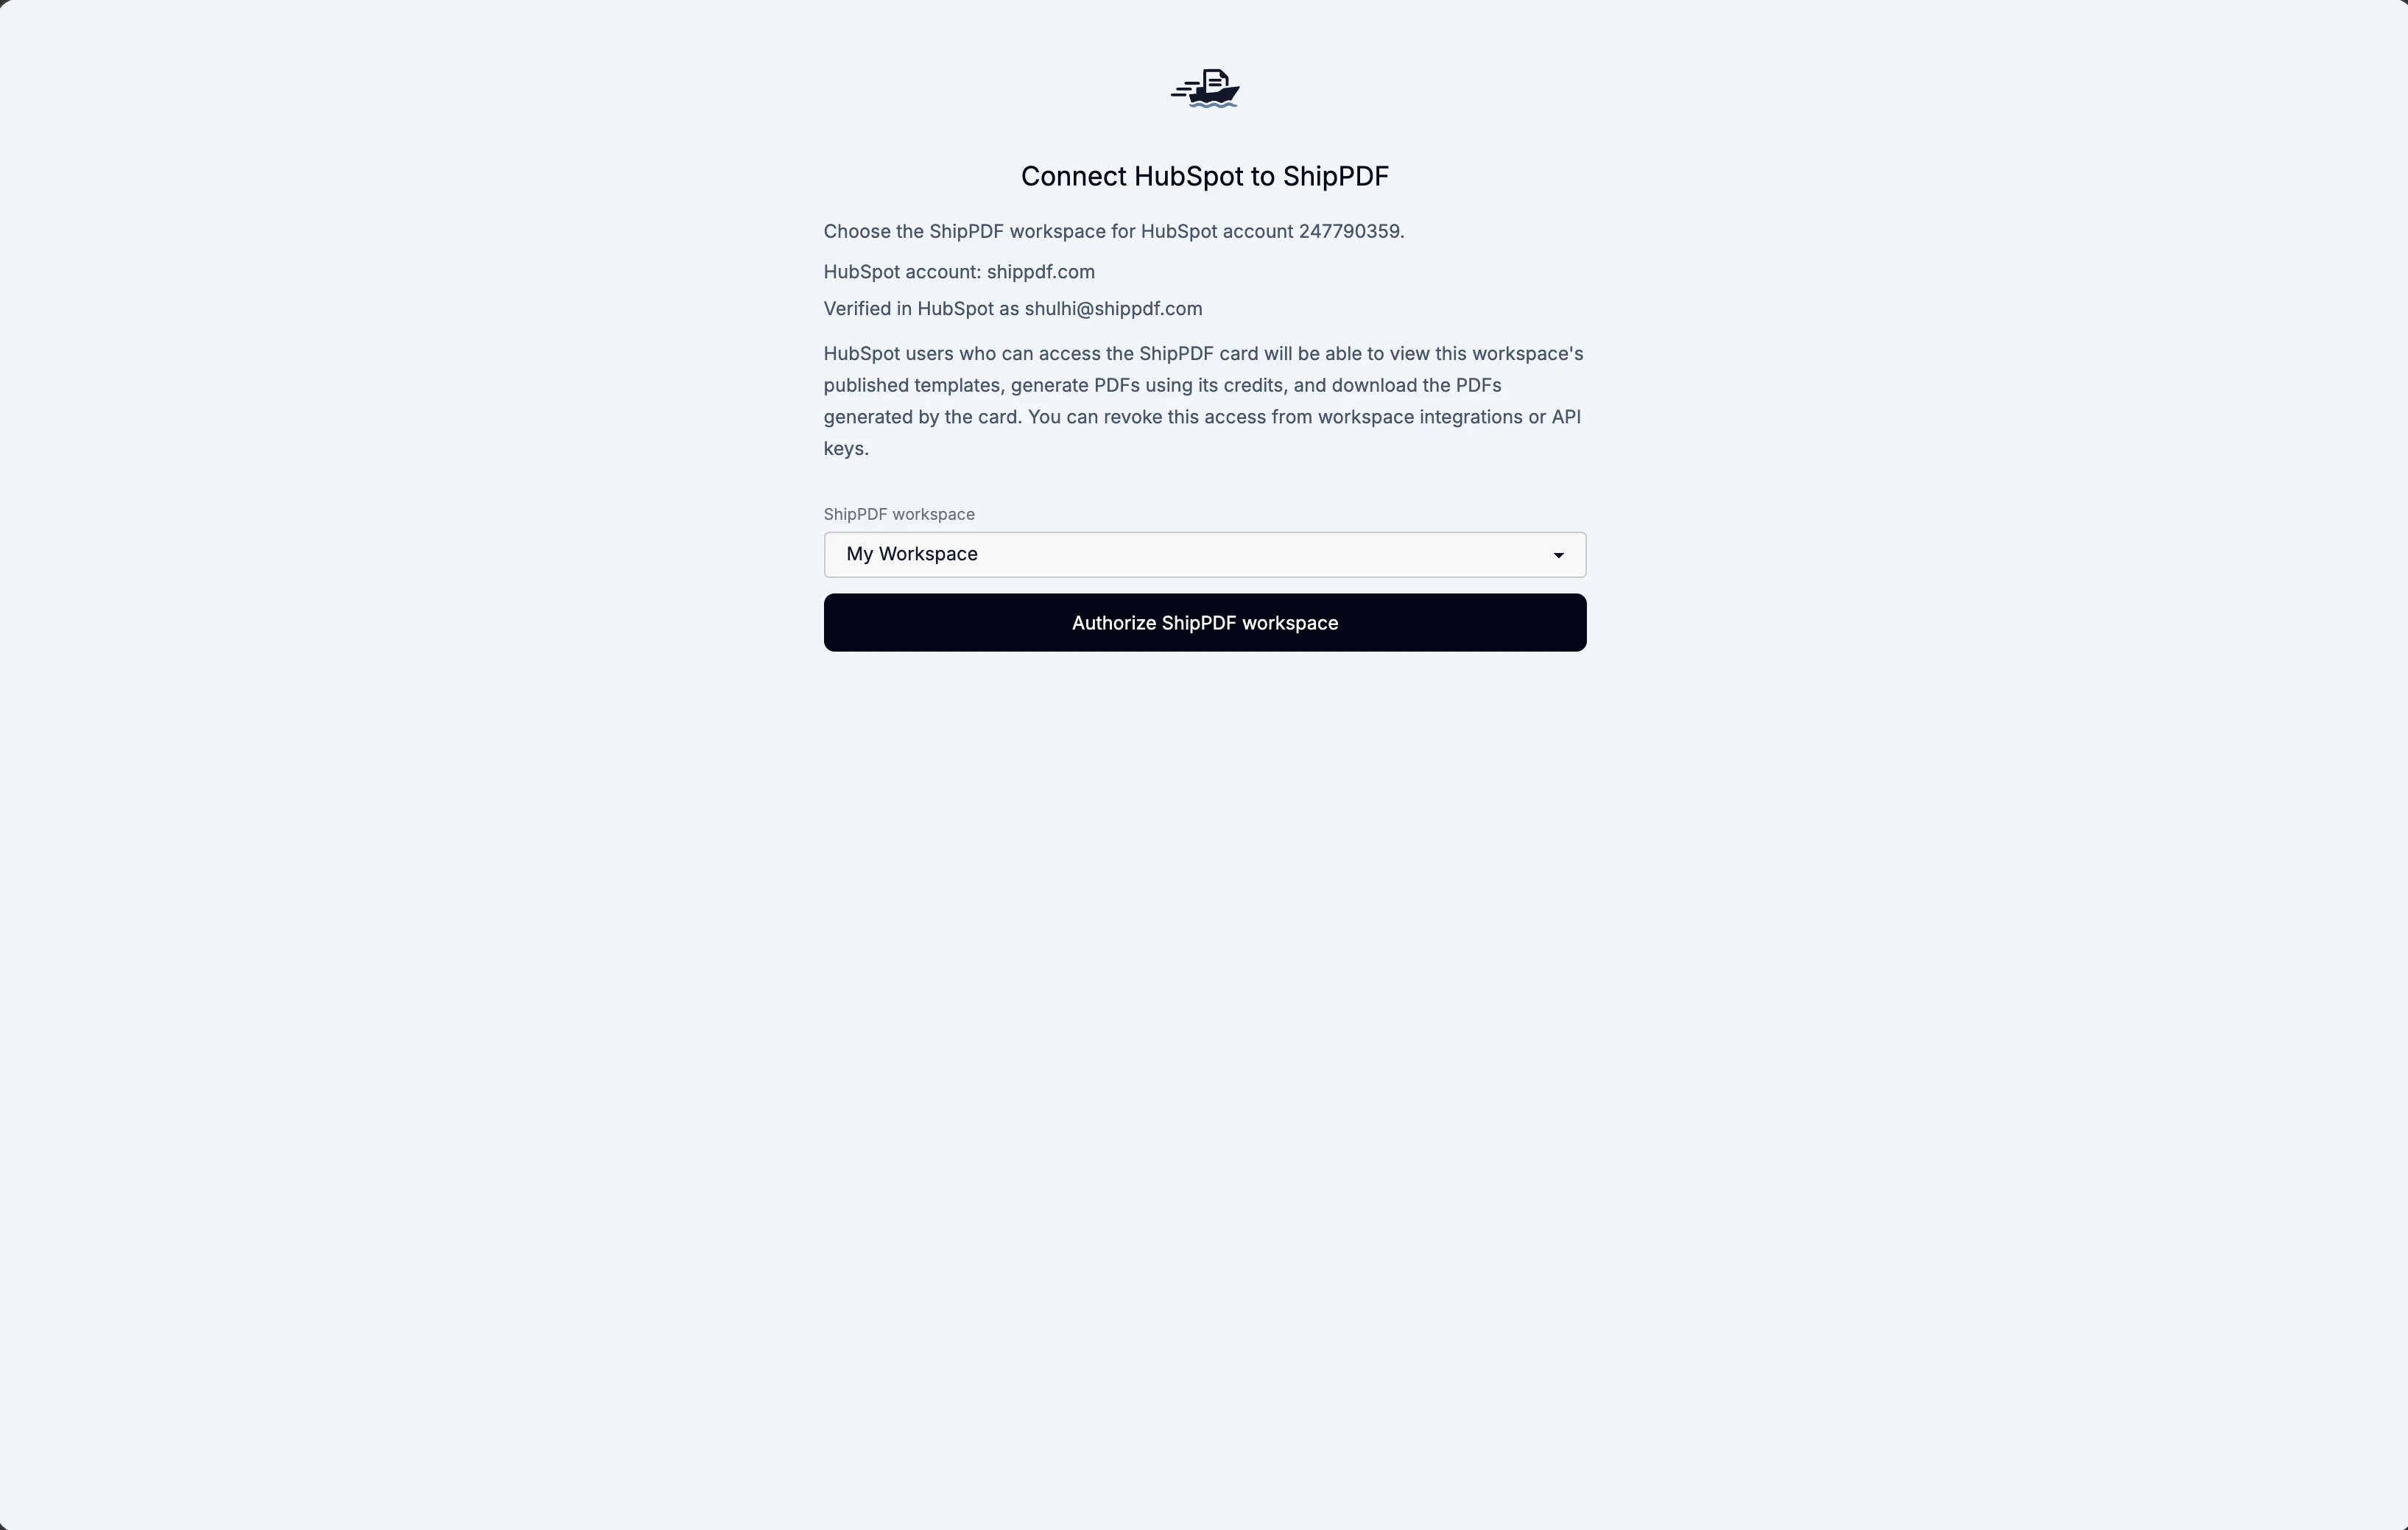
This is a shared account connection. HubSpot users who can access the ShipPDF card can view the connected workspace’s published templates, generate PDFs using its credits, and download PDFs generated by the card. They do not each need a separate ShipPDF login. You do not need to create or paste an API key during setup.
A HubSpot account can have one active ShipPDF workspace connection. To move it to another workspace, disconnect it from the current workspace first.
5. Return to HubSpot
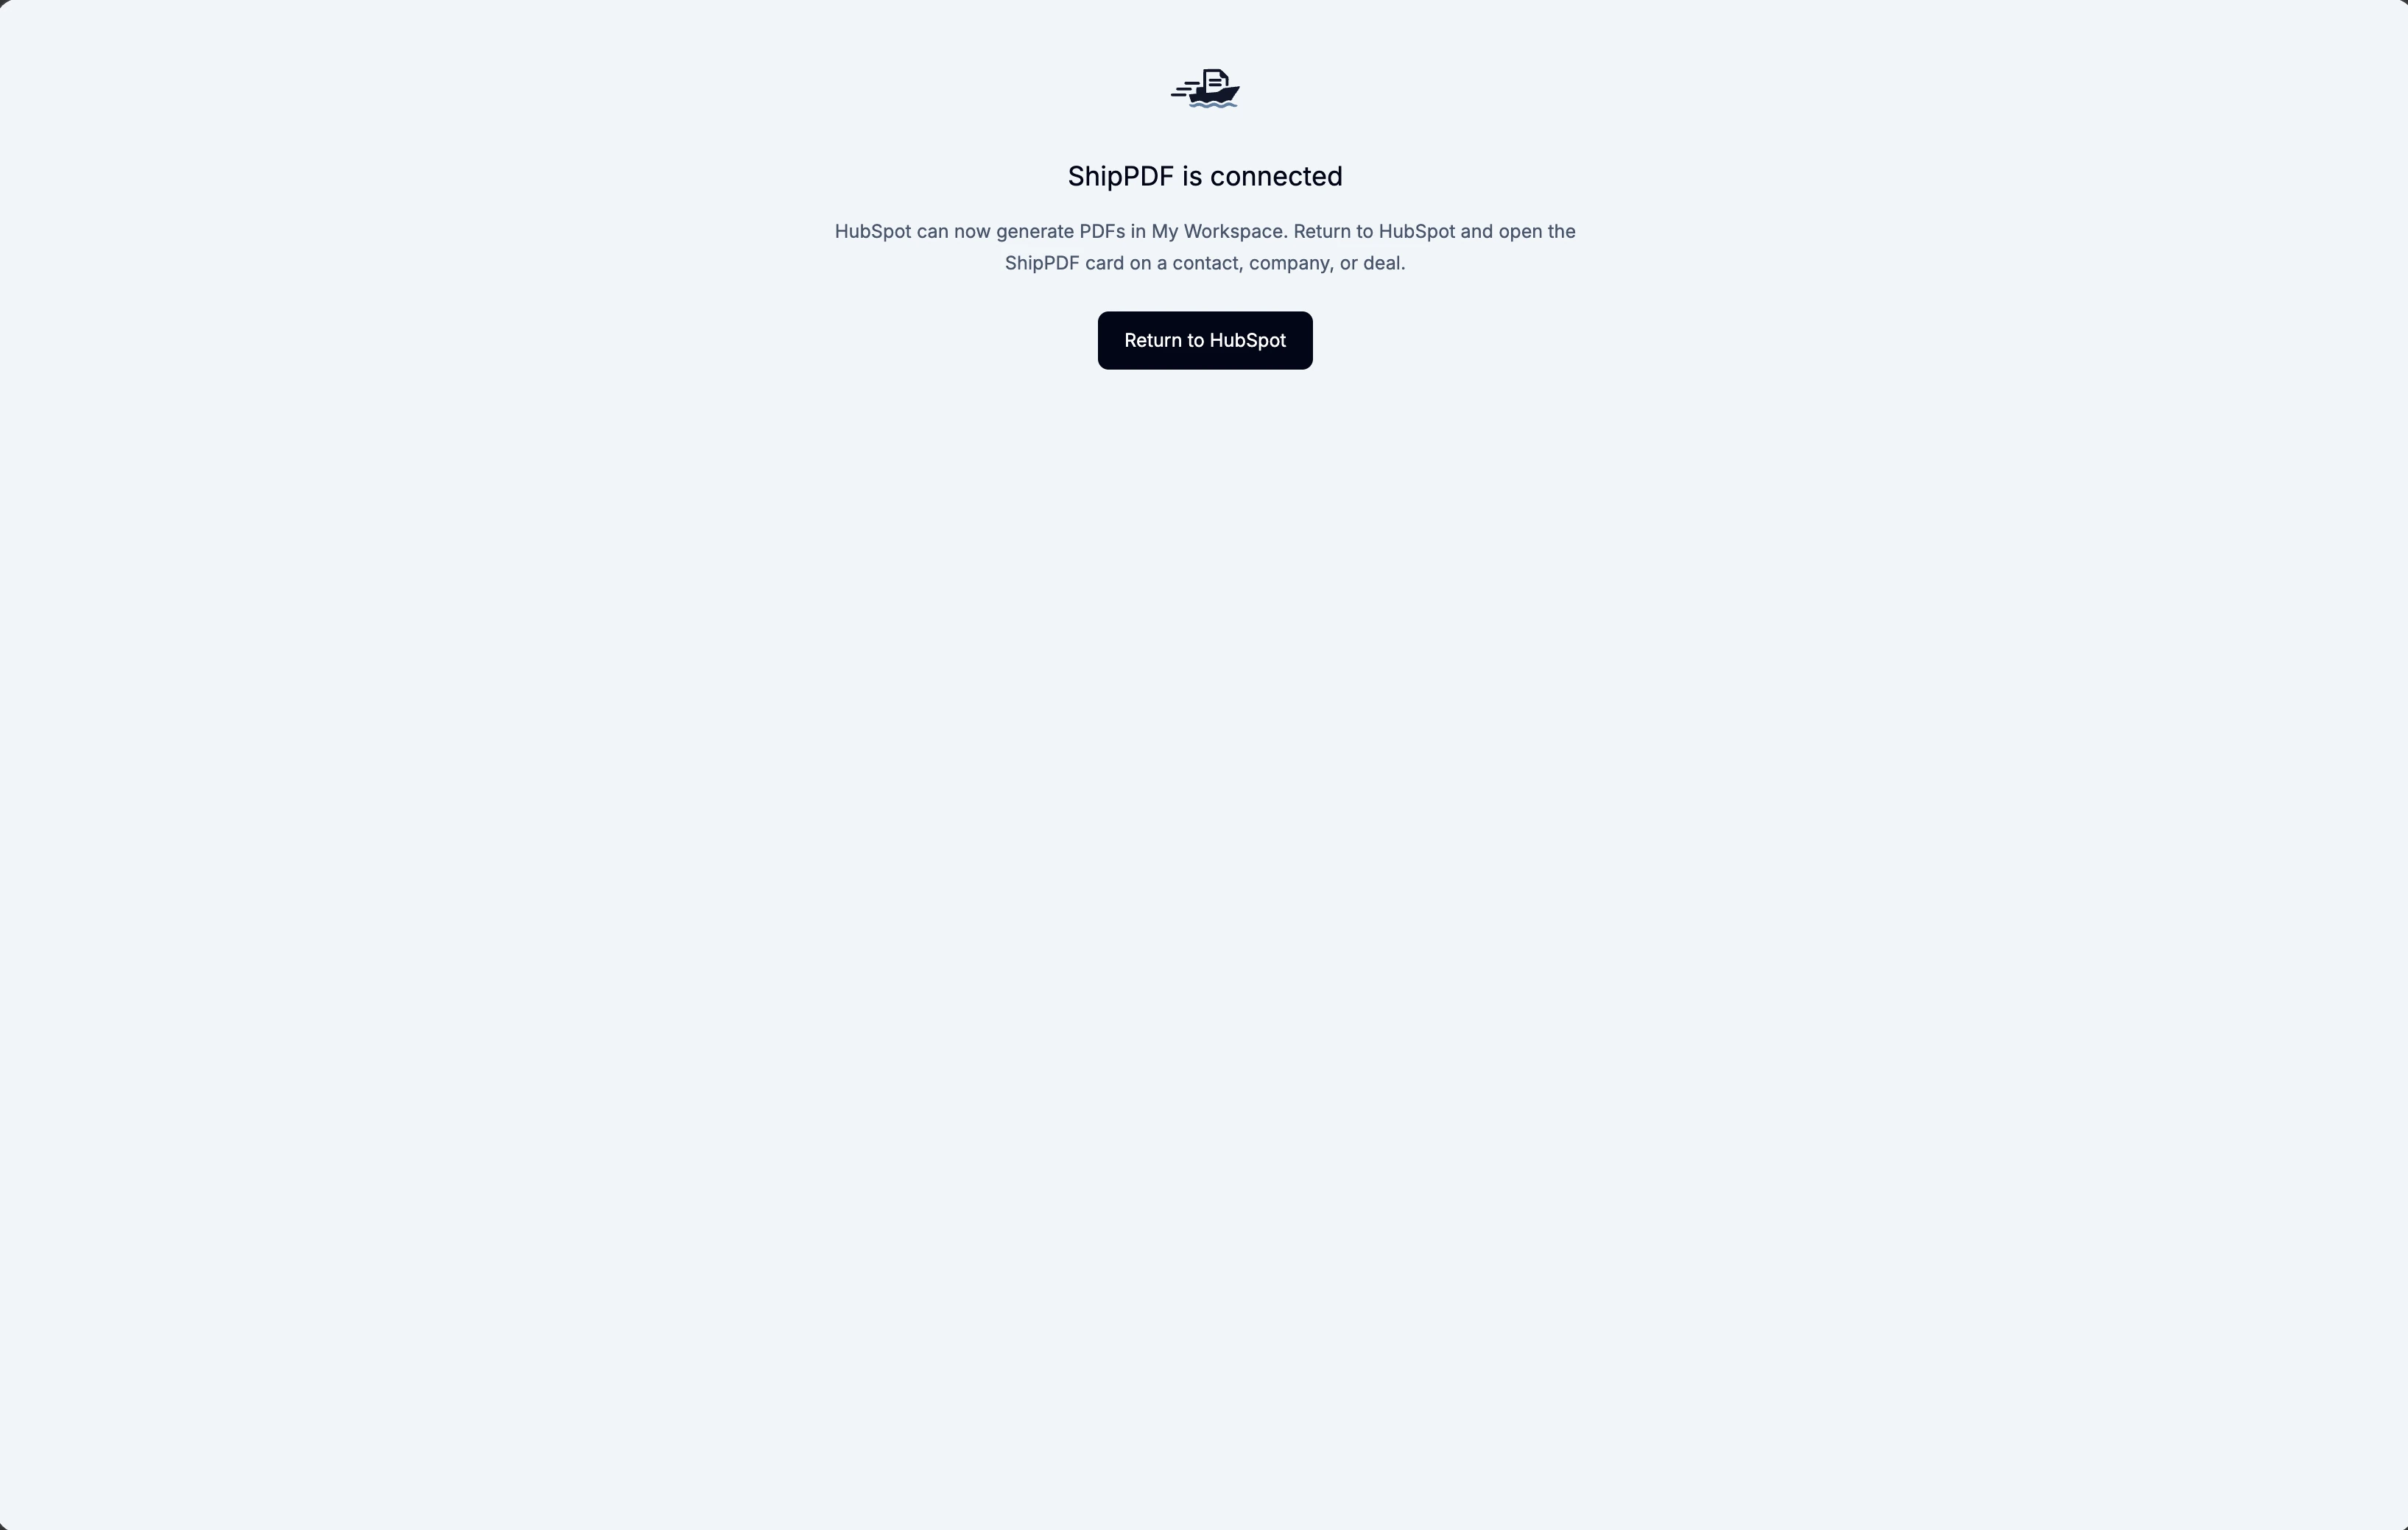
When ShipPDF is connected appears, choose Return to HubSpot. Next, add the card to the record views where your team will use it.
Add the ShipPDF card to a record view
Installing the app and adding its card to a record view are separate steps. Configure each object type your team needs, such as Contacts and Deals.
1. Open record customization
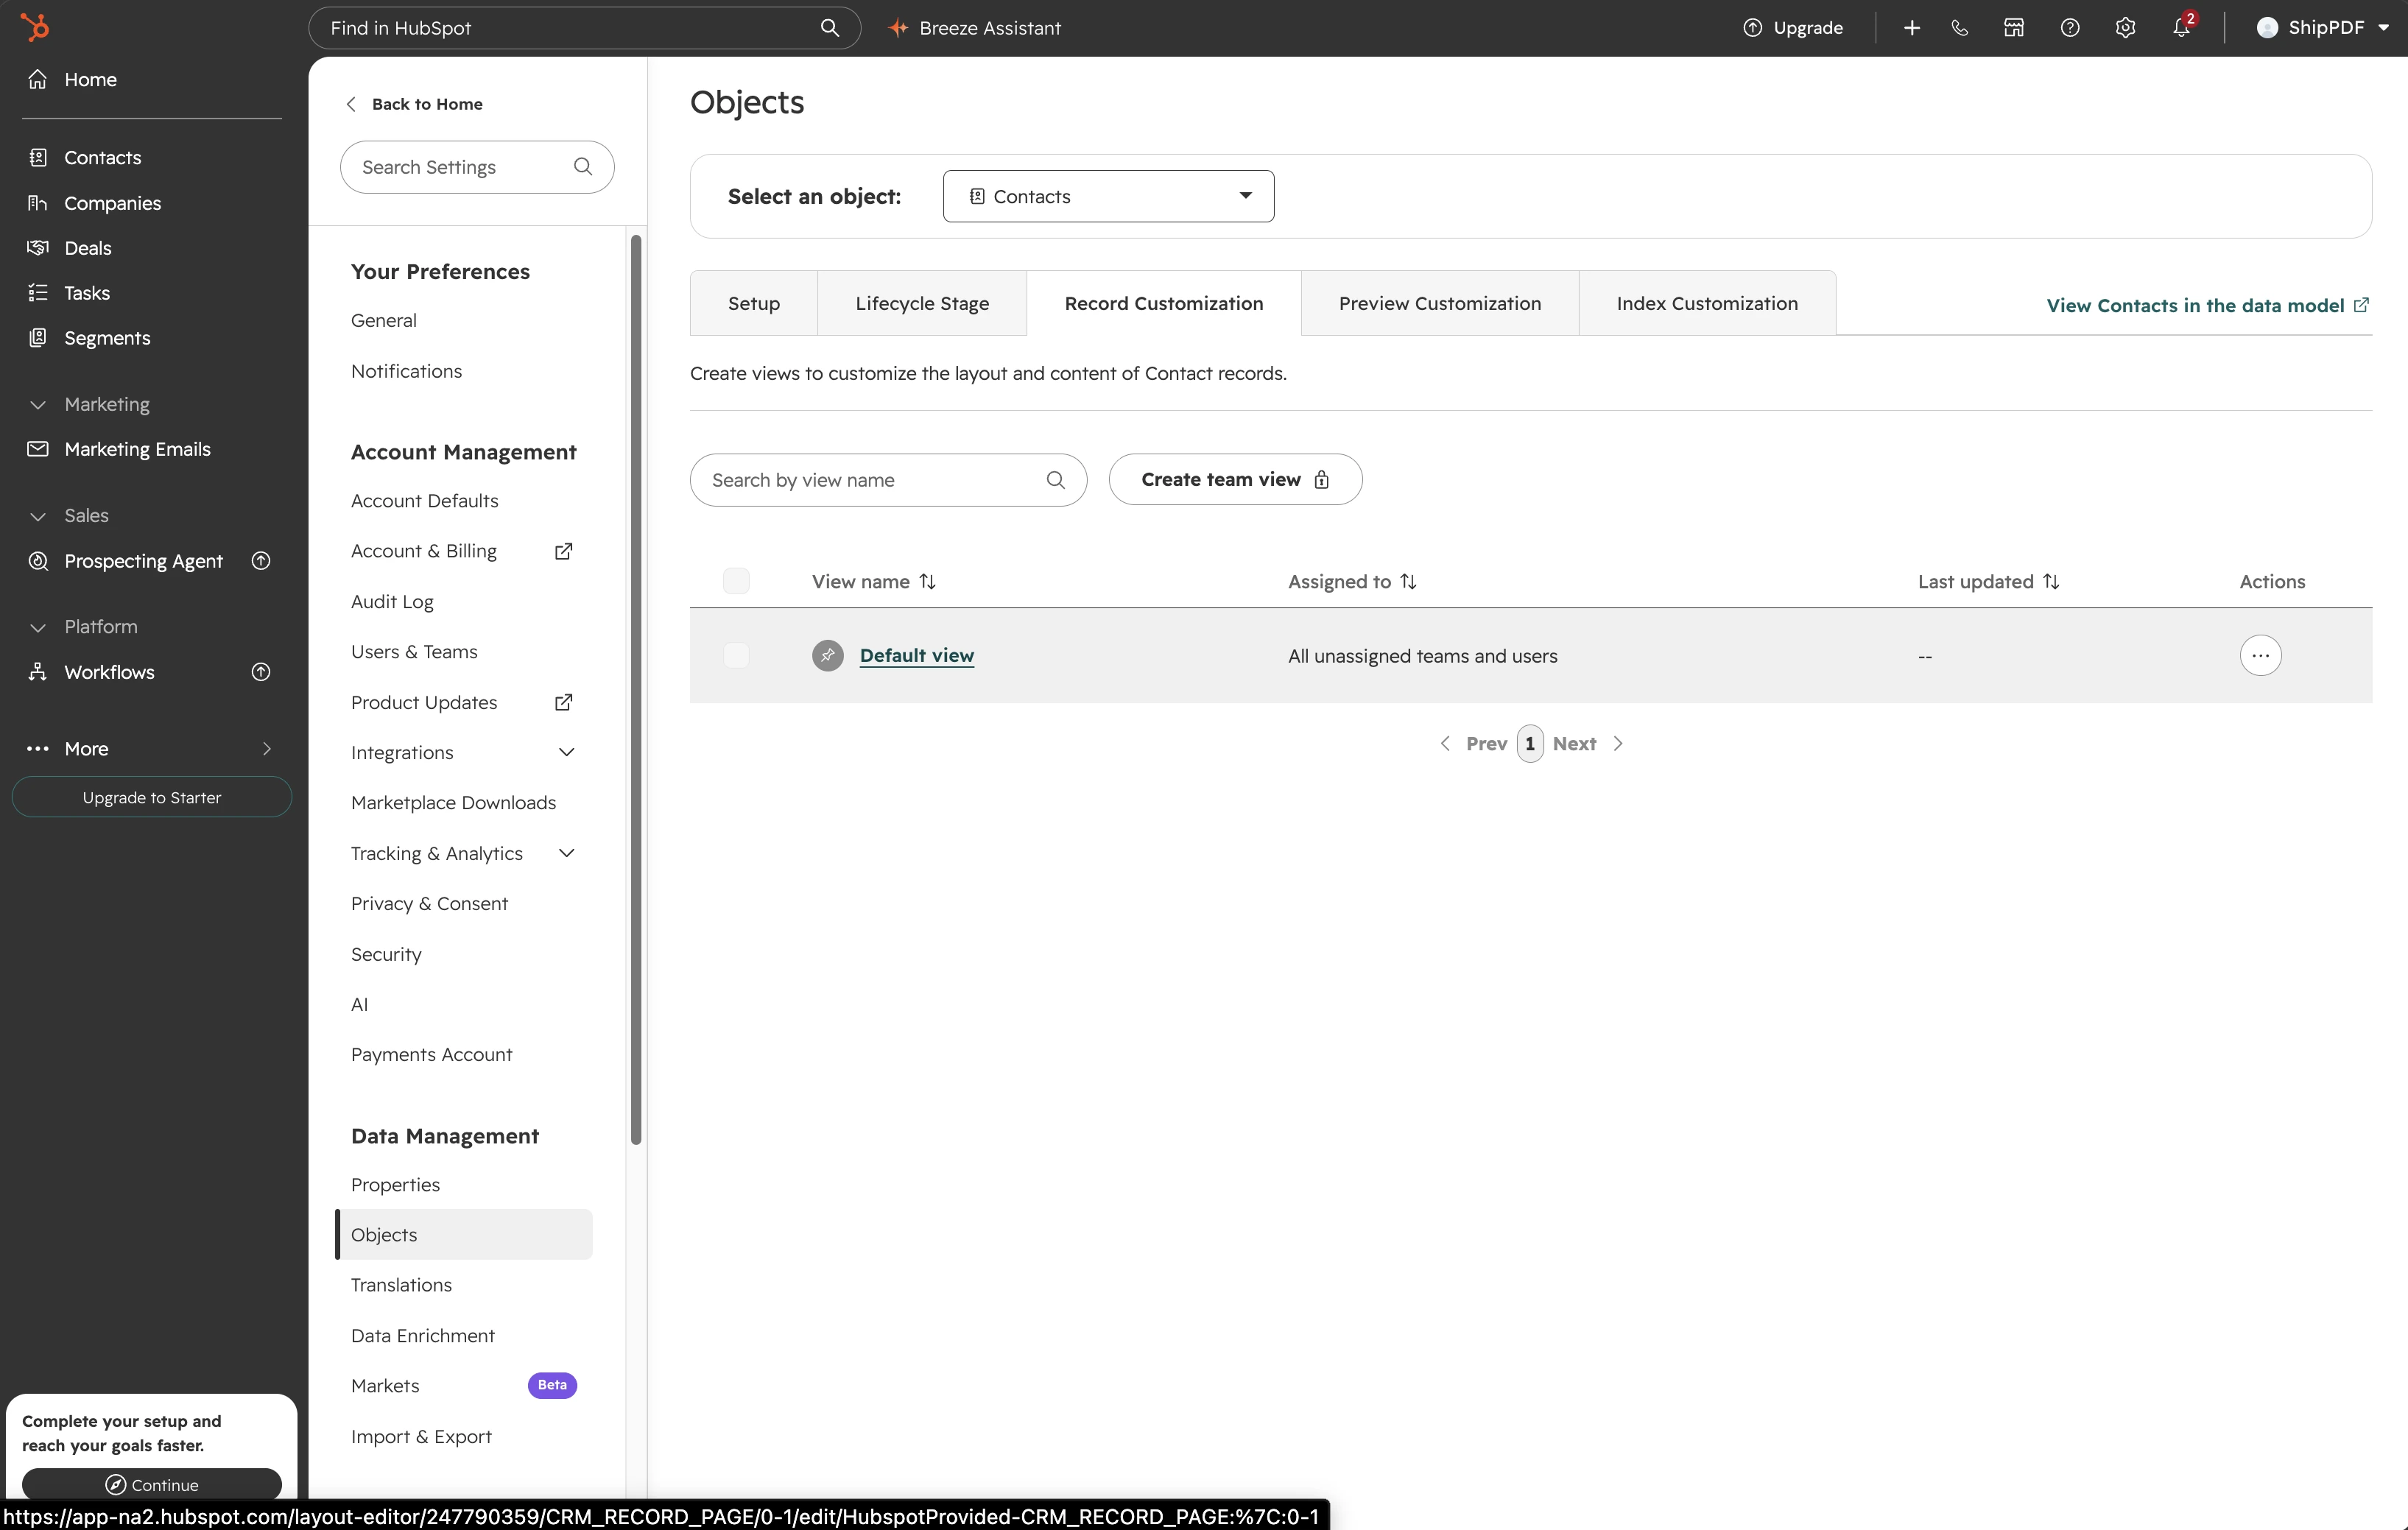
In HubSpot settings, open Data Management → Objects. Select the object type and open Record Customization. Open the Default view, or the appropriate team view.
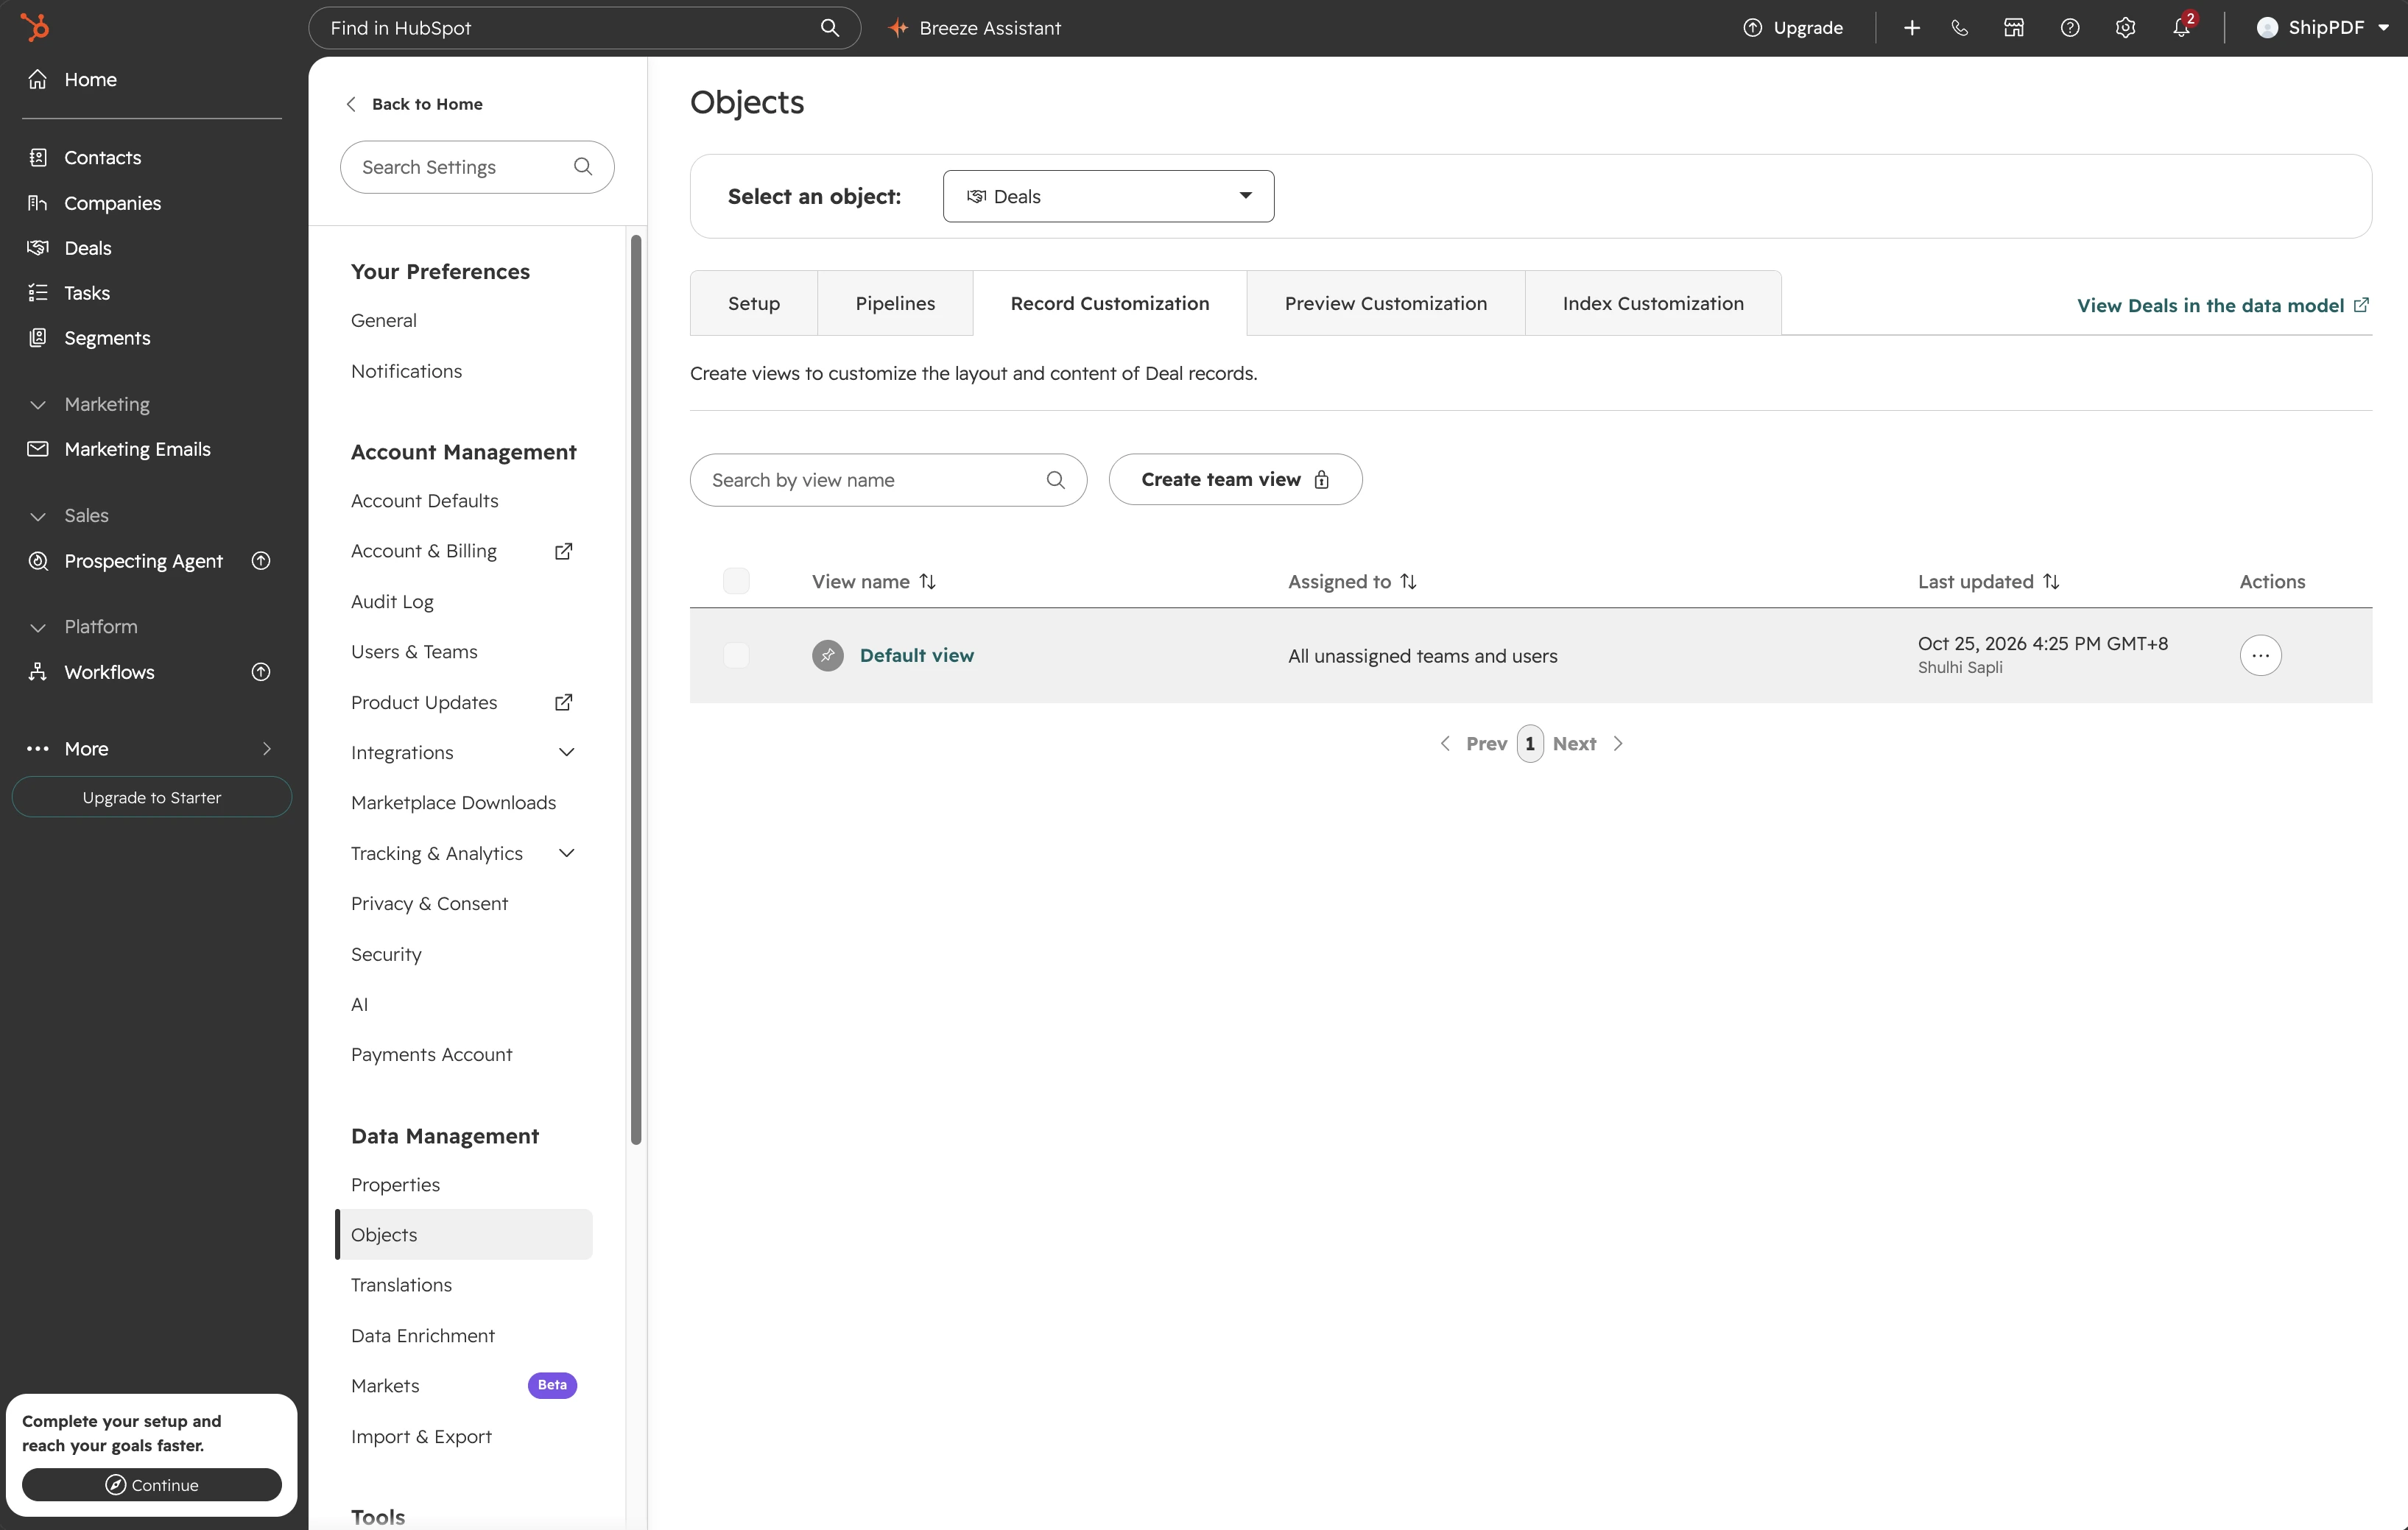
For the deal example, select Deals and open its Default view.
2. Find ShipPDF in the card library
In the record layout editor, use the middle column’s + control to add a card. Open Card library, search for ShipPDF, and click Add card on Generate PDF document with ShipPDF.
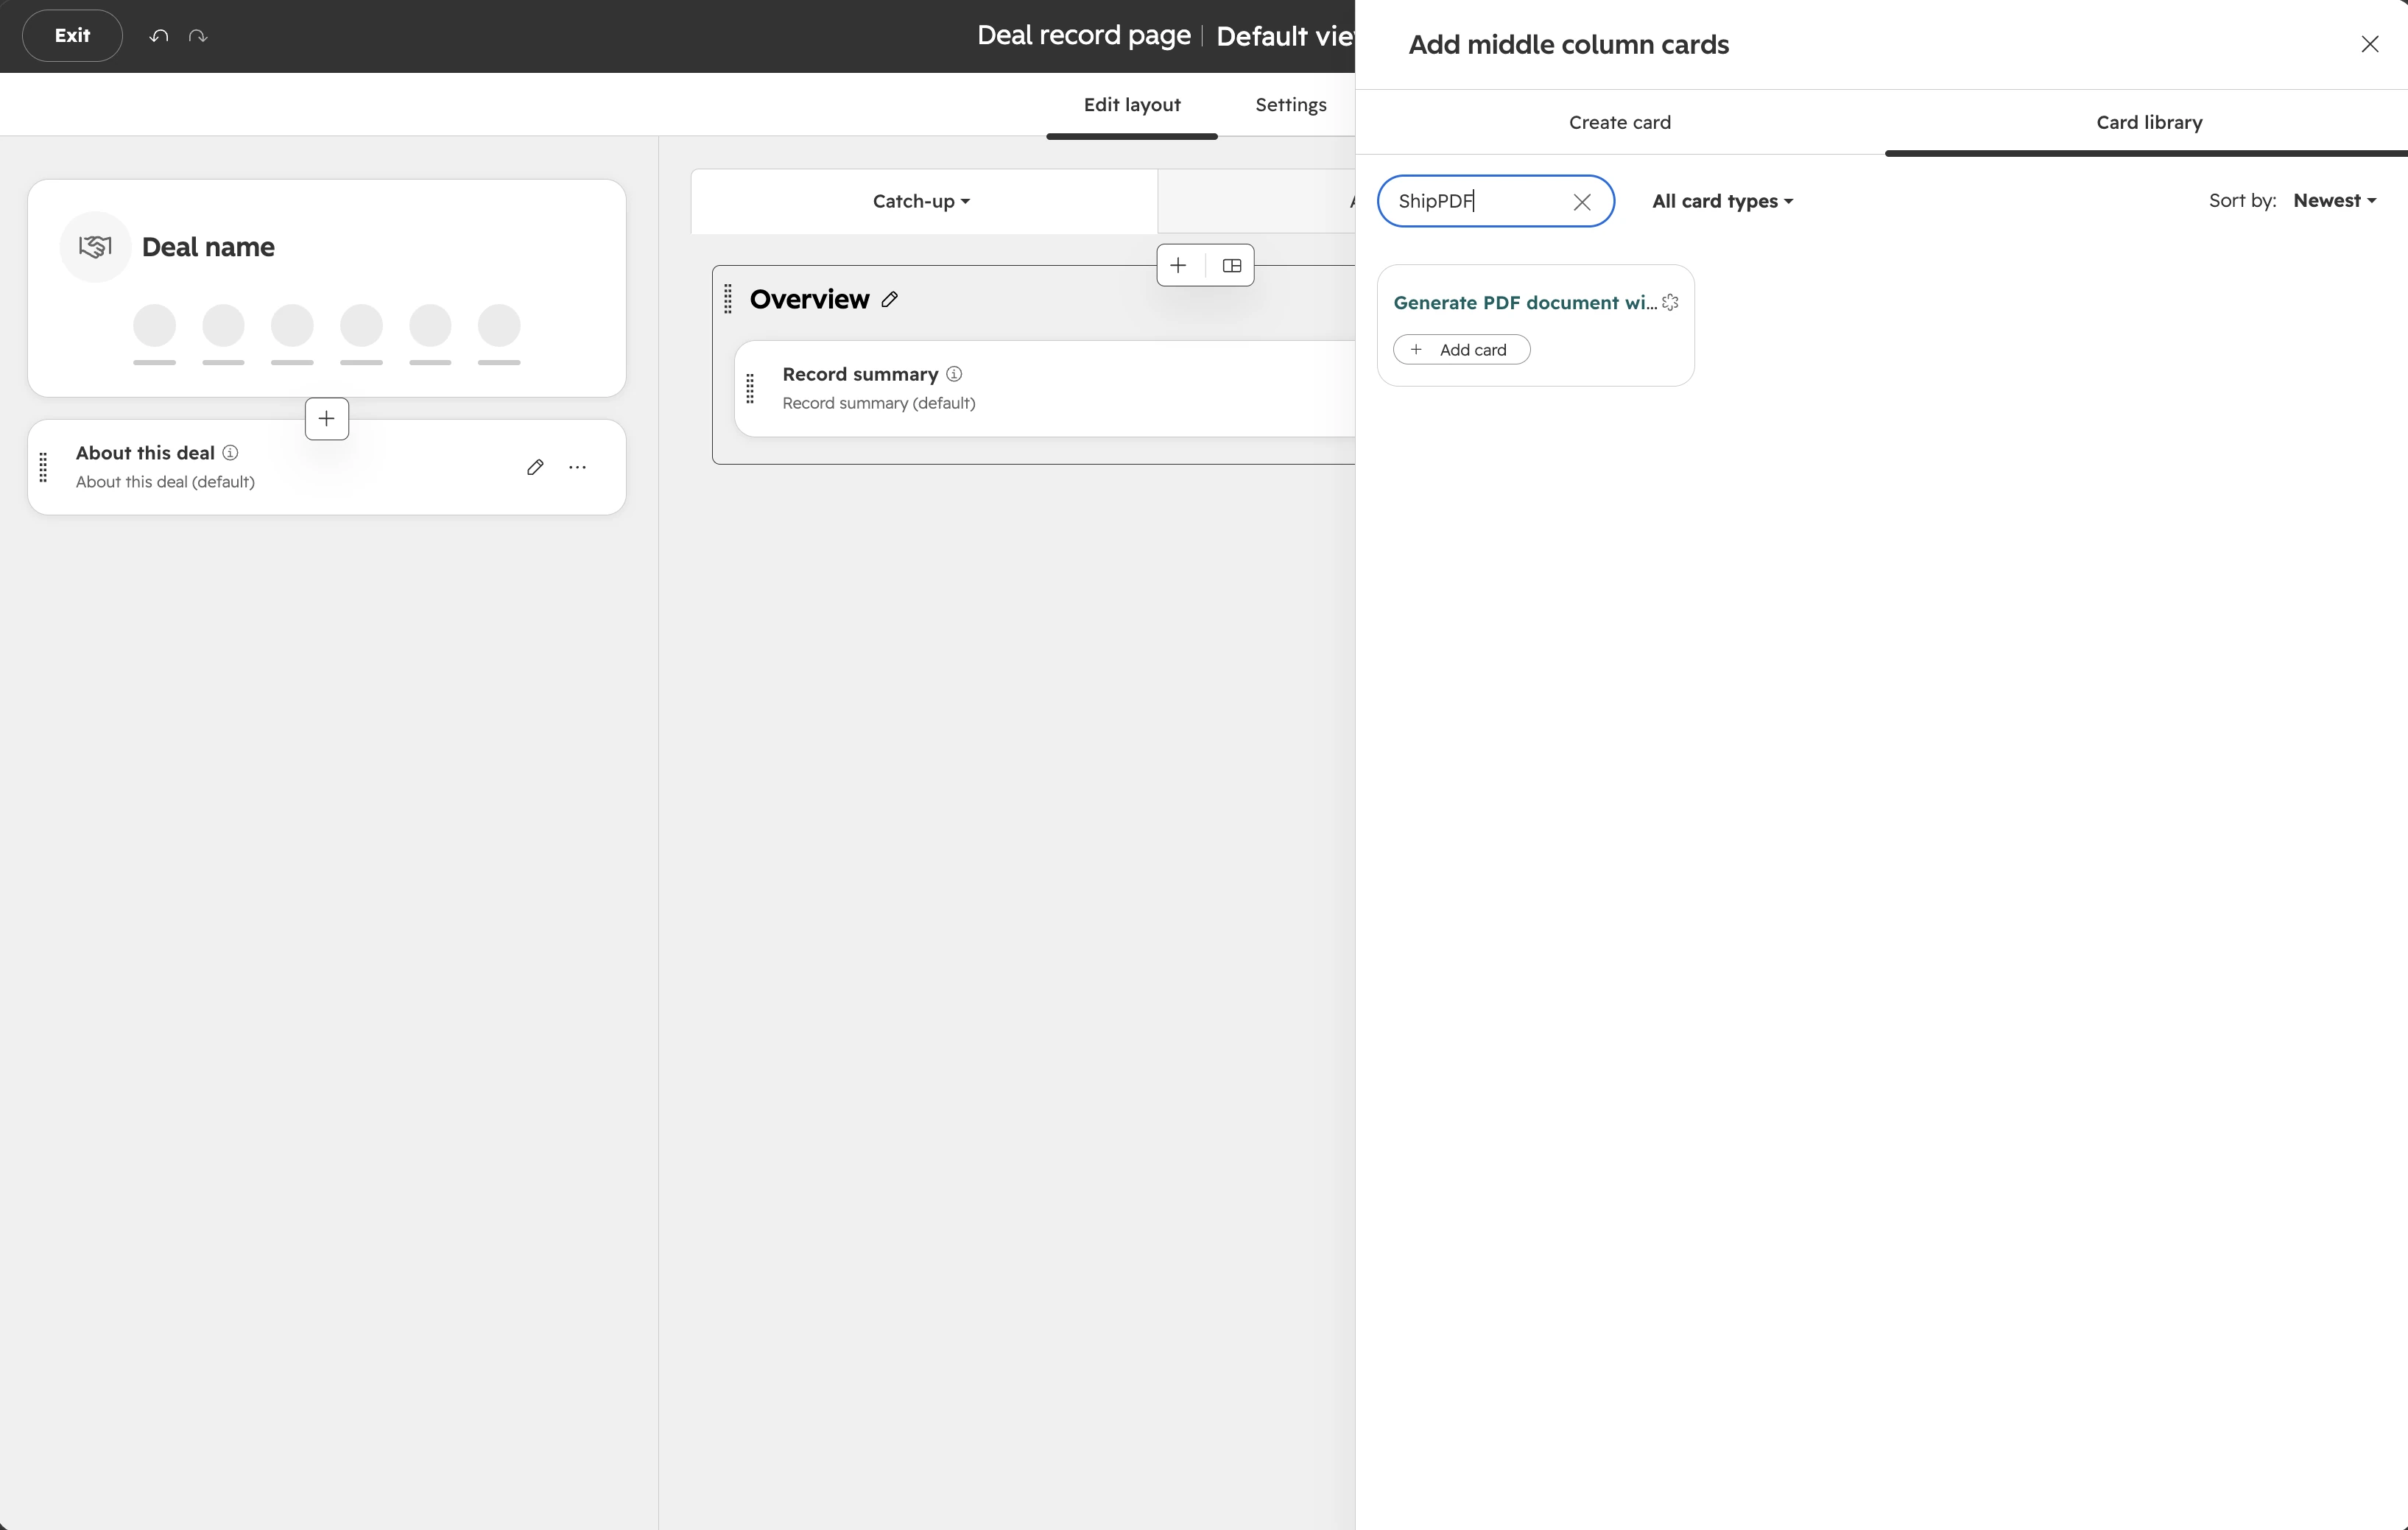
3. Save the layout
Place the card where your team can find it, then choose Save and exit. Open a record that uses that view.
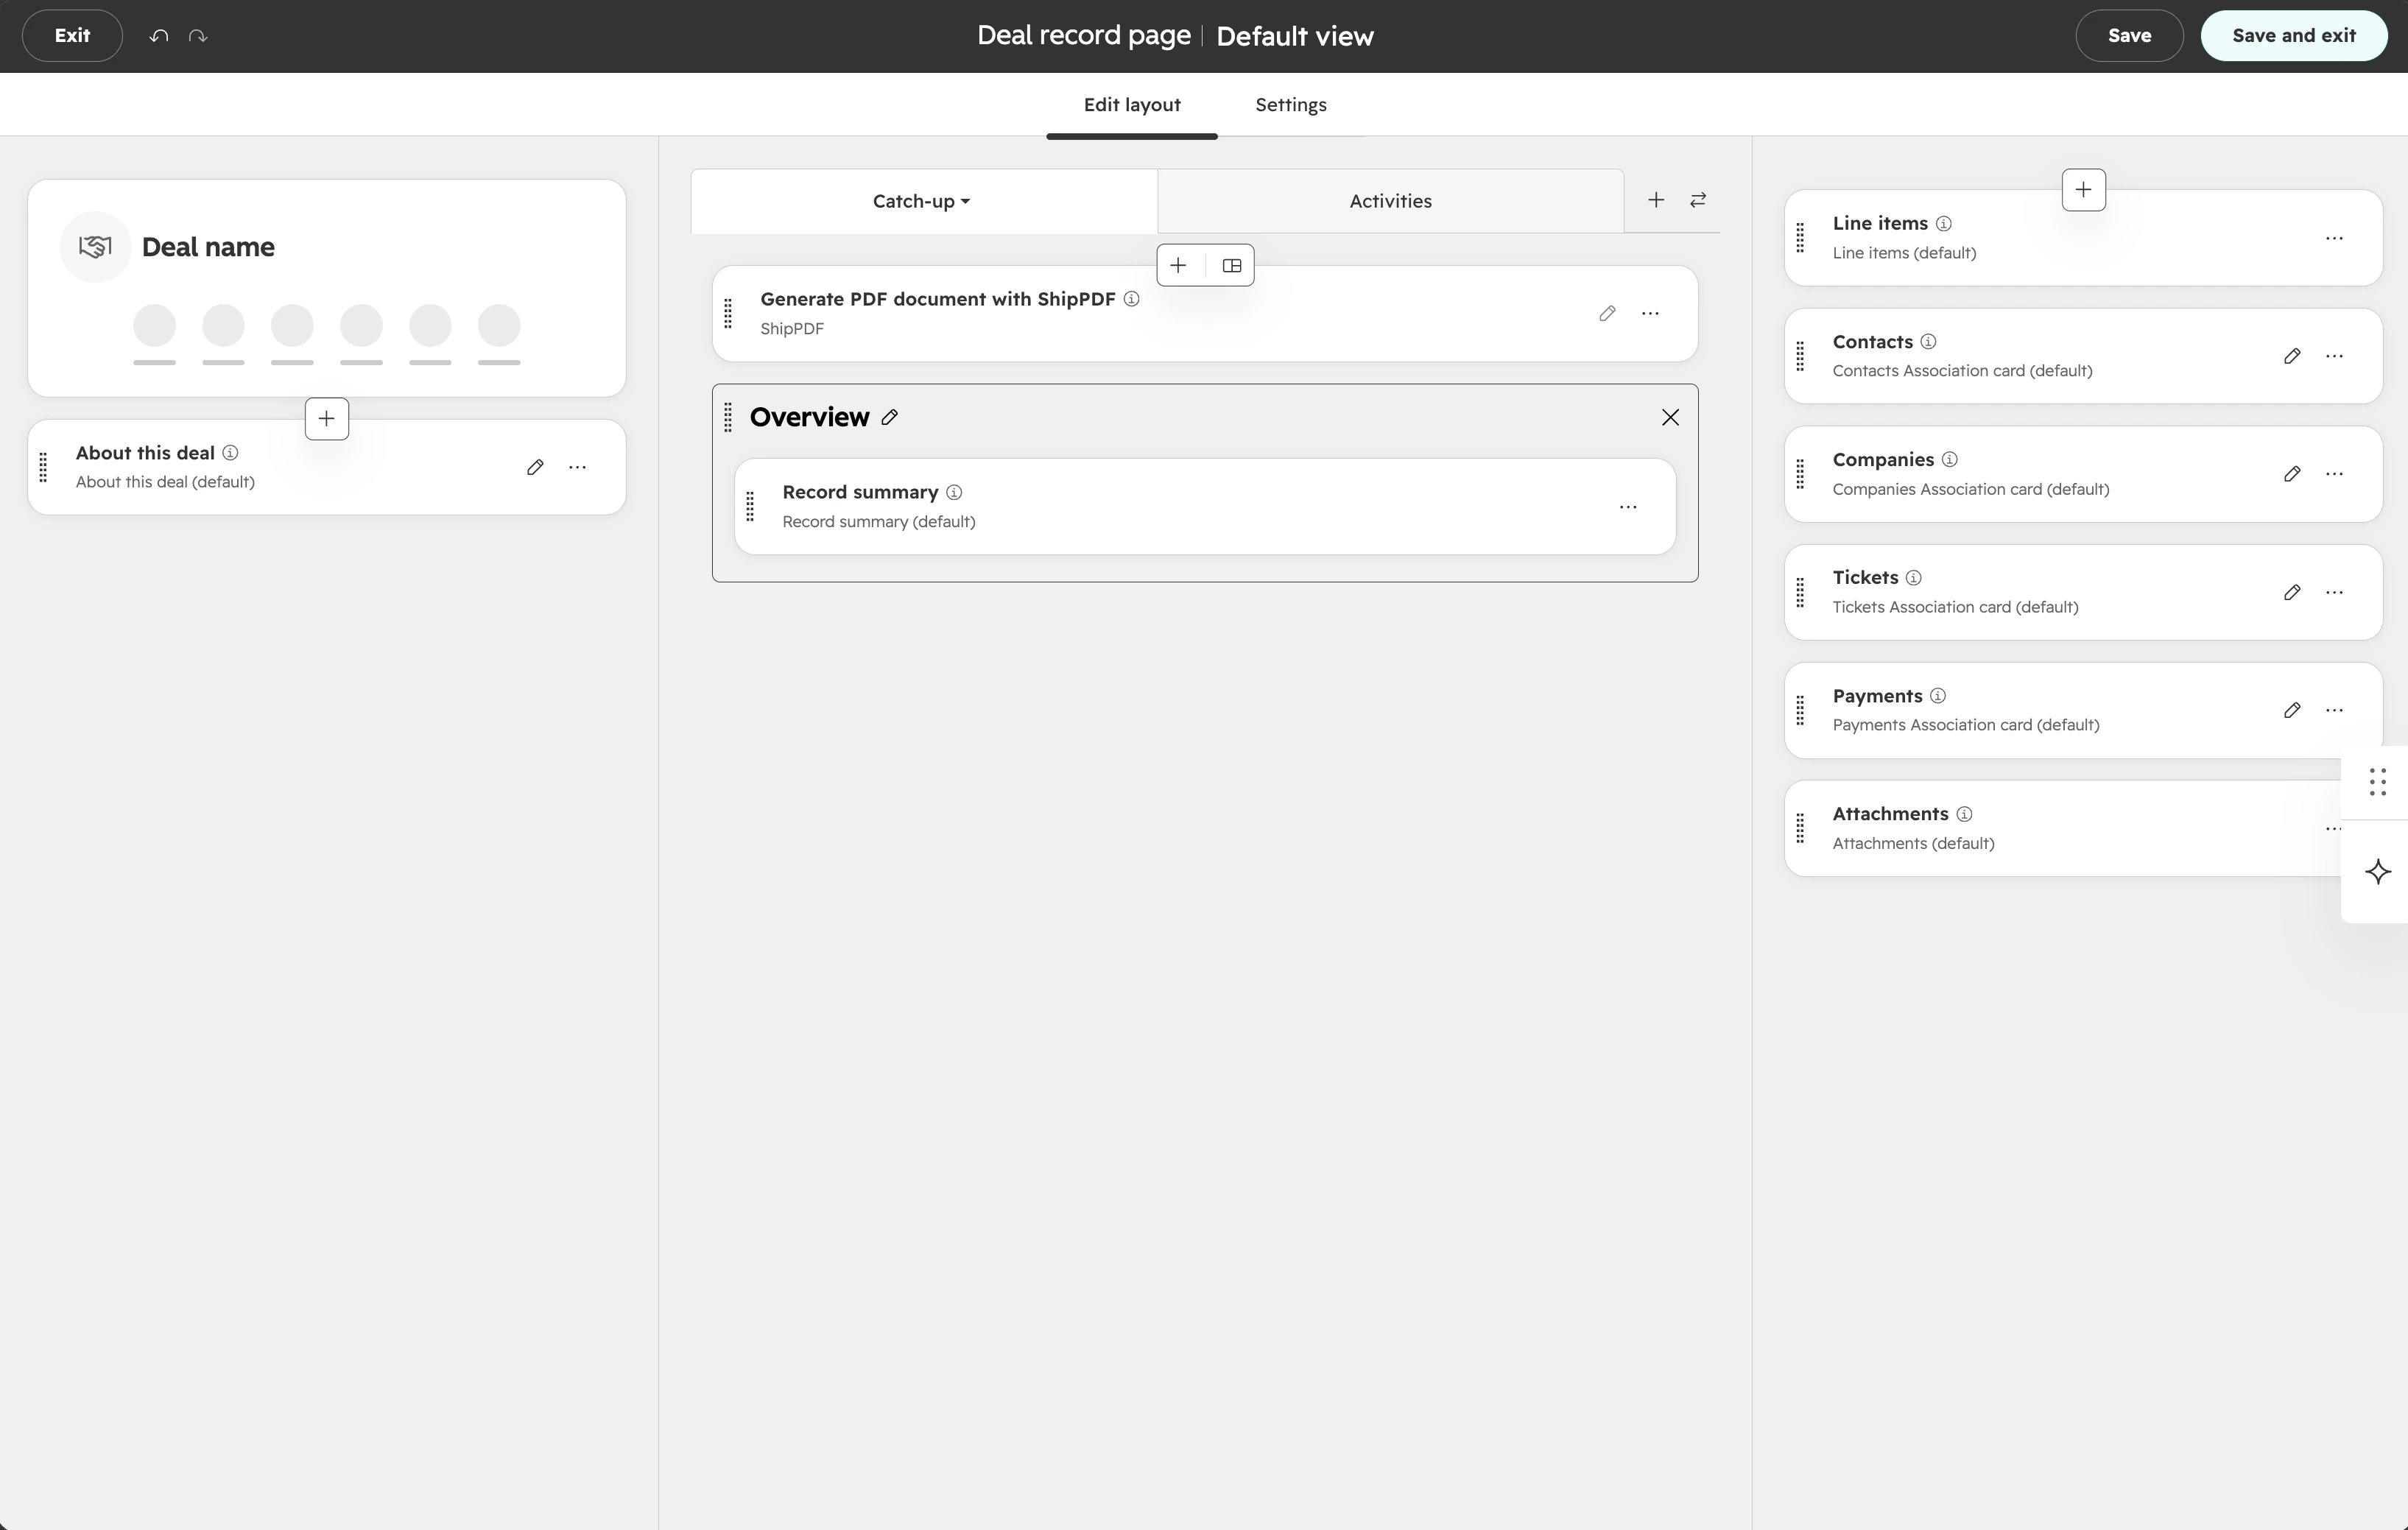
HubSpot documents record-view configuration in Customize records and Create cards to display data on records.
Choose a template and map fields
Open a contact, company, or deal and find Generate PDF document with ShipPDF. Select a Project and Template. Choose New mapping to configure a new setup, or select an existing Saved mapping.
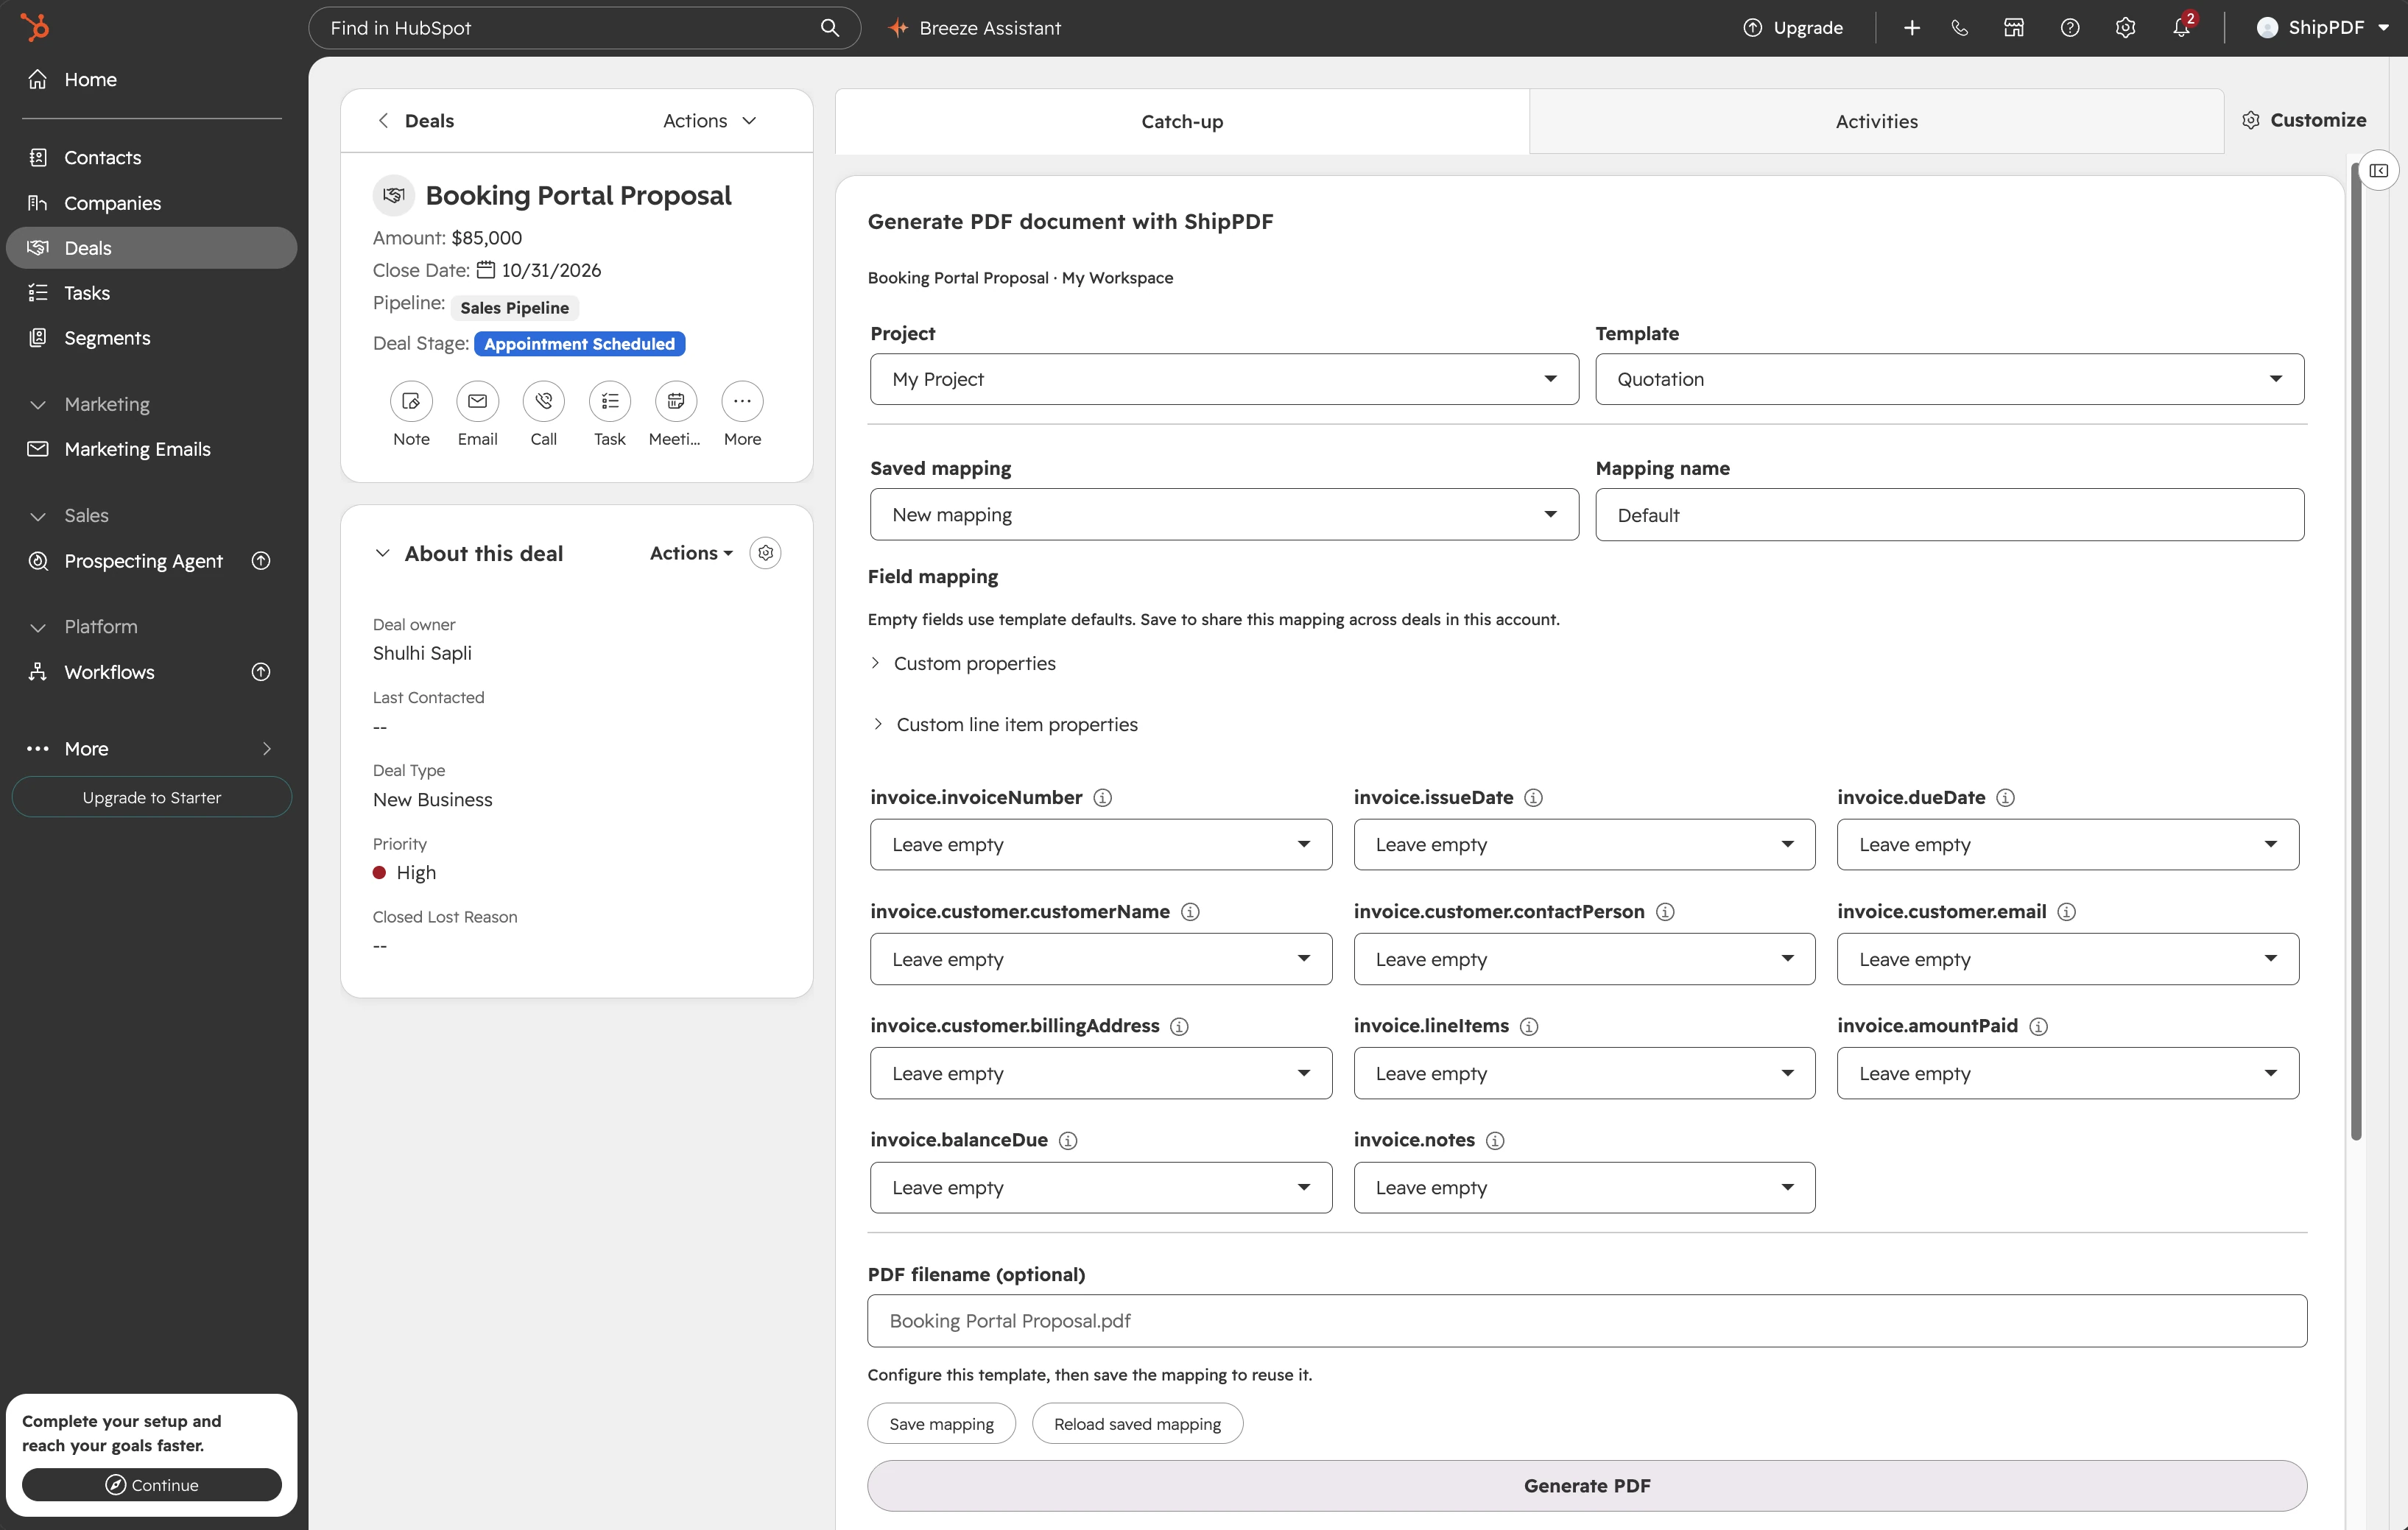
For each template field, choose a property on the current record, a property from an associated contact or company, Enter a value, or Leave empty.
| Source | Behavior |
|---|---|
| Current record property | Reads that property’s value from the open contact, company, or deal. |
| Contact or Company property | Reads a property from an associated record. Select the record if there is more than one candidate. |
| Enter a value | Uses a fixed value. For a List or Collection, enter a JSON array matching the template’s schema. |
| Leave empty | Omits the field from the request, allowing the template’s defaults to apply. |
| Deal line items | Available for Collection fields on deals. Maps each associated line item into one row. |
Missing CRM values are also omitted. Check your template defaults: leaving a customer field empty can cause an example name or address to appear in the PDF if that value is still configured as a default.
Mapped values must match the template’s field types. Numbers must be numeric, and Boolean values must be true or false. Dates, dropdowns, and multi-select properties may expose stored values rather than the formatted labels you see elsewhere in HubSpot. Check their compatibility before generating. Calculated template fields are not editable inputs in the card.
Use an existing custom property
The card starts with common record properties. If the property you need is missing:
- Expand Custom properties.
- Choose Property belongs to: This record, Associated contact, or Associated company.
- Enter the existing property’s internal name, such as
invoice_number, under HubSpot property. - Choose Add property, then select it from the relevant template field’s source picker.
Add property does not create a property in HubSpot. It makes an existing property available to this mapping. Use its internal name, not its display label. If the record properties fail to load, use Retry properties after correcting the cause.
Include deal line items
For a Collection such as invoice.lineItems, choose Deal line items. Under Each line item, map its child fields to line item properties. For example, map a description to Description, quantity to Quantity, and unit price to Unit price. Use the actual child fields in your template.
Expand Custom line item properties to add an existing line item property’s internal name. After changing the deal’s items, use Refresh line items and check the loaded count before generating.
An empty deal produces an empty line item collection. A load failure blocks generation rather than sending an incomplete list. For collections entered manually with Enter a value, use JSON instead of expecting an interactive row editor.
Save and reuse mappings
Enter a clear Mapping name, such as Customer quotation, and choose Save mapping. Saved mappings are shared across records of the same object type in the connected HubSpot account, for that workspace and template.
On another record, choose the project, template, and saved mapping. The card reads that record’s current property values and deal line items. If there are several associated contacts or companies, choose the one to use for that document. A selected associated record is not saved as a fixed customer for future records.
Keep these distinctions in mind:
- Save mapping updates a loaded mapping’s shared rules. Generate PDF does not automatically save changes.
- To create a separate version, change Mapping name and choose Save as new when an existing mapping is loaded.
- Enter a value values and an explicitly entered filename are fixed parts of a saved mapping. Review them before reuse.
- Reload saved mapping reloads the saved configuration. Save changes you want to keep before using it.
- If another user changes the same mapping, reload it and review the current rules before saving again.
- After a template update, review the fields and save the mapping for the new published revision before generating.
Owners and managers can open Integrations → HubSpot in ShipPDF to view saved mapping details or delete a mapping. Create and edit the field rules in the HubSpot card. Deleting a mapping does not delete its template or previously generated PDFs.
Generate and download the PDF
Review the mapped values and enter a PDF filename (optional) if needed. Choose Generate PDF. A new PDF uses one ShipPDF generation credit. The card displays progress and updates when the document is ready.
When Your PDF is ready appears, choose Open PDF to view or download the file, or Copy PDF link to copy its temporary download URL. Use Refresh PDF link to retrieve a fresh link for the same document if needed, rather than generating another PDF.
The PDF is not attached to the HubSpot record automatically. Download the file to keep a lasting copy. A copied ShipPDF URL expires, so it is not permanent file storage.
If the result could not be confirmed and the card offers Retry generation, use that action to retry the same request. If status updates stop, use Check PDF status. Check whether the existing document completed before starting another generation.
Manage or disconnect the connection
Open the connected workspace’s Integrations → HubSpot page in ShipPDF. An owner or manager can disconnect the HubSpot account there, or revoke its generated card API key in API keys. This stops the card from using that workspace’s templates and credits. Previously generated documents are not deleted by disconnecting.
Troubleshooting
| Problem | What to check |
|---|---|
| The ShipPDF card is missing | Confirm installation, add the card to the correct object’s record view, and save the layout. |
| No ShipPDF workspace is available | Sign in as an owner or manager of the workspace you want to authorize. |
| The account is already linked elsewhere | Disconnect it in its current ShipPDF workspace before choosing another. |
| A template cannot be used | Publish it in the connected workspace and choose the correct project. |
| A needed property is missing | Add the existing property’s internal name under Custom properties or Custom line item properties. |
| An associated value is unavailable | Choose the correct associated contact or company and check its property value. |
| The PDF contains example data | Map the field explicitly or remove the unwanted template default. |
| Mapped values do not match the template | Check numbers, Booleans, date formats, and JSON arrays against the published schema. |
| The template was updated | Review and save the mapping against the current published revision. |
| The workspace has no generation credits | Check the connected workspace’s billing and credit balance in ShipPDF. |
| The PDF link expired | Use Refresh PDF link for the completed document. |
For template layout and long line item tables, see Pages and overflow. For number and date presentation, see Data field bindings and formatting.